Week 1 - Project Manage
Goal:
Build a personal site for final project and recording assignments.
Prepartion (Install Following):
- Github Desktop (https://desktop.github.com)
- nodejs (https://nodejs.org/en/)
- VScode (https://code.visualstudio.com/)
- Image upload service Picgo (https://github.com/Molunerfinn/PicGo/releases/tag/v2.2.2)
Set up website with Vitepress
After done installing open Vscode and run the following code to install vitepress \
bash
npm add -D vitepressThis will generate a node_modules folder. 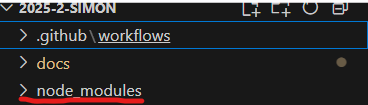
Next run following command to start building project:
bash
npx vitepress initWith this a blank website is built, to add things in lets start with a template.
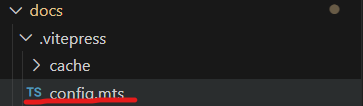
Vitepress builds through a file called config.mts under docs/.vitepress
Details of my config page is following:
bash
import { defineConfig } from 'vitepress'

// https://vitepress.dev/reference/site-config
export default defineConfig({
  title: "My Fablab Project",
  description: "A VitePress Site",
  base: '/2025-2-simon/',
  themeConfig: {
    // https://vitepress.dev/reference/default-theme-config
    nav: [
      { text: 'Home', link: '/' },
      { text: 'Course', link: '/Project-Manage' },
      { text: 'Homework', link: '/Open-Source' }
    ],

    sidebar: [
      {
        text: 'Course',
        items: [
          { text: 'Project Manage', link: '/Project-Manage' },
          { text: 'Arduino', link: '/Arduino' },
        ]
      },
        {
        text: 'Homework',
        items: [
          { text: 'Open Source', link: '/Open-Source' },
          { text: 'Progamming Sowftware Apple', link: '/Apple-Program' },
        ]
      }

    ],

    socialLinks: [
      { icon: 'github', link: 'https://github.com/vuejs/vitepress' }
    ]
  }
})
In addition index.md file:
bash
---
# https://vitepress.dev/reference/default-theme-home-page
layout: home

hero:
  name: "My Fablab Project"
  text: "A VitePress Site"
  tagline: Simon Li
  image:
    light: https://image-processor-storage.s3.us-west-2.amazonaws.com/images/281c2d4581ed27c8a258b0e79bc504ad/halo-of-neon-ring-illuminated-in-the-stunning-landscape-of-yosemite.jpg
    dark: https://d1hjkbq40fs2x4.cloudfront.net/2020-12-04/files/1.jpg
    style:
      width: '2000px'
      height: 'auto'


  ##actions:
  ##  - theme: brand
  ##    text: Get Started
  ##    link: /markdown-examples
  ##  - theme: alt
  ##    text: More in GitHub
  ##    link: /api-examples

features:
  - title: HTML Web Design
    details: Course details
  - title: TBD
    details: N/A
  - title: TBD
    details: N/A
---
Results shown below: 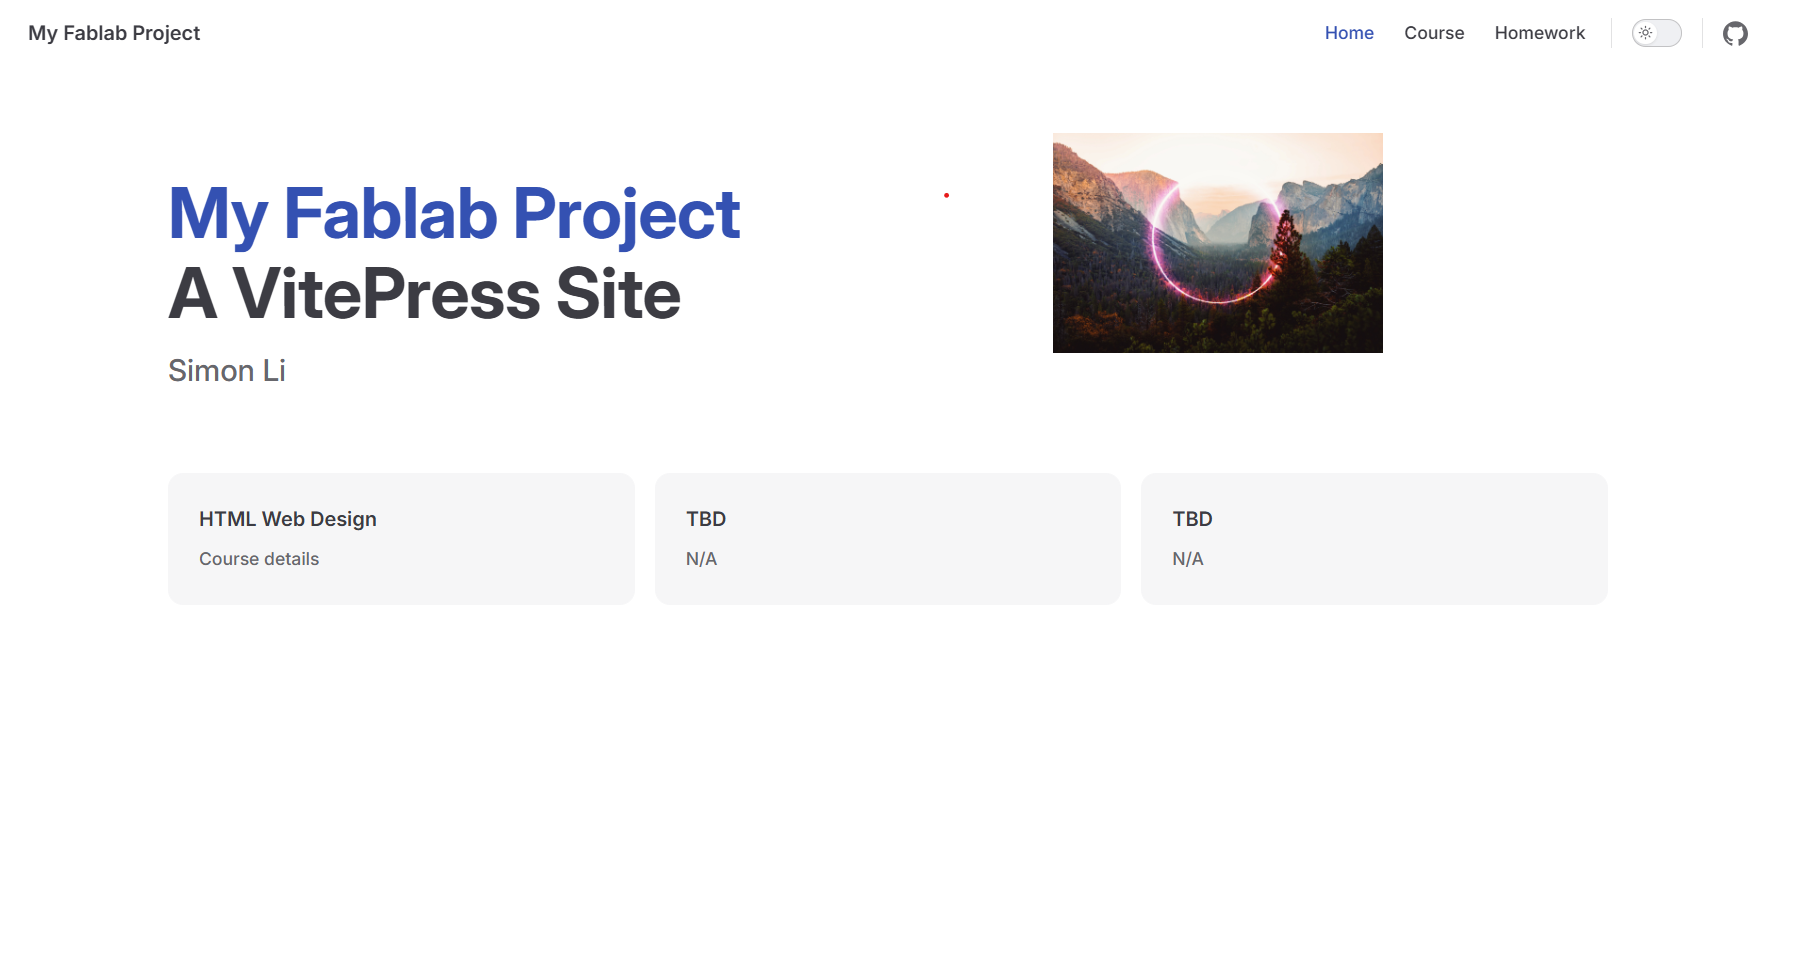
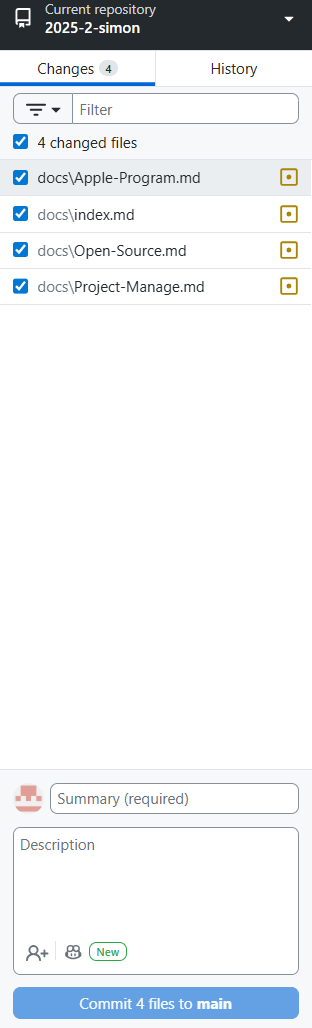
Deploy to GitHub
There are two ways to push changes to Github
- Use Git to commit and push change to repository of GiHub
bash
git add --all    # Add all changes
git commit -m "v1"    # Commit changes
git push origin main # Push changes to GitLab- Use GitHub desktop to push changes. First thing is to create a new folder called .github\workflows and create a new file named deploy.yml
 Then proceed to add following code into deploy.yml
bash
name: Deploy VitePress site to Pages

on:
  push:
    branches: [main]

  workflow_dispatch:

permissions:
  contents: read
  pages: write
  id-token: write

concurrency:
  group: pages
  cancel-in-progress: false

jobs:

  build:
    runs-on: ubuntu-latest
    steps:
      - name: Checkout
        uses: actions/checkout@v4
        with:
          fetch-depth: 0 # 如果未启用 lastUpdated,则不需要

      - name: Setup Node
        uses: actions/setup-node@v4
        with:
          node-version: 22.14.0
          cache: npm
      - name: Setup Pages
        uses: actions/configure-pages@v4
      - name: Install dependencies
        run: npm ci
      - name: Build with VitePress
        run: npm run docs:build
      - name: Upload artifact
        uses: actions/upload-pages-artifact@v3
        with:
          path: docs/.vitepress/dist


  deploy:
    environment:
      name: github-pages
      url: ${{ steps.deployment.outputs.page_url }}
    needs: build
    runs-on: ubuntu-latest
    name: Deploy
    steps:
      - name: Deploy to GitHub Pages
        id: deployment
        uses: actions/deploy-pages@v4
Fill in summary, description and then commit to main. Afterwards push to origins changes will be uploaded to GitHub Repository.