Appearance
Assignments of Arduino
OpenSource hardware
| Name | Core Features / Positioning | Key Hardware Info | Applicable Scenarios |
|---|---|---|---|
| NanoPi R76S | Dual 2.5 Gbps network ports, strong network performance | RK3576 chip, optional enclosure | Soft router, network firewall, home server |
| LCPI Allwinner H3 | High cost-performance, low power, optimized for lightweight NAS | Allwinner H3 Cortex-A7 chip, gigabit network port, optimized power for HDD | Lightweight NAS, file sharing, edge compute node |
| NodeMCU Lua V3 | Ultra-low cost, Wi-Fi networking, entry-level IoT | ESP8266 chip, supports Lua scripting | Smart home, Wi-Fi remote control, sensor data acquisition |
| GD32VW553 | Domestic RISC-V architecture, supports Wi-Fi 6 | Goodix (JiaLiChuang) GD32VW553 chip, RISC-V core | IoT development, projects requiring communication performance & domestic chips |
.jpg)
.jpg)
.jpg)
Specific examples of other open-source hardware
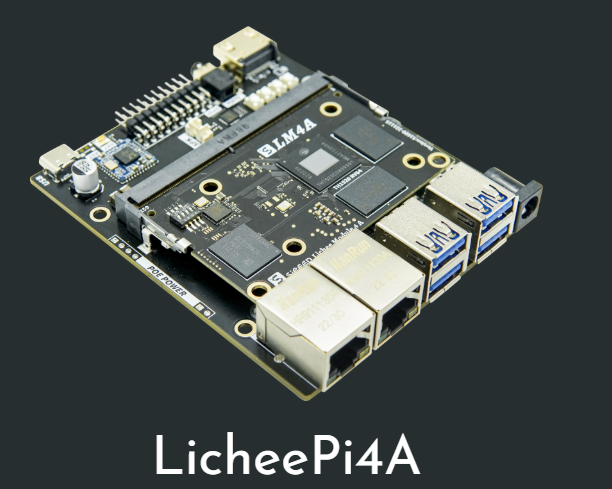
1.Licheepi
.png)
"LicheePi" is an embedded development board launched by Sipeed (Silicon Speed Technology), featuring open source and cost-effectiveness as its main characteristics. Its goal is to enable developers and students to learn and practice Linux system development, embedded system design, and Internet of Things applications at a relatively low cost.
2.Core features and application scenarios
| Aspect | Description |
|---|---|
| Product Positioning | An open-source single-board computer, similar to Raspberry Pi, but more focused on low-level system development and hardware customization. |
| Core Hardware | Typically uses Allwinner Technology's ARM architecture processors. For example, the Lichee Nano model uses the F1C100s chip, which integrates CPU and memory, and offers a rich set of interfaces. |
| Software Ecosystem | Supports running mainline Linux kernel, as well as some real-time operating systems (such as RT-Thread) or bare-metal programs (like Xboot). Software resources are typically open-sourced in the official community. |
| Primary Applications | Suitable for embedded product prototyping, industrial control, academic research, and serves as an excellent platform for learners to deeply understand Linux kernel, Bootloader, and file systems. |
The basic of Arduino
Definition:Arduino is an open-source electronic prototyping platform that enables ordinary people to easily create interactive electronic projects.
You can think of it as the "Lego" or "universal toolbox" of the electronic world. It consists of two parts:
1.Hardware (circuit board): A microcontroller board, which is equivalent to the brain of the project. 2.Software (IDE) : A computer software used to program the "brain".
What Can Arduino Be Used For?
Its applications are almost endless. Here are some examples:
Beginner/Educational: Blinking LED lights, controlling servo motors, simple thermometers.
Smart Home: Automatic plant watering systems, smart lighting control, door/window alarm sensors.
Robotics: Line-following cars, robotic arms, the control core for quadcopters (drones).
Interactive Art: Interactive installations that change lights and music based on human movement.
3D Printers/CNC: The control boards for many desktop 3D printers are based on Arduino.
Wearable Devices: Light-up clothing, smartwatch prototypes.
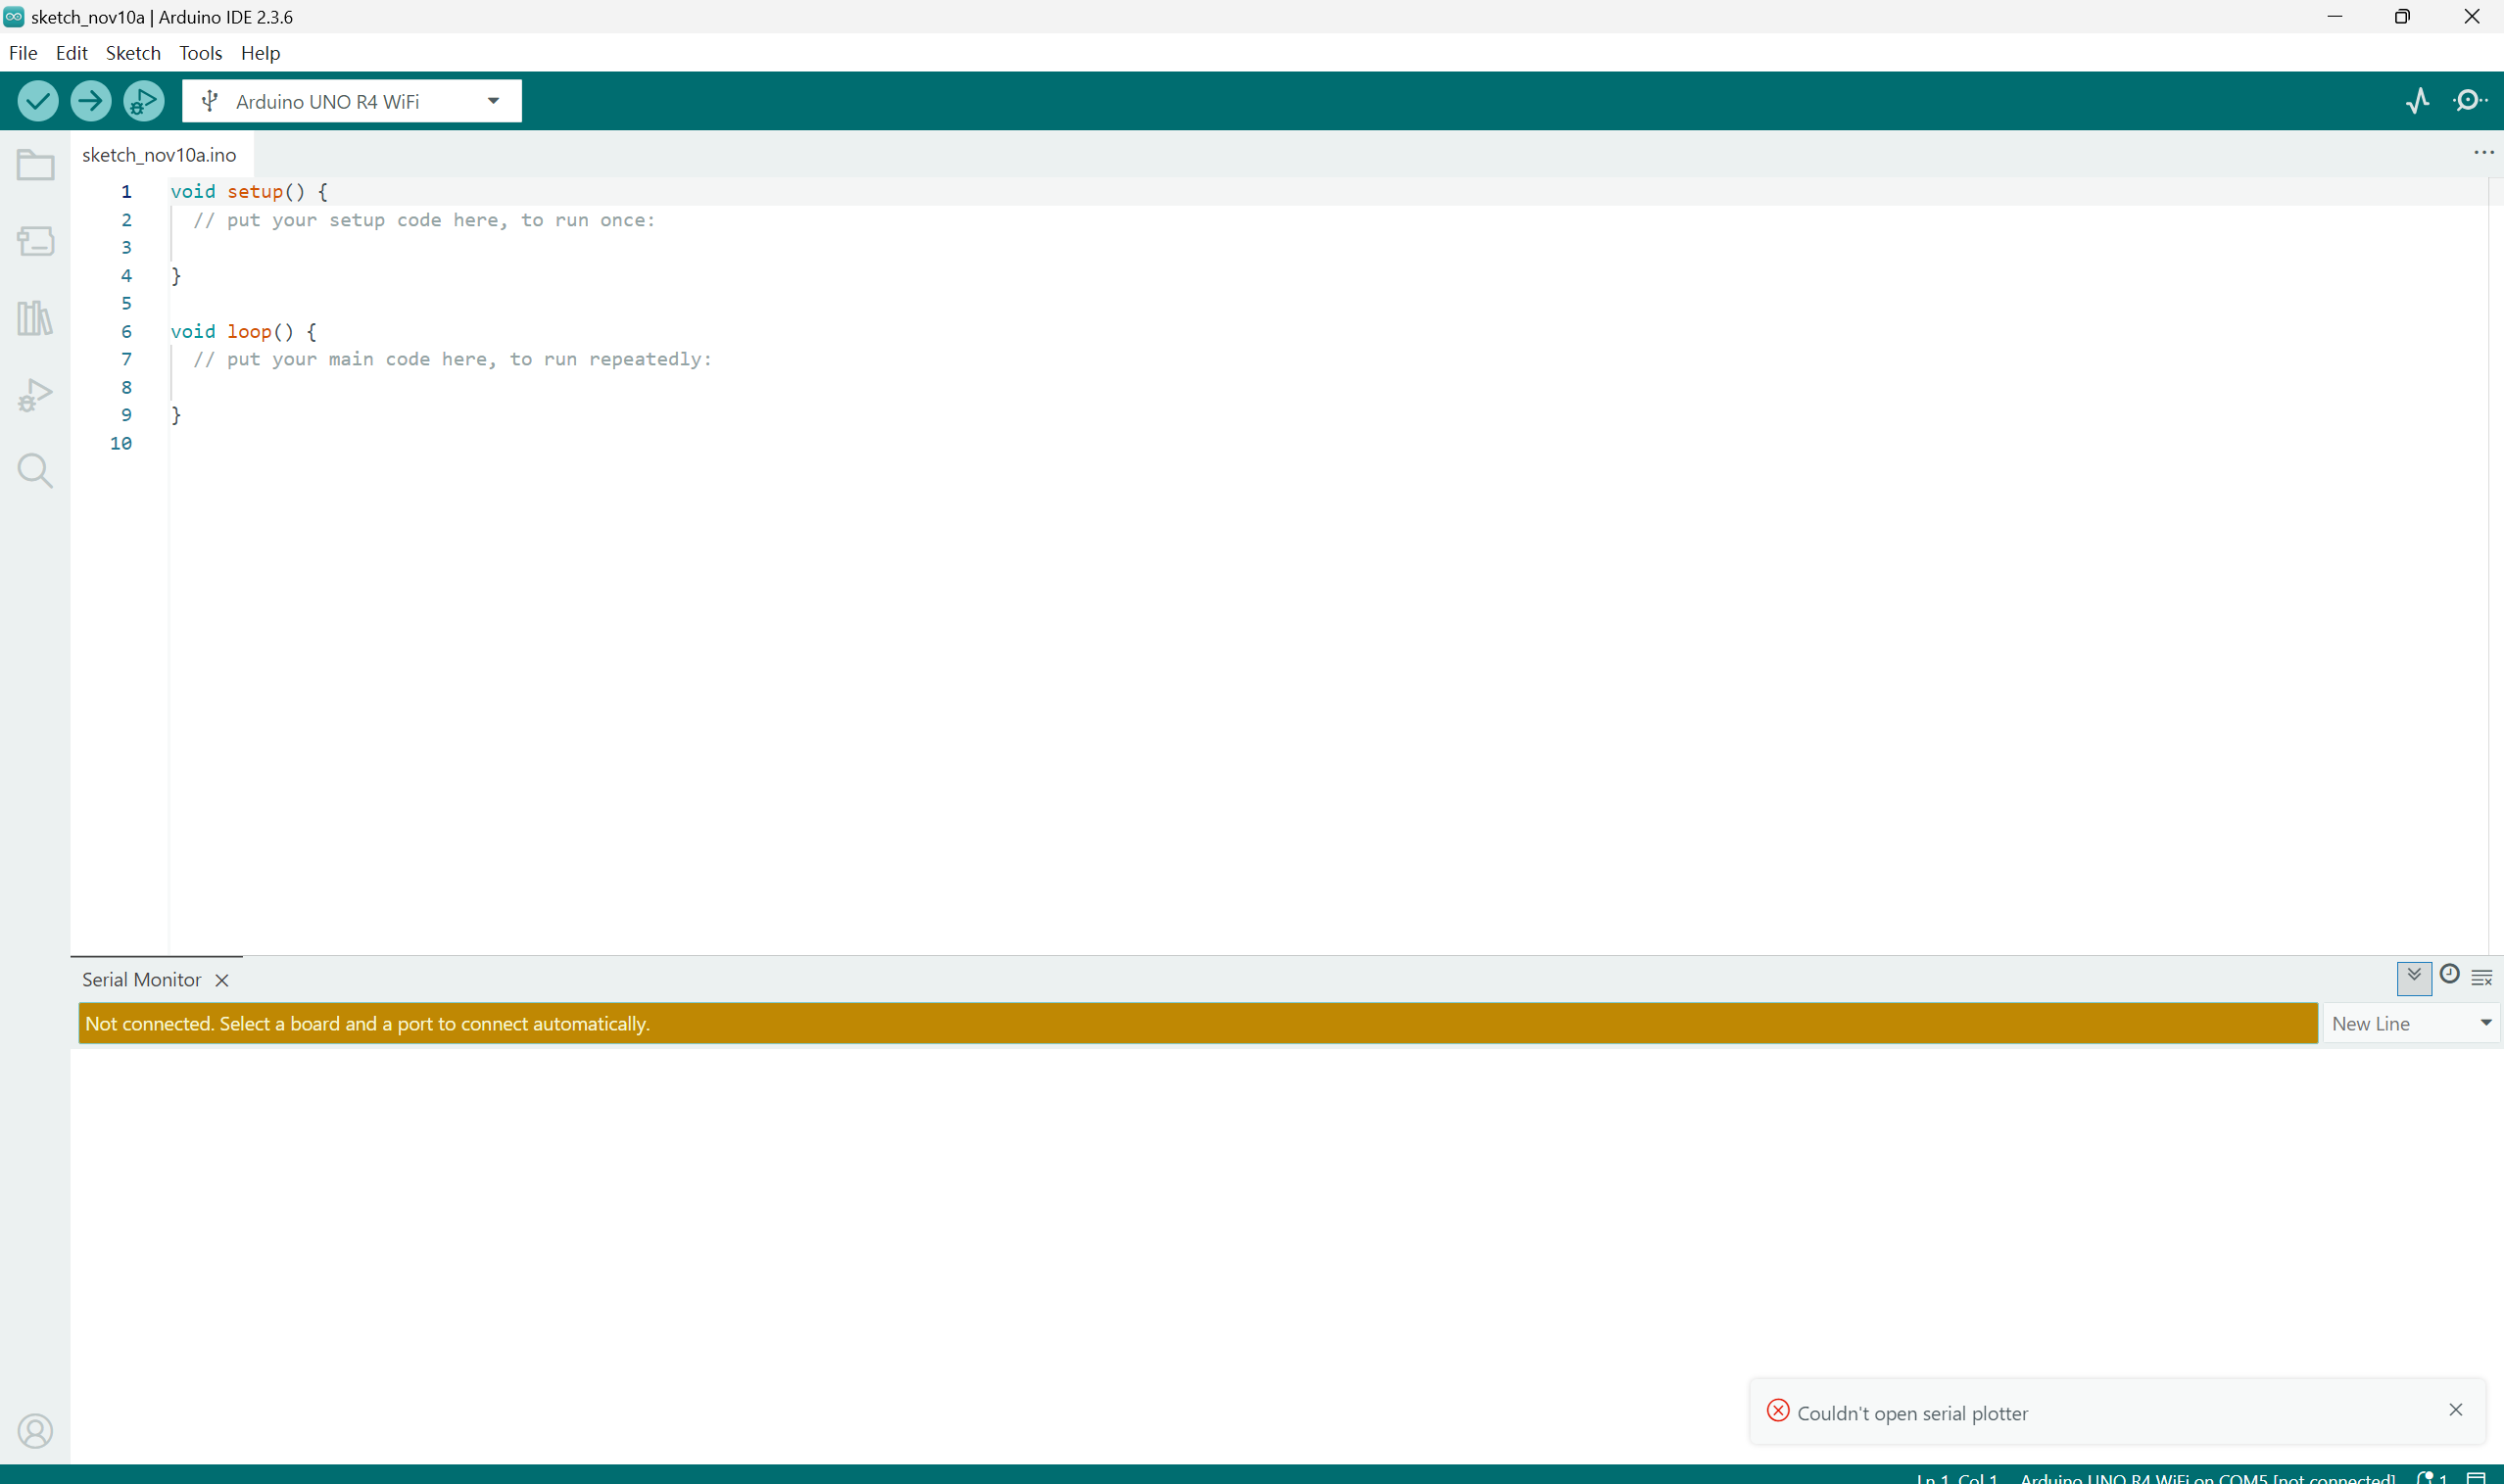
Arduino IDE
The interface of arduino
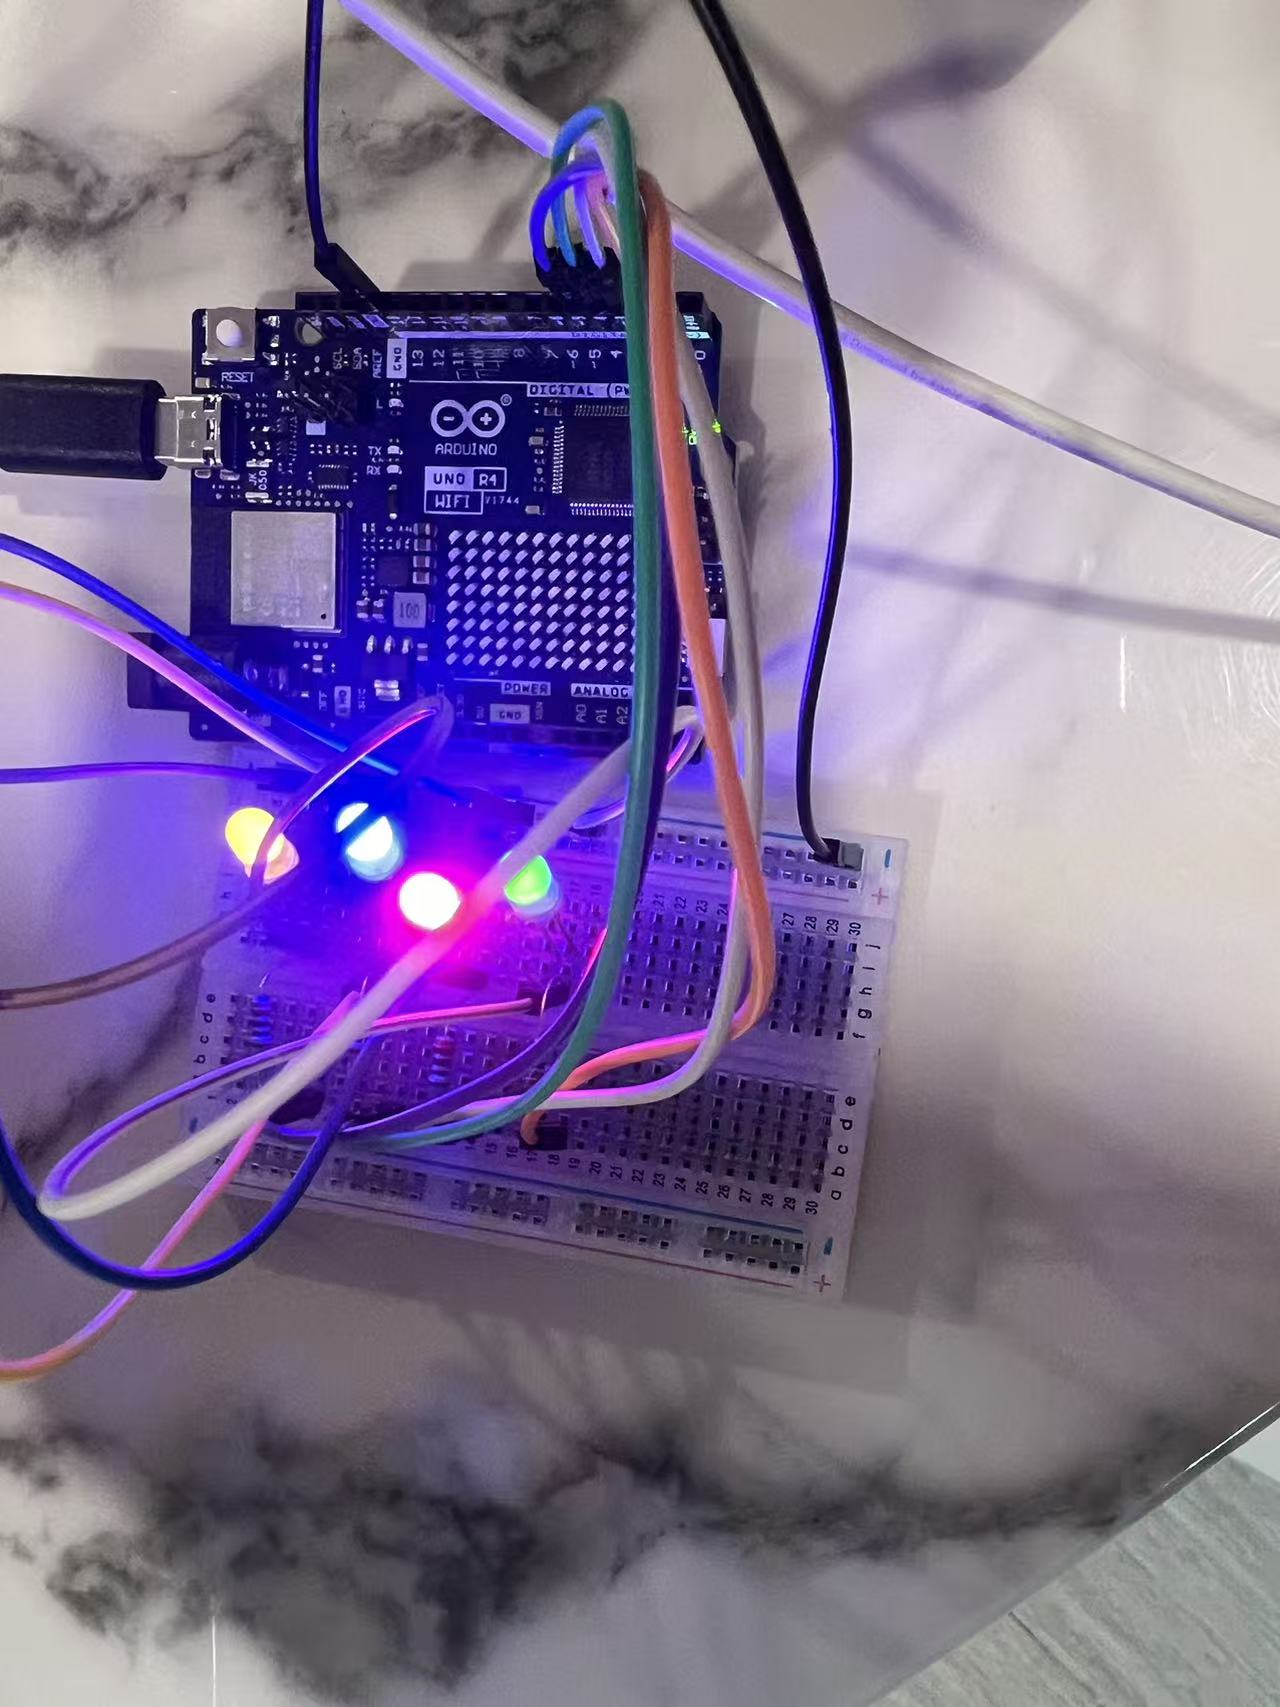
Run water light program
int val;//定义变量val
int BASE = 2 ;  //第一颗LED 接的I/O脚
int NUM = 4;   //LED 的个数
void setup()
{
   for (int i = BASE; i < BASE + NUM; i ++)
   {
     pinMode(i, OUTPUT);   //设定数字I/O脚为输出
   }
}
void loop()
{
   for (int i = BASE; i < BASE + NUM; i ++)
   {
     digitalWrite(i, LOW);    //设定数字I/O脚为输出为"低",即逐渐关灯
     delay(200);        //延迟
   }
   for (int i = BASE; i < BASE + NUM; i ++)
   {
     digitalWrite(i, HIGH);    //设定数字I/O脚为输出为"高",即逐渐开灯
     	   delay(200);        //延迟
   }
}
INPUT & OUTPUT PROJECTS
Arduino Smoke Sensor
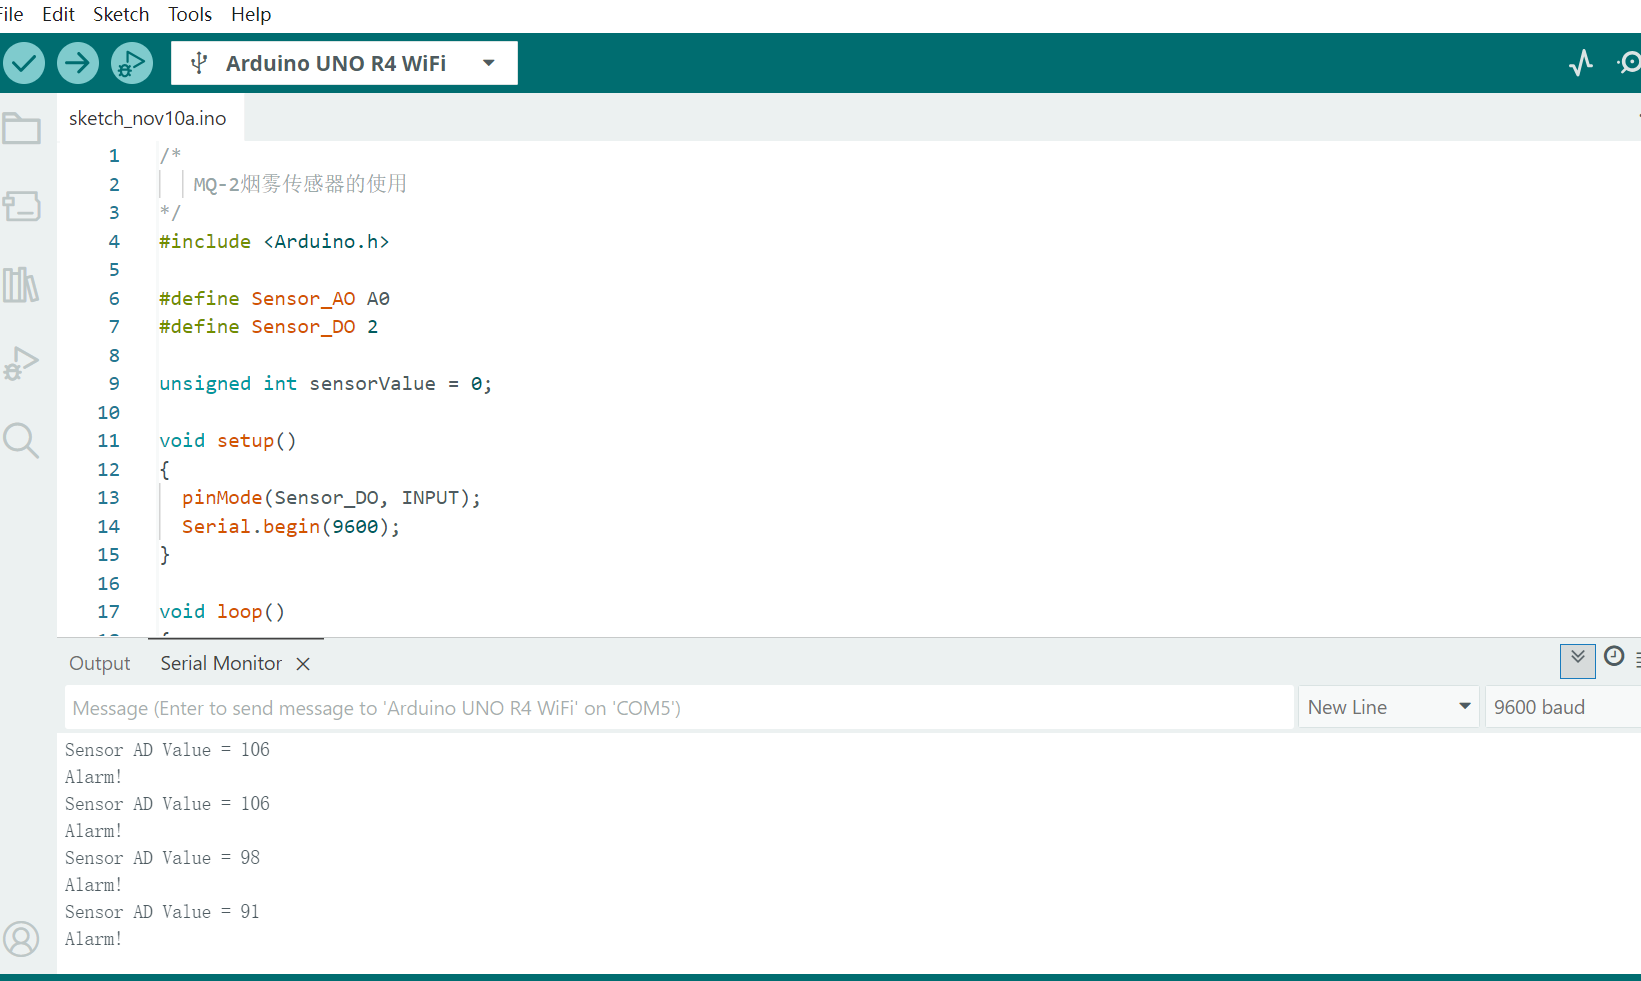
My code for the Arduino project will be shown below with commentation:
/*
MQ-2烟雾传感器的使用
*/
#include <Arduino.h>
#define Sensor_AO A0
#define Sensor_DO 2
unsigned int sensorValue = 0;
void setup()
{
pinMode(Sensor_DO, INPUT);
Serial.begin(9600);
}
void loop()
{
sensorValue = analogRead(Sensor_AO);
Serial.print("Sensor AD Value = ");
Serial.println(sensorValue);
if (digitalRead(Sensor_DO) == LOW)
{
Serial.println("Alarm!");
}
delay(1000);
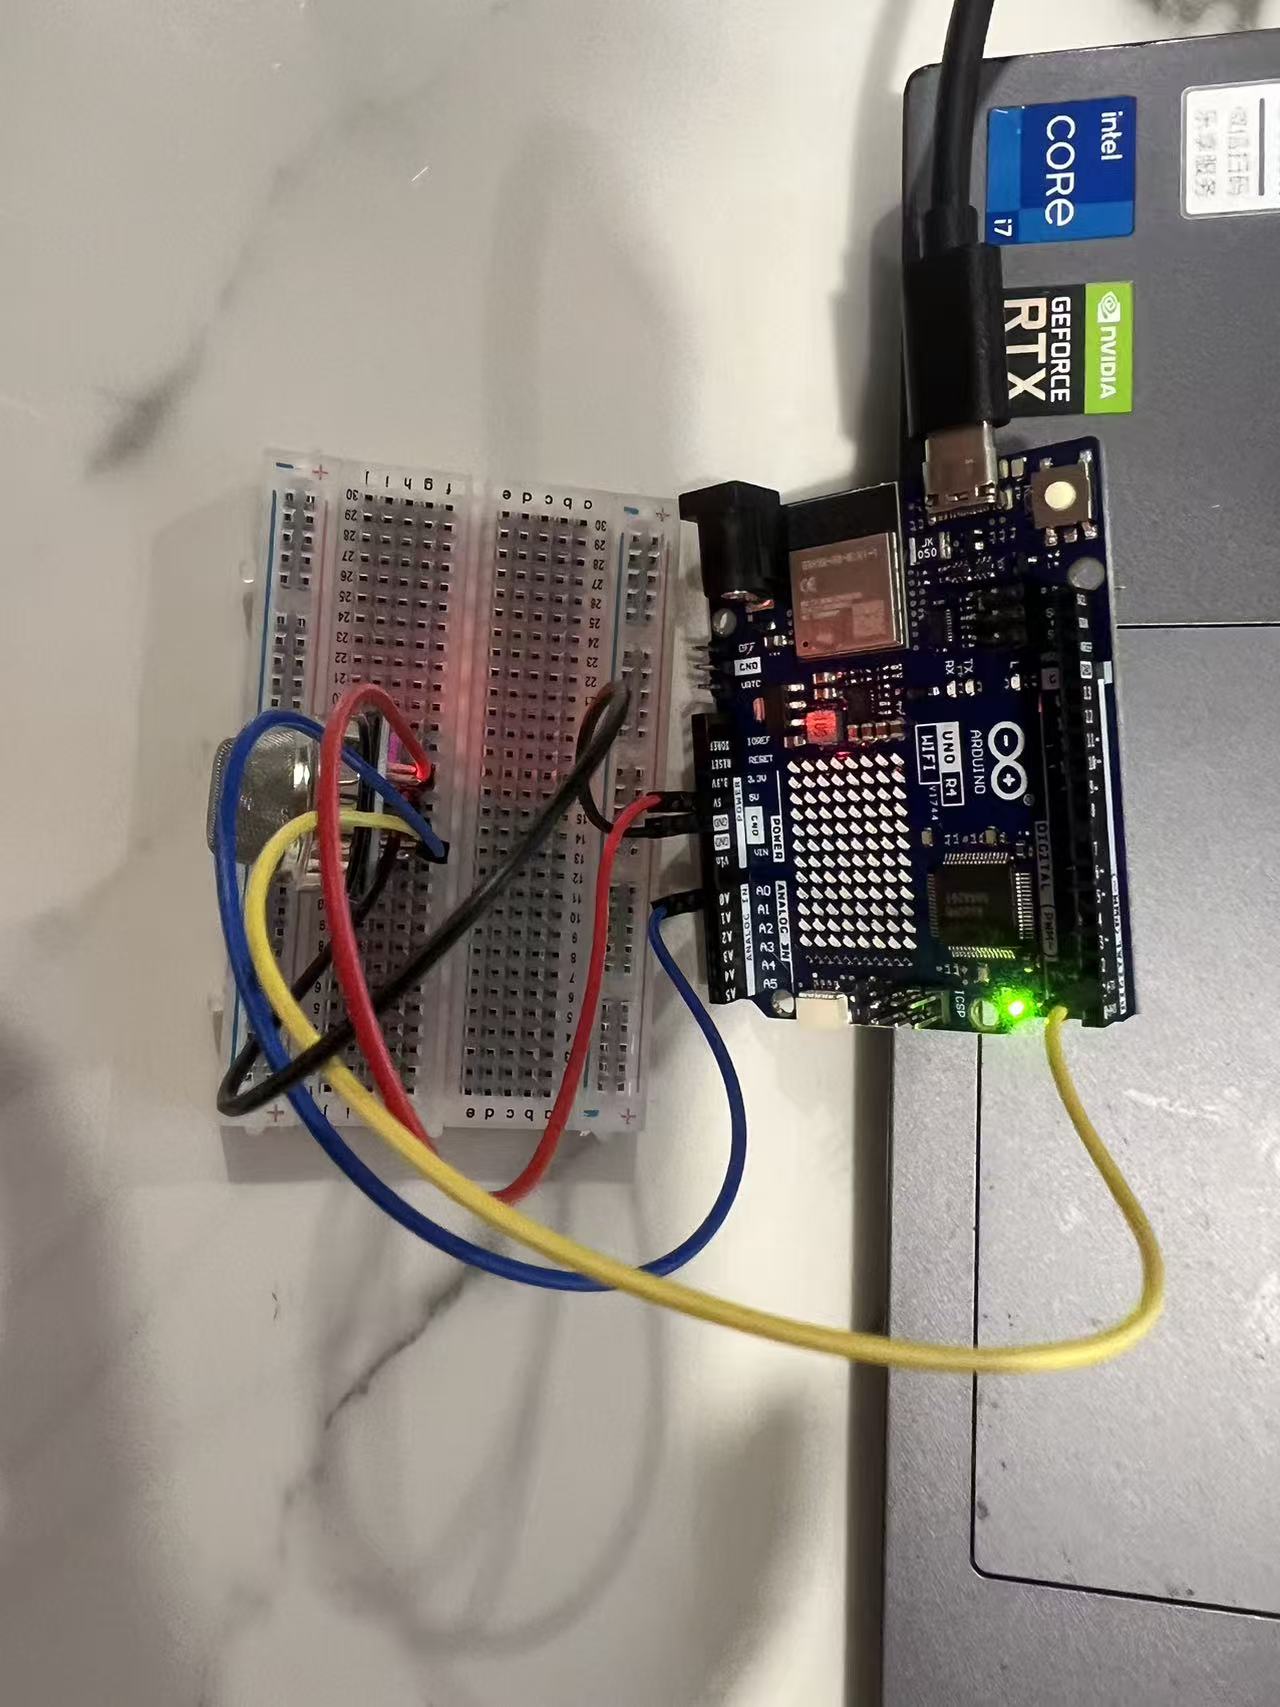
}Arduino Digital Tube
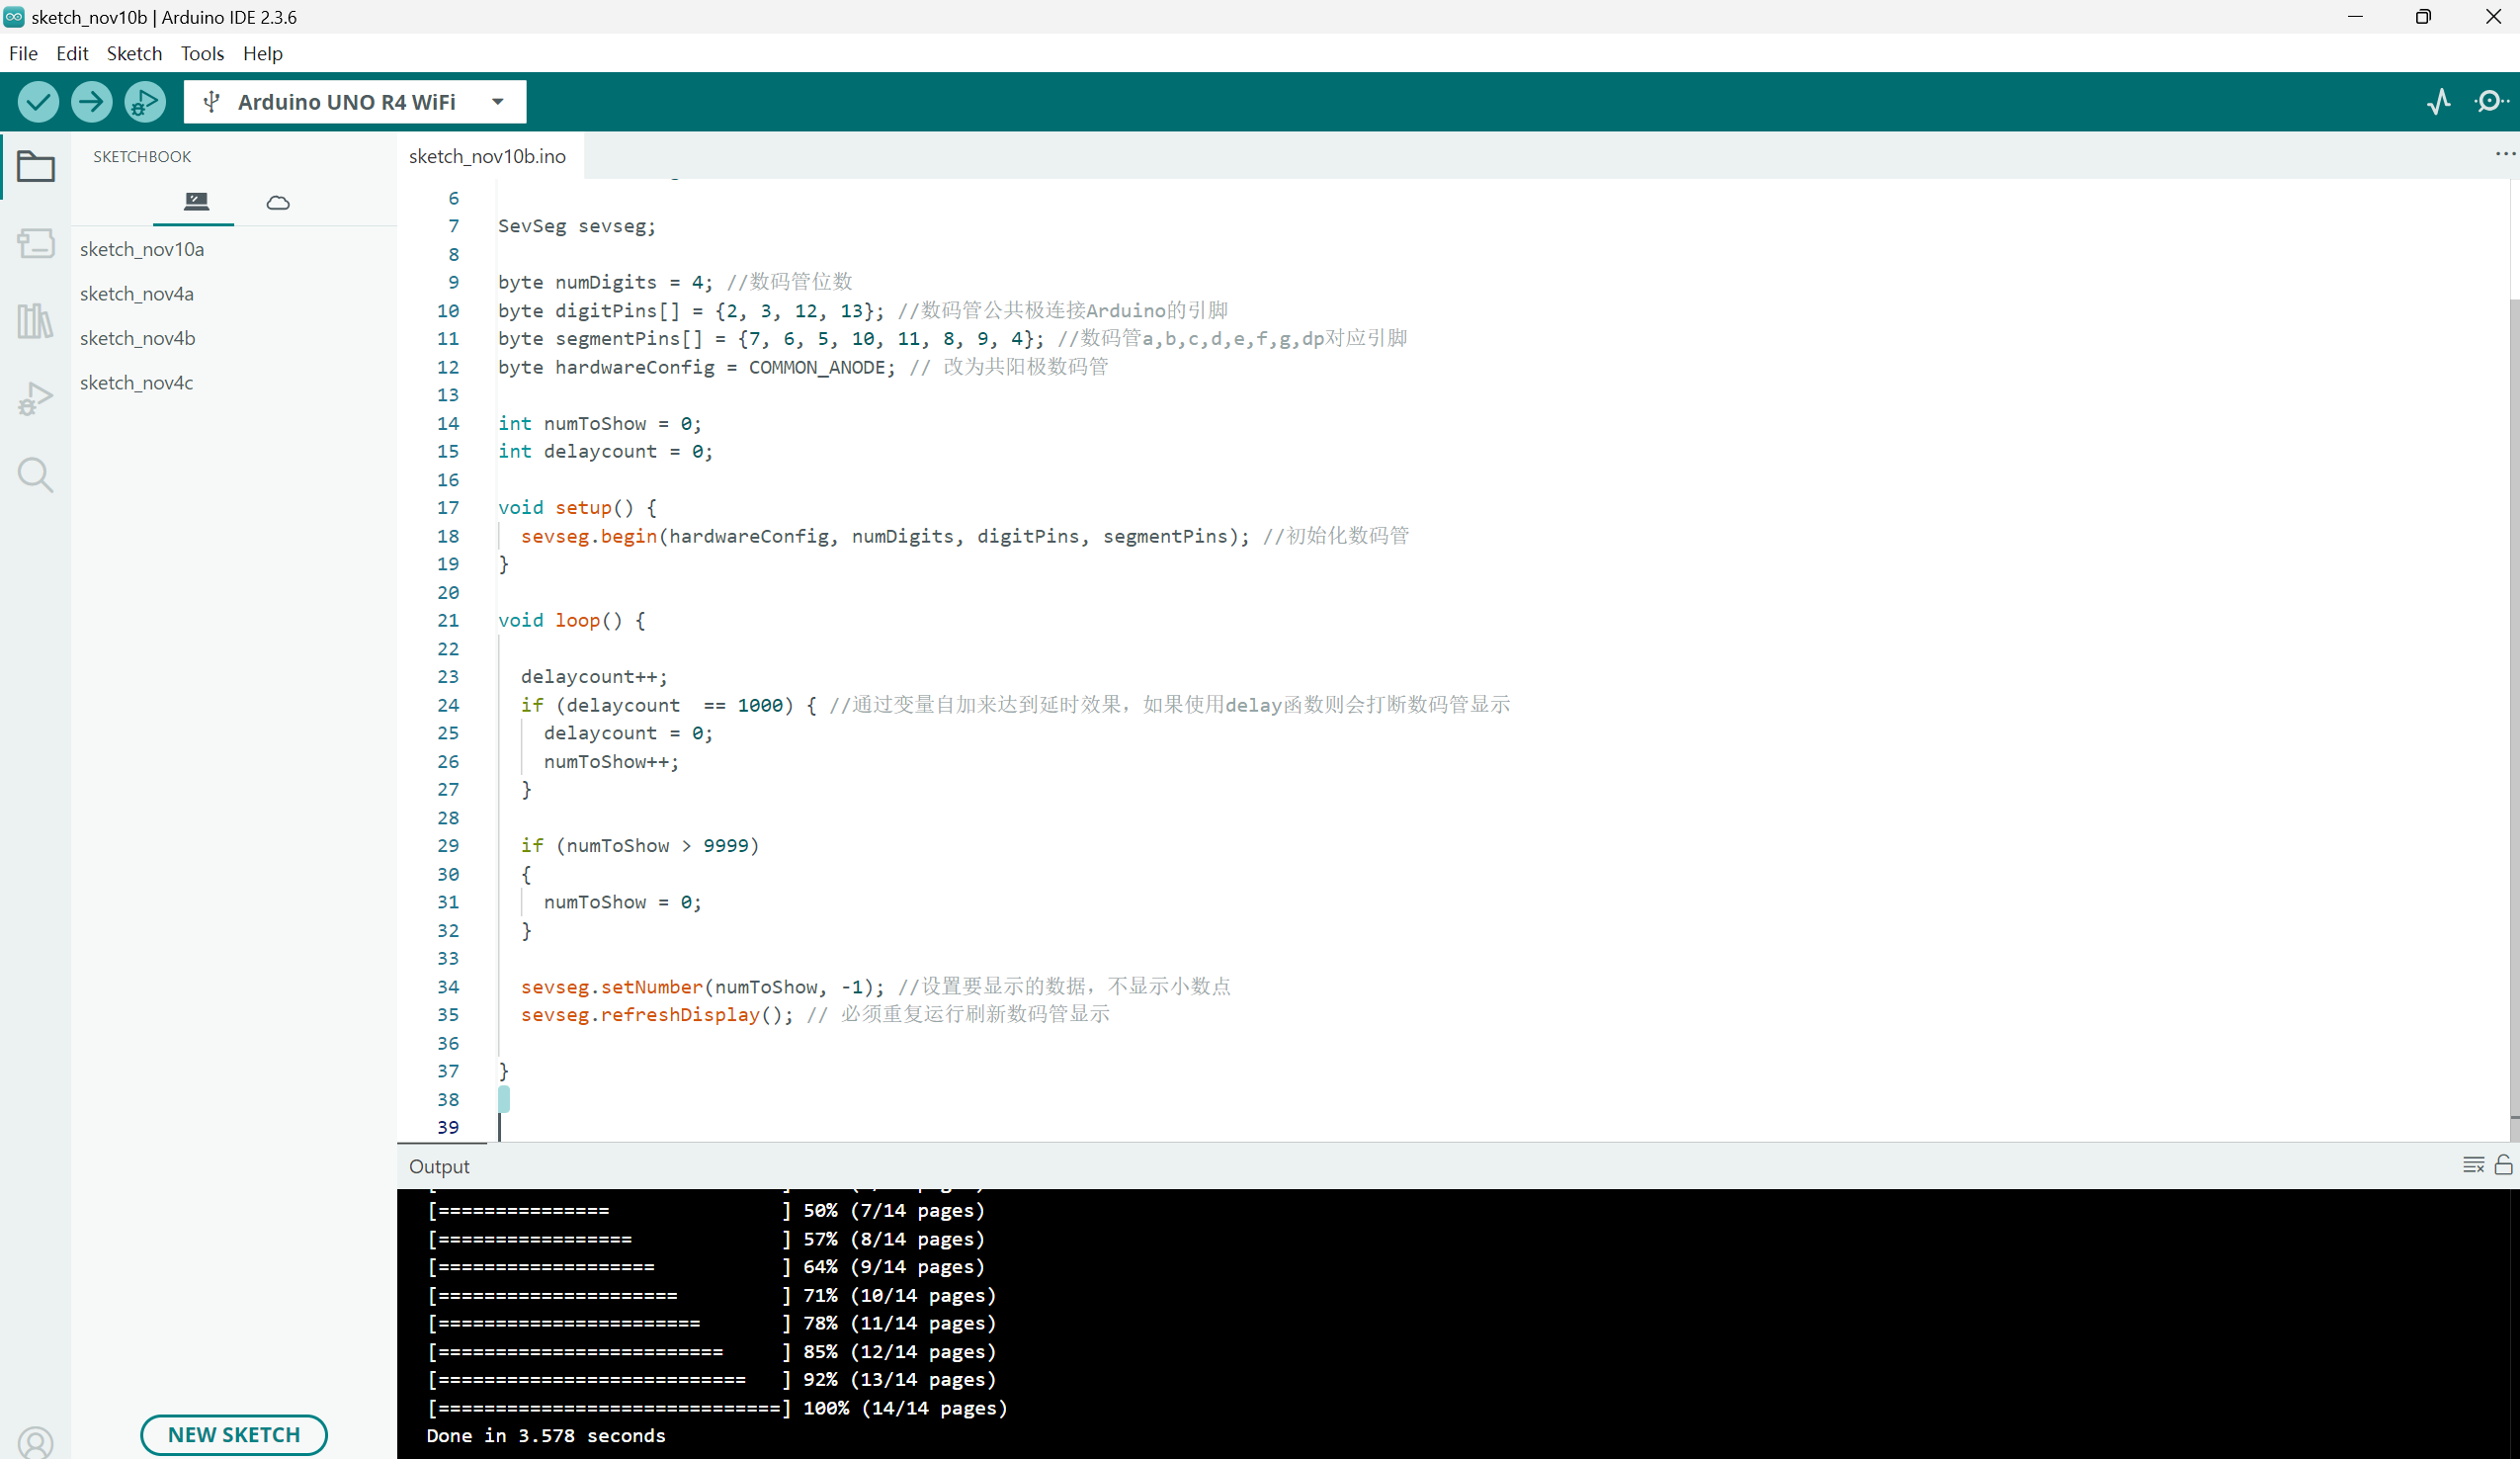
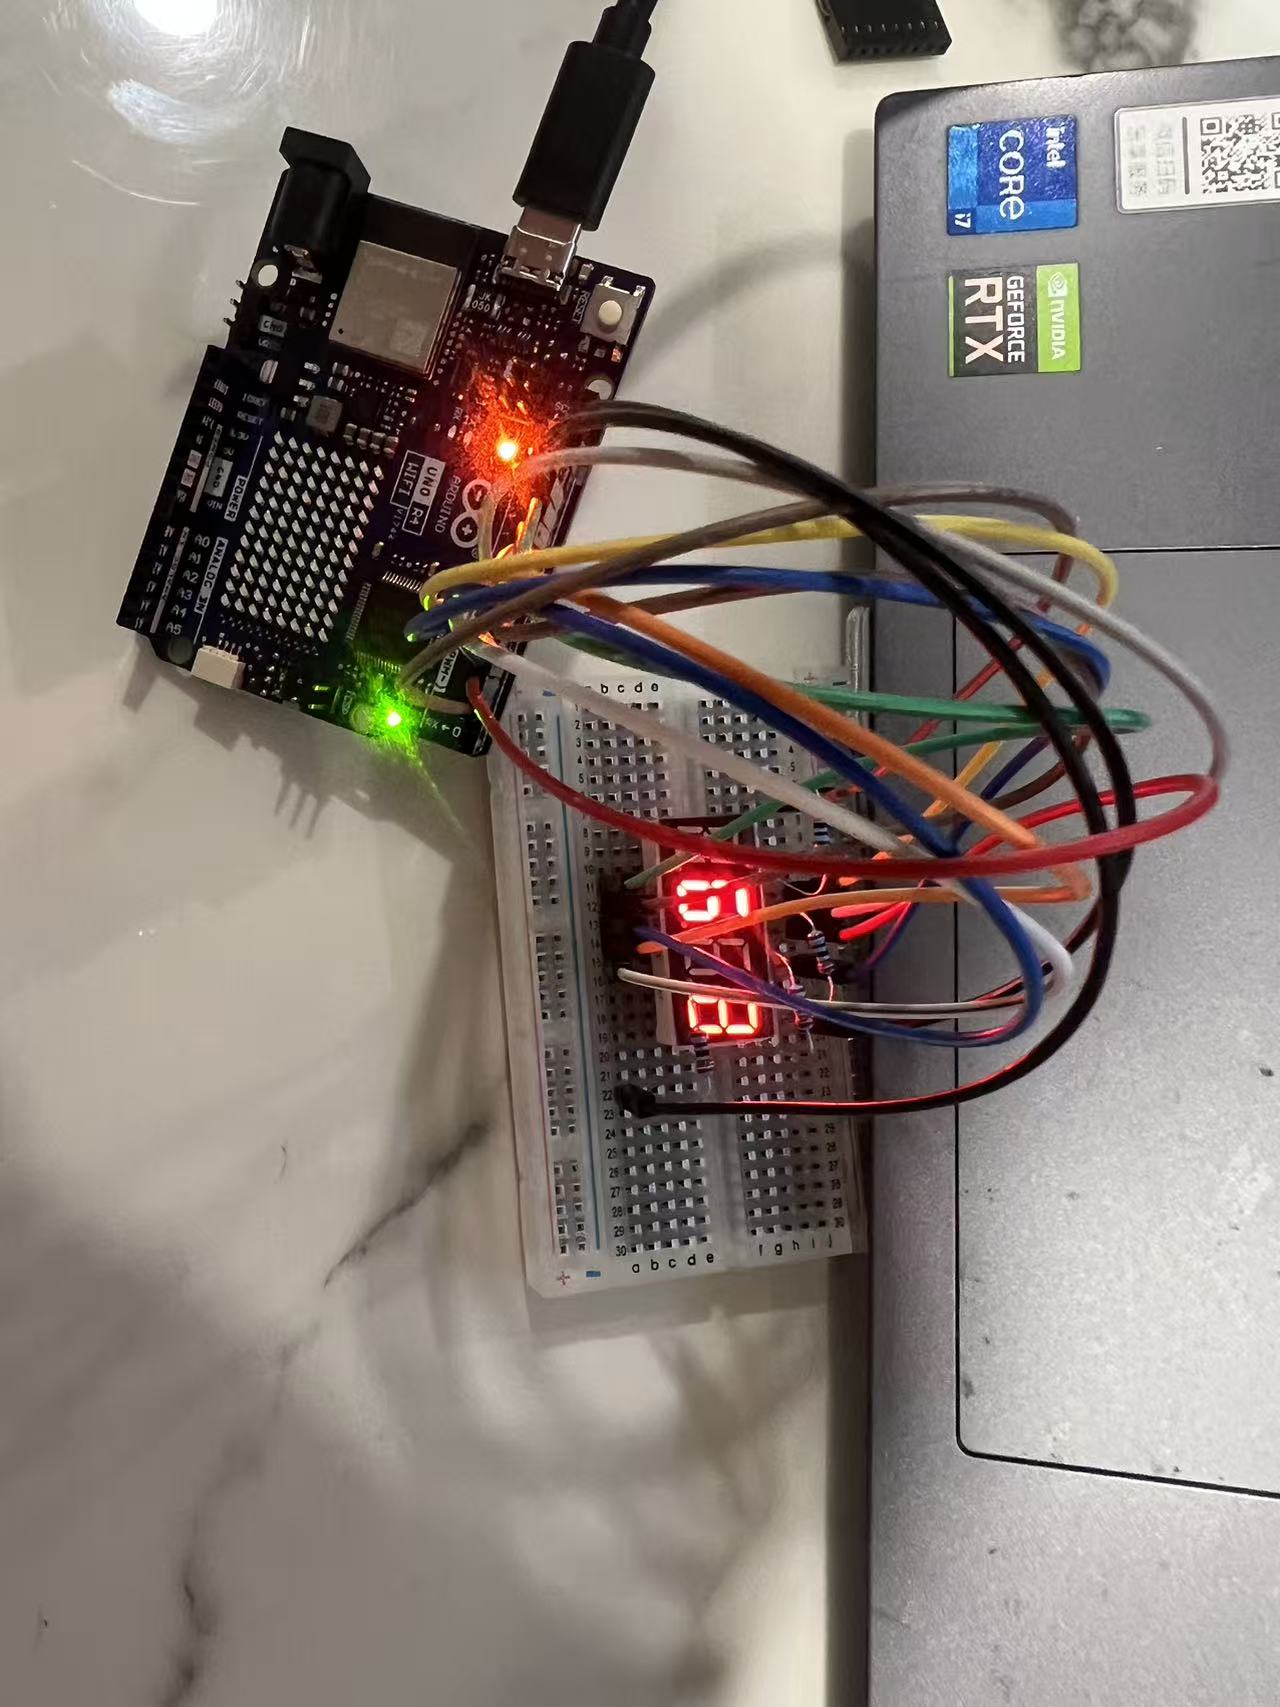
My code for the Arduino project will be shown below with commentation:
/*
 * SevSegFour
 * 驱动四位数码管显示0到9999
 */
#include "SevSeg.h"

SevSeg sevseg;

byte numDigits = 4; //数码管位数
byte digitPins[] = {2, 3, 12, 13}; //数码管公共极连接Arduino的引脚
byte segmentPins[] = {7, 6, 5, 10, 11, 8, 9, 4}; //数码管a,b,c,d,e,f,g,dp对应引脚
byte hardwareConfig = COMMON_ANODE; // 改为共阳极数码管

int numToShow = 0;
int delaycount = 0;

void setup() {
  sevseg.begin(hardwareConfig, numDigits, digitPins, segmentPins); //初始化数码管
}

void loop() {

  delaycount++;
  if (delaycount  == 1000) { //通过变量自加来达到延时效果,如果使用delay函数则会打断数码管显示
    delaycount = 0;
    numToShow++;
  }

  if (numToShow > 9999)
  {
    numToShow = 0;
  }

  sevseg.setNumber(numToShow, -1); //设置要显示的数据,不显示小数点
  sevseg.refreshDisplay(); // 必须重复运行刷新数码管显示

}