Appearance
How construct the web?
Prepare
To create our webpage, we will utilize the following tools(Click the tool name to download and install):
- GitHub:Serves as the hosting platform for our webpage.
- GitHub Desktop:Simplifies the process of transferring code from a local environment to GitHub.
- Node.js:Establishes the necessary development environment.
- VSCode:The platform for writing the project。
- Picgo:Image upload service.
- Git:
Set up the website with the vitepress
Installation Wizard
VitePress comes with a command-line setup wizard that can help you build a basic project. After installation, start the wizard by running the following command:
npm add -D vitepress@nextnpx vitepress initThen you should answer some question.
┌  Welcome to VitePress!
│
◇  Where should VitePress initialize the config?
│  ./docs
│
◇  Where should VitePress look for your markdown files?
│  ./docs
│
◇  Site title:
│  My Awesome Project
│
◇  Site description:
│  A VitePress Site
│
◇  Theme:
│  Default Theme
│
◇  Use TypeScript for config and theme files?
│  Yes
│
◇  Add VitePress npm scripts to package.json?
│  Yes
│
◇  Add a prefix for VitePress npm scripts?
│  Yes
│
◇  Prefix for VitePress npm scripts:
│  docs
│
└  Done! Now run pnpm run docs:dev and start writing.
Project Tree
docs
├── .vitepress
│   ├── cache
│   ├── config.mts
│   ├── dist
│   └── theme
│       ├── components
│       │   └── HomeCustomContent.vue
│       ├── index.ts
│       └── style.css
├── 3D-Printer.md
├── Arduino.md
├── Electronic-Design.md
├── Final presentation.md
├── Fusion-360.md
├── Interface-application.md
├── Laser-Cutting.md
├── Modeling-Casting.md
├── NVIDIA.md
├── OpenSource-LIcense.md
├── PCB-Manufacture.md
├── Project Management.md
├── index.md
└── logo-dark.png.png)
docs:dev The script will start the local development server with instant hot updates. Run it using the following command:
··· npm run docs:dev ···
The setting with Github
Web page setting
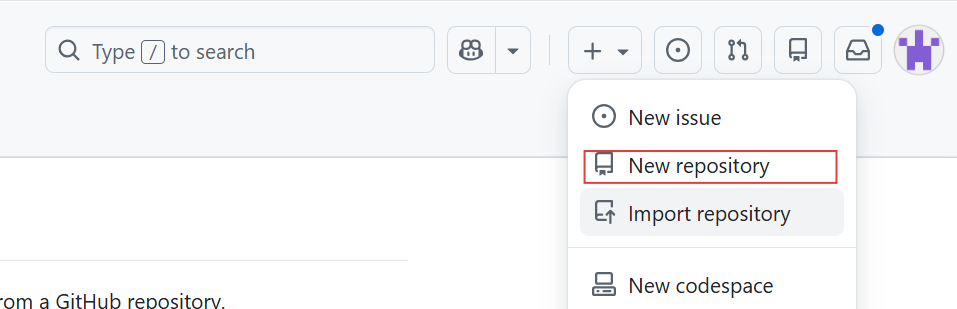
.png)
Local setting
.png)
.png)
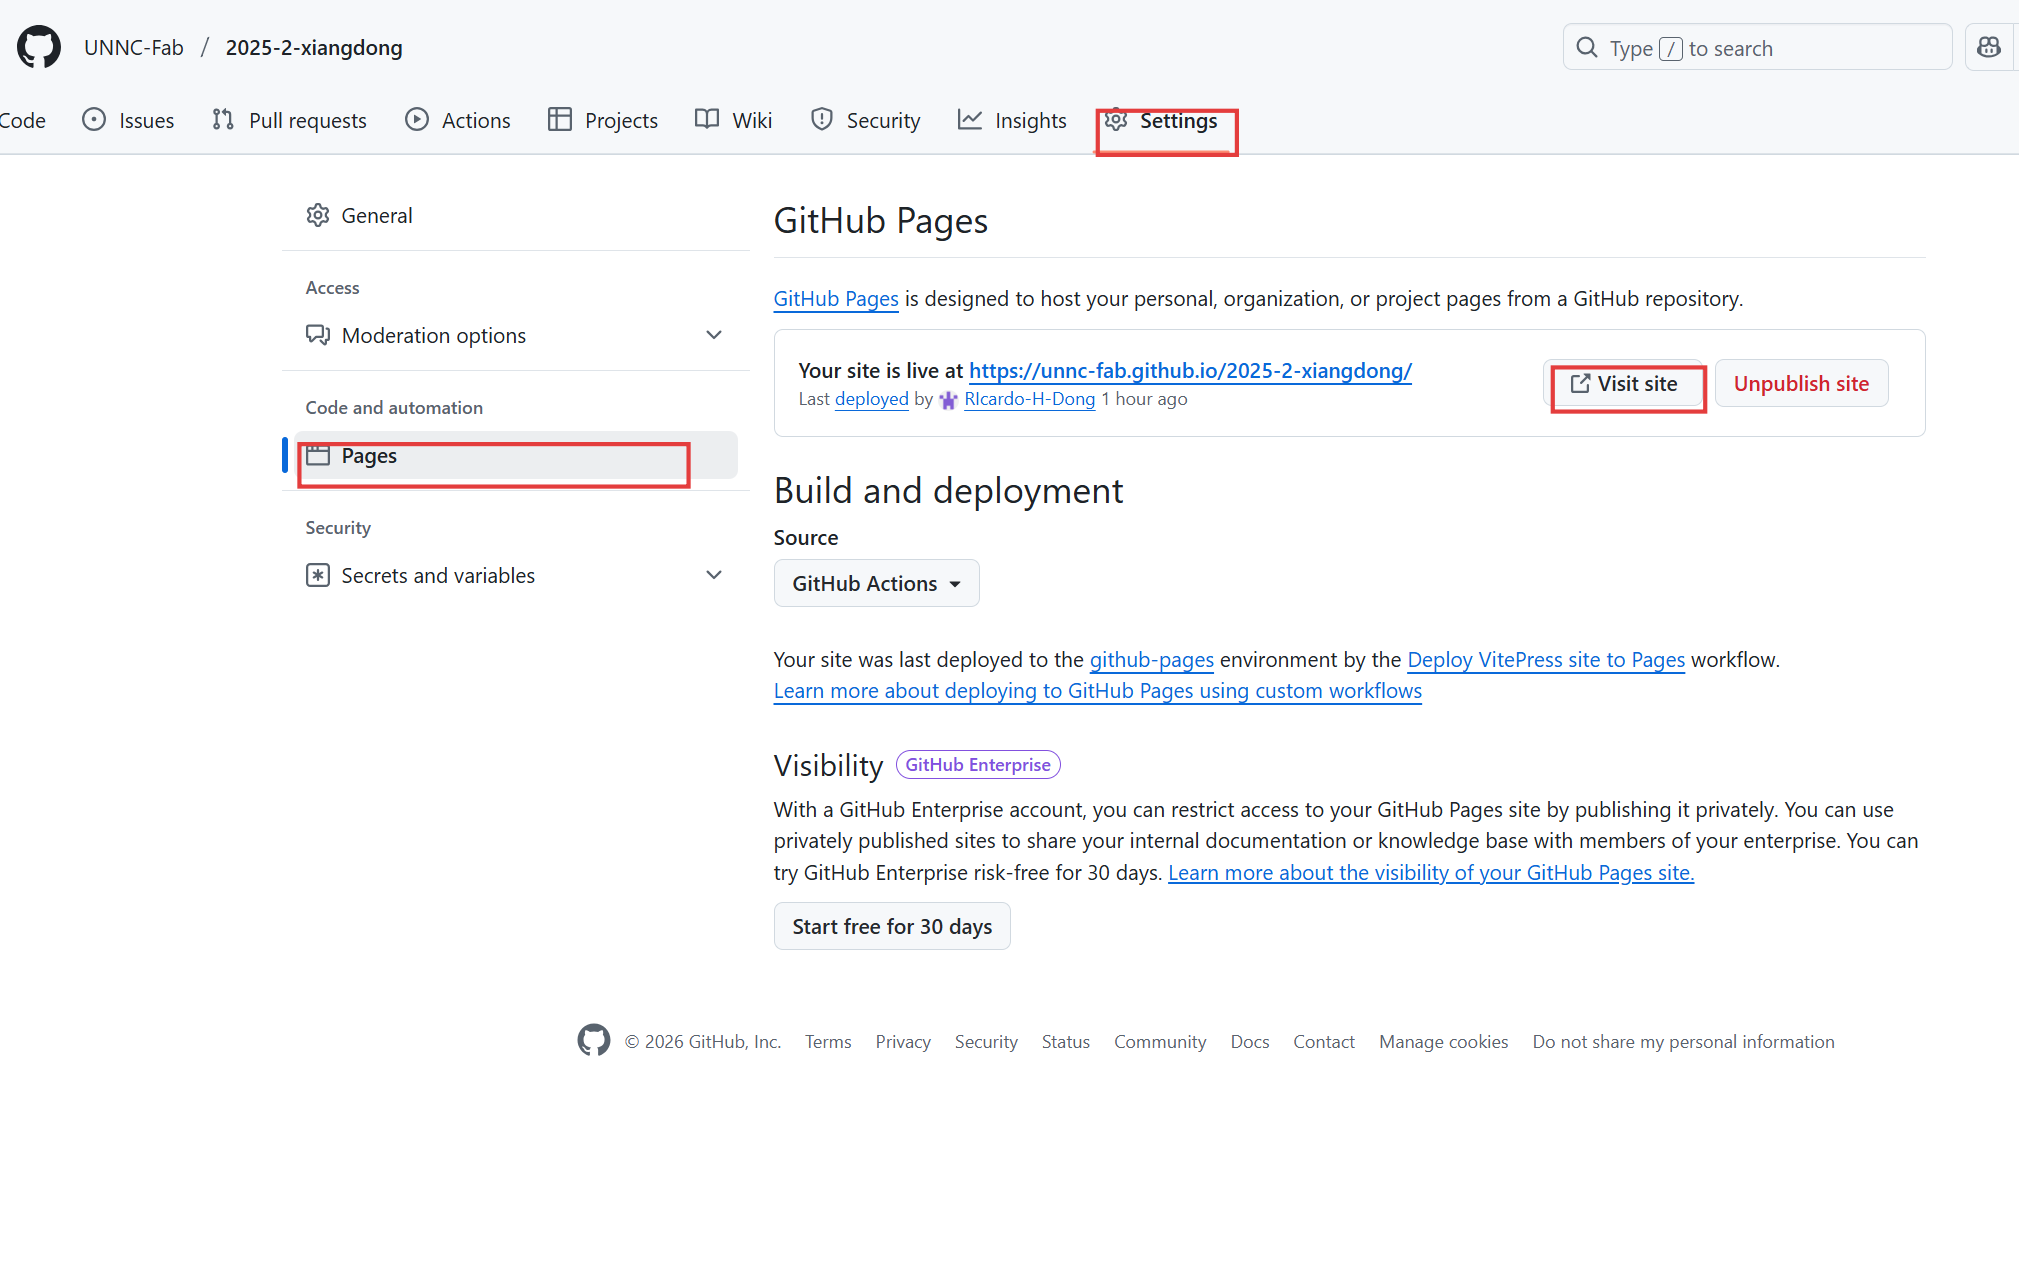
Deploy to GitHub
First thing is to create a new file called github\workflows ,then create a new file named deploy.yml

Then proceed to add following code into deploy.yml
name: Deploy VitePress site to Pages

on:
  push:
    branches: [main]

  workflow_dispatch:

permissions:
  contents: read
  pages: write
  id-token: write

concurrency:
  group: pages
  cancel-in-progress: false

jobs:

  build:
    runs-on: ubuntu-latest
    steps:
      - name: Checkout
        uses: actions/checkout@v4
        with:
          fetch-depth: 0 # 如果未启用 lastUpdated,则不需要

      - name: Setup Node
        uses: actions/setup-node@v4
        with:
          node-version: 22.14.0
          cache: npm
      - name: Setup Pages
        uses: actions/configure-pages@v4
      - name: Install dependencies
        run: npm ci
      - name: Build with VitePress
        run: npm run docs:build
      - name: Upload artifact
        uses: actions/upload-pages-artifact@v3
        with:
          path: docs/.vitepress/dist


  deploy:
    environment:
      name: github-pages
      url: ${{ steps.deployment.outputs.page_url }}
    needs: build
    runs-on: ubuntu-latest
    name: Deploy
    steps:
      - name: Deploy to GitHub Pages
        id: deployment
        uses: actions/deploy-pages@v4
Picgo
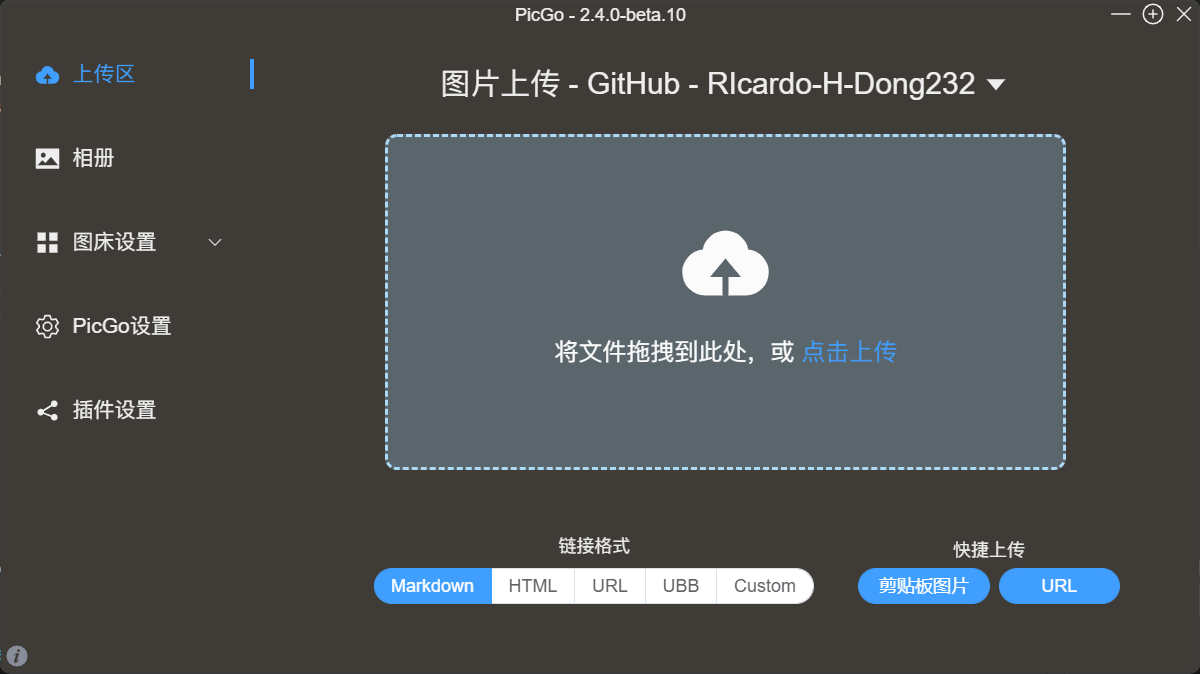
The setting of Picgo
.png)
.png)
FInally
Extra thing about the web style
If you want to change the style about the web, you can touch this and learn (https://vitepress.dev/zh/guide/custom-theme).