Week 6 - 3D Scanning and Printing
Assignments of the Week
- 3D Scanning Exercise Conduct a 3D scaning prject and scan a physical object to create a digital model.
- 3D Printing Project Design and fabricate an object with the following specifications:
- Dimensions:Small scale( few cubic centimeters)
- Manufacturing:Additive manufacturing only (Must utilize geometries impossible for subtractive methods)
- Time: Optimize for efficient print duration.
This week, I explored practical applications of additive manufacturing technology. Initially, I performed design rule testing on the 3D printer to ensure its printing precision and quality met requirements. Then, I successfully materialized the model designed in week four using 3D printing technology. Furthermore, I mastered basic 3D scanning technology operations and used the SHINING 3D EinStar series handheld 3D scanner to scan the upper body of a person, experiencing firsthand the process of converting physical objects into digital models.
3D Scanning
Throughout my hands-on experience with 3D scanning technology, I utilized a professional handheld scanner from the EinStar series, which employs advanced blue light structured illumination for precise 3D data acquisition. This sophisticated device demonstrated remarkable capabilities in capturing detailed three-dimensional information swiftly and accurately. For my practical application, I focused on digitizing the upper torso of a human subject, successfully creating a detailed digital representation of the physical form. 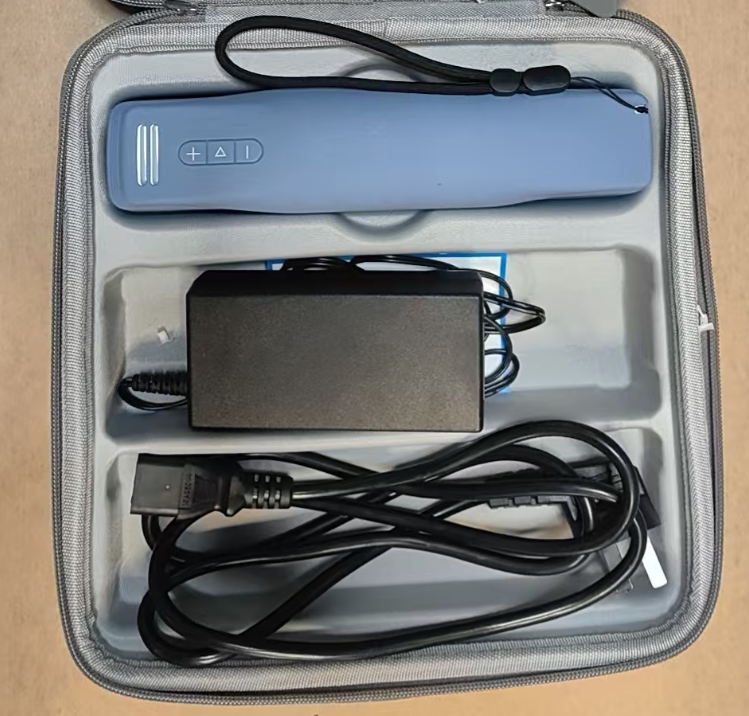
Operation procedure
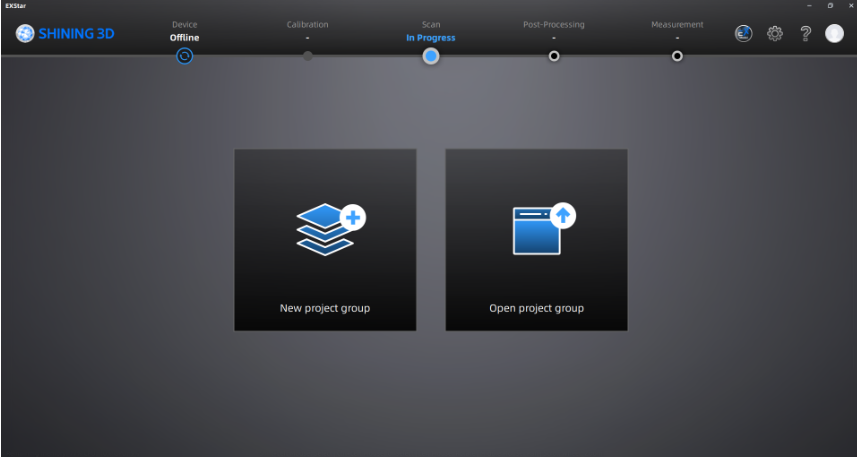
- Software Preparation Begin by downloading and setting up the EXStar software . To unlock the full functionality, users must create and verify their account credentials through the manufacturer's authentication system. The software's intuitive interface guides users through the complete workflow sequence: starting with device calibration, followed by data capture, then post-scan processing, and finally dimensional analysis.
 v
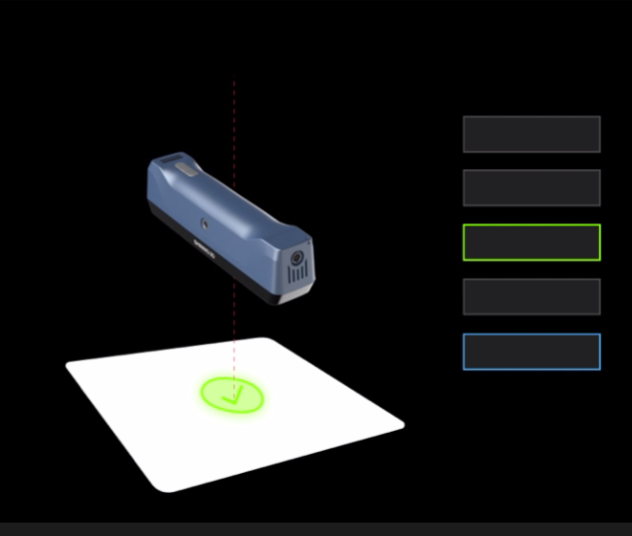
v - Device Connection and Calibration Once the scanning device is properly interfaced with your computer system, launch a fresh project within the application environment. Follow the step-by-step calibration wizard provided by the system to optimize the scanner's performance and ensure precise data collection.
- Scanning Data Acquisition I looked for a classmate as a model, sitting in a chair with her upper body perpendicular to the floor.
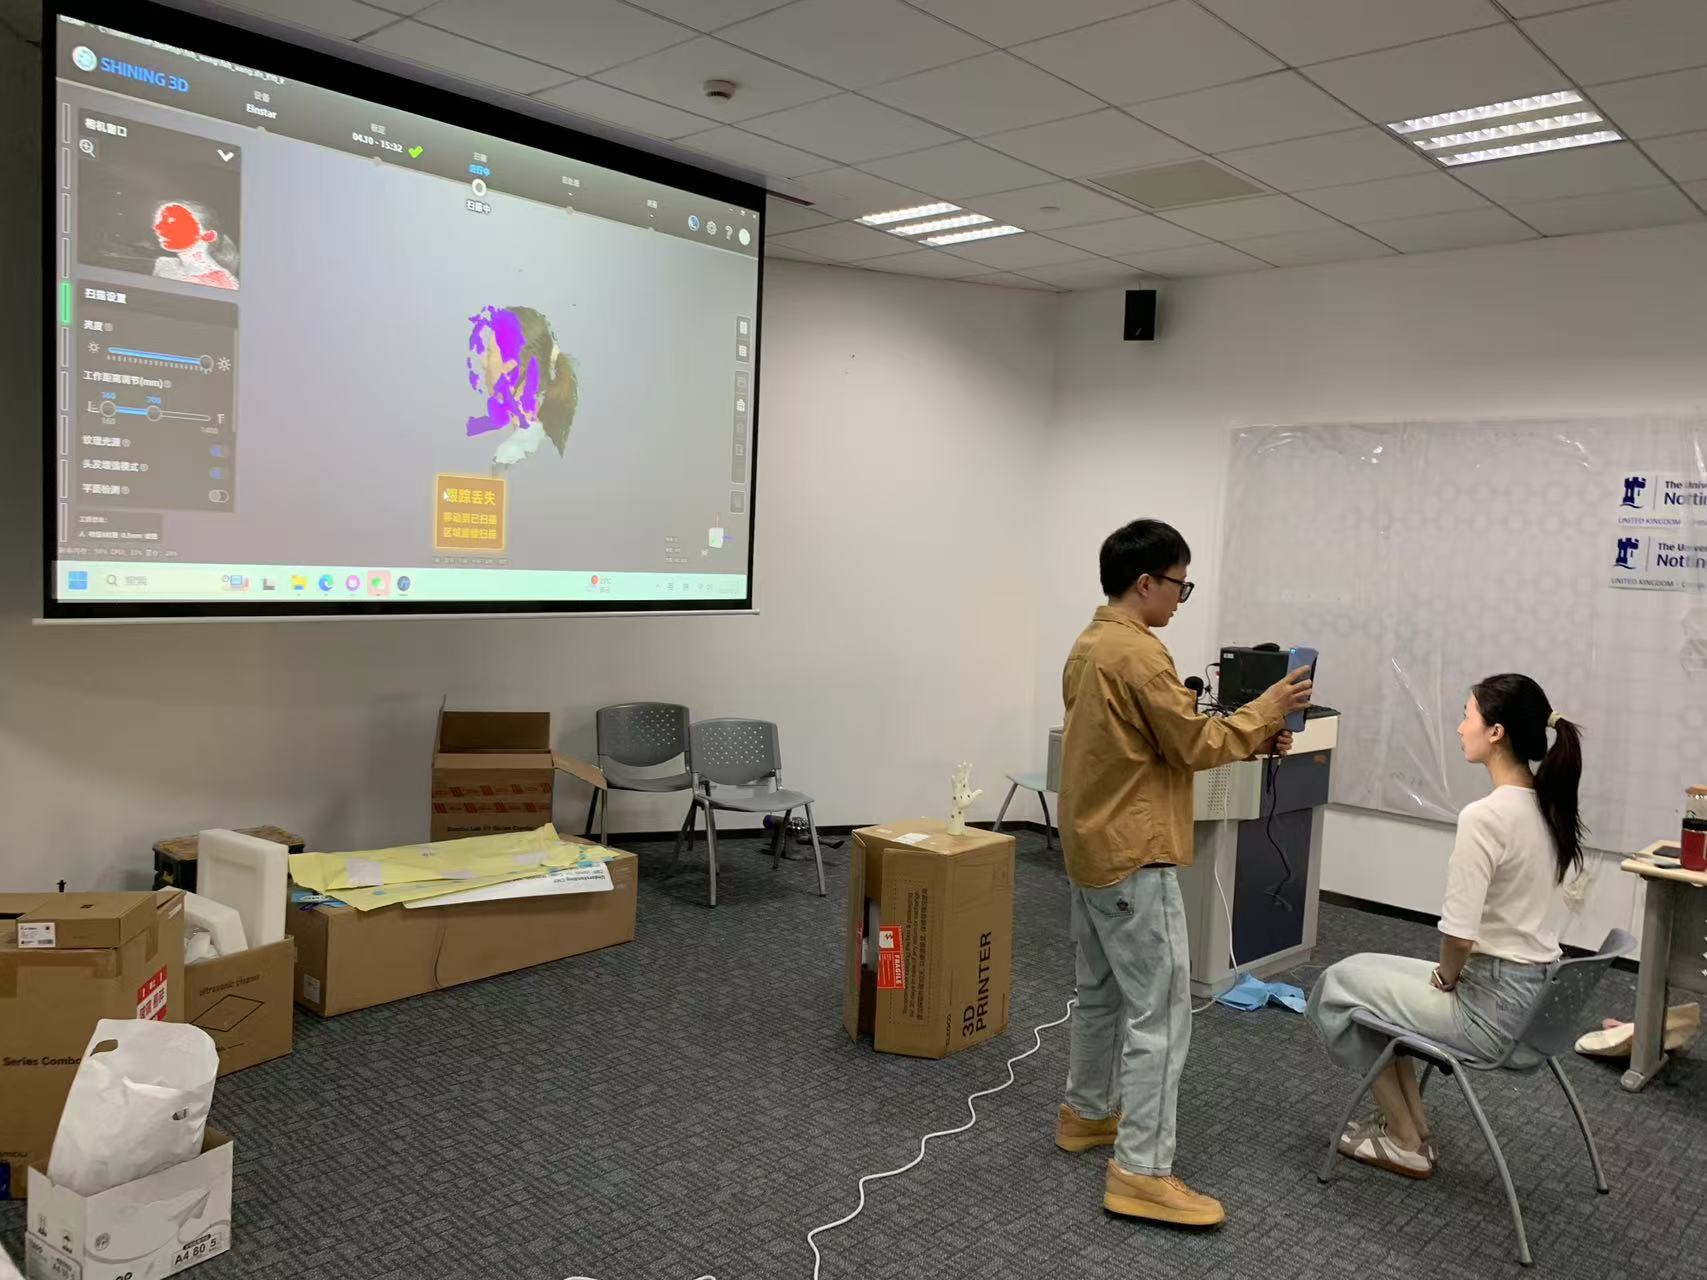 During scanning, maintain a distance of 30-50cm between the device and the target object while performing a 360-degree scan to ensure data completeness.
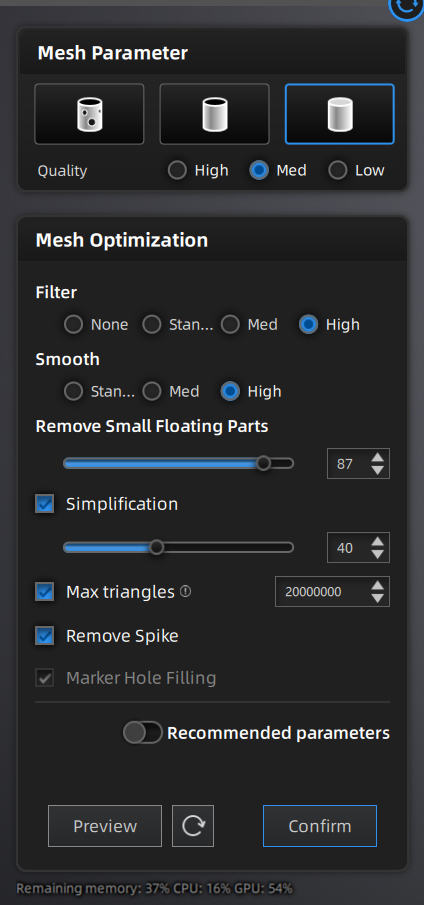
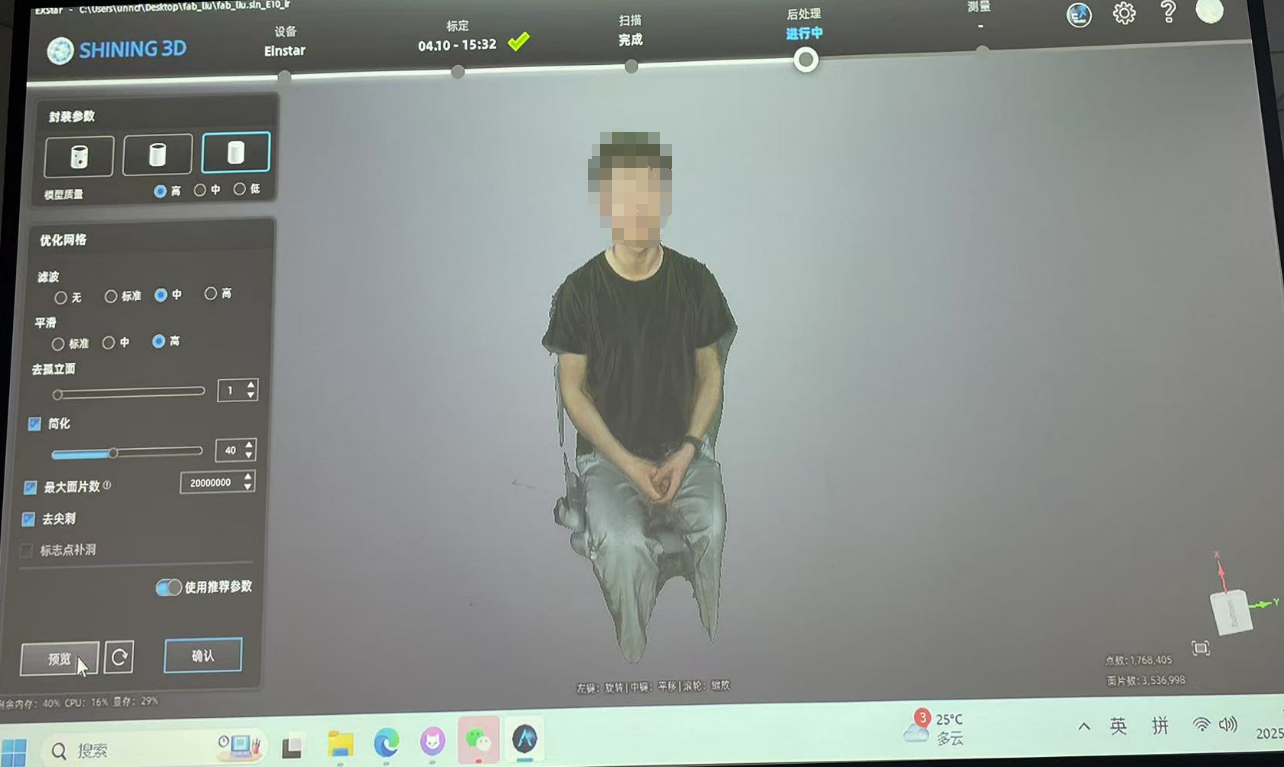
 - Post-Scan Processing After the scan is complete, the system will automatically perform post-scan processing to refine the captured data. This step ensures the highest quality of the final model. After post-processing, complete the final model processing using the wrapping function.
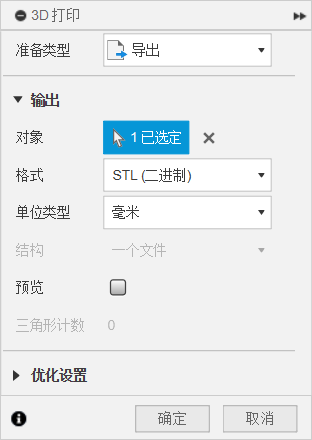
 After model processing is complete, click export data and select STL format.
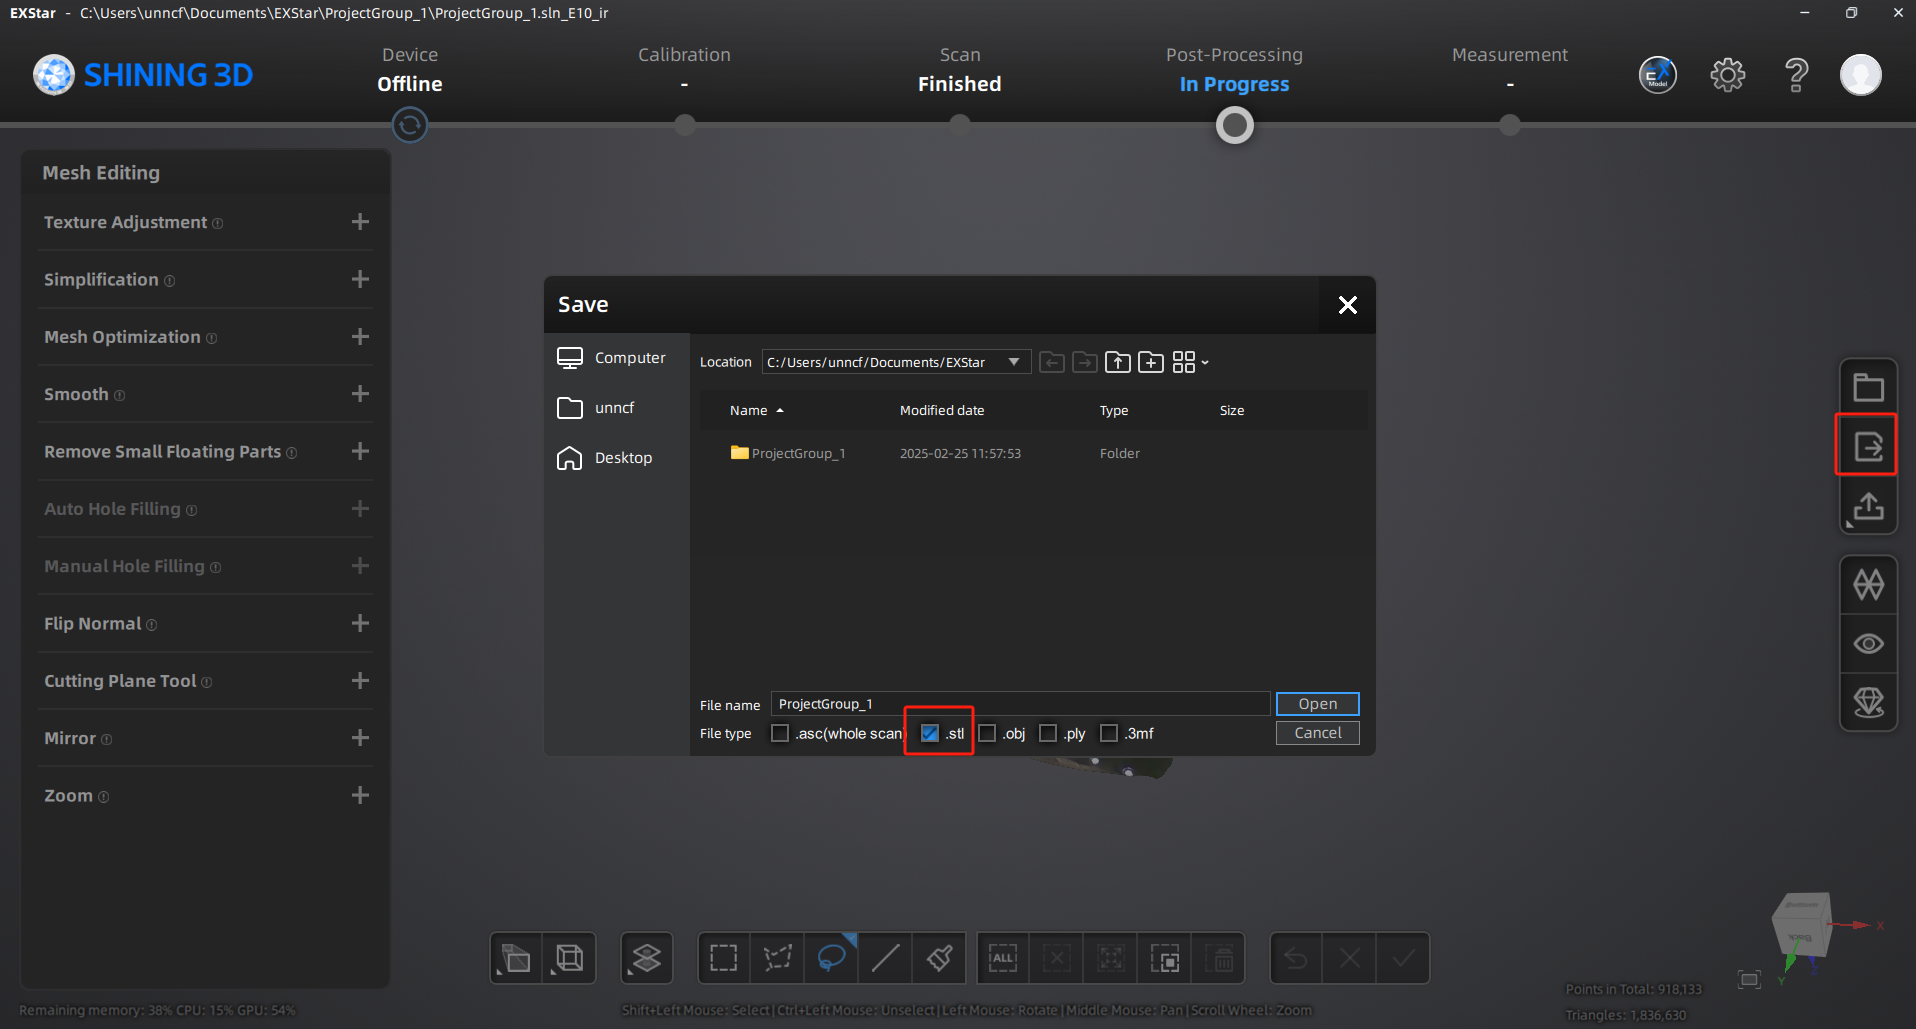
3D Printing
Advantages and Disadvantages of 3D Printing Technology
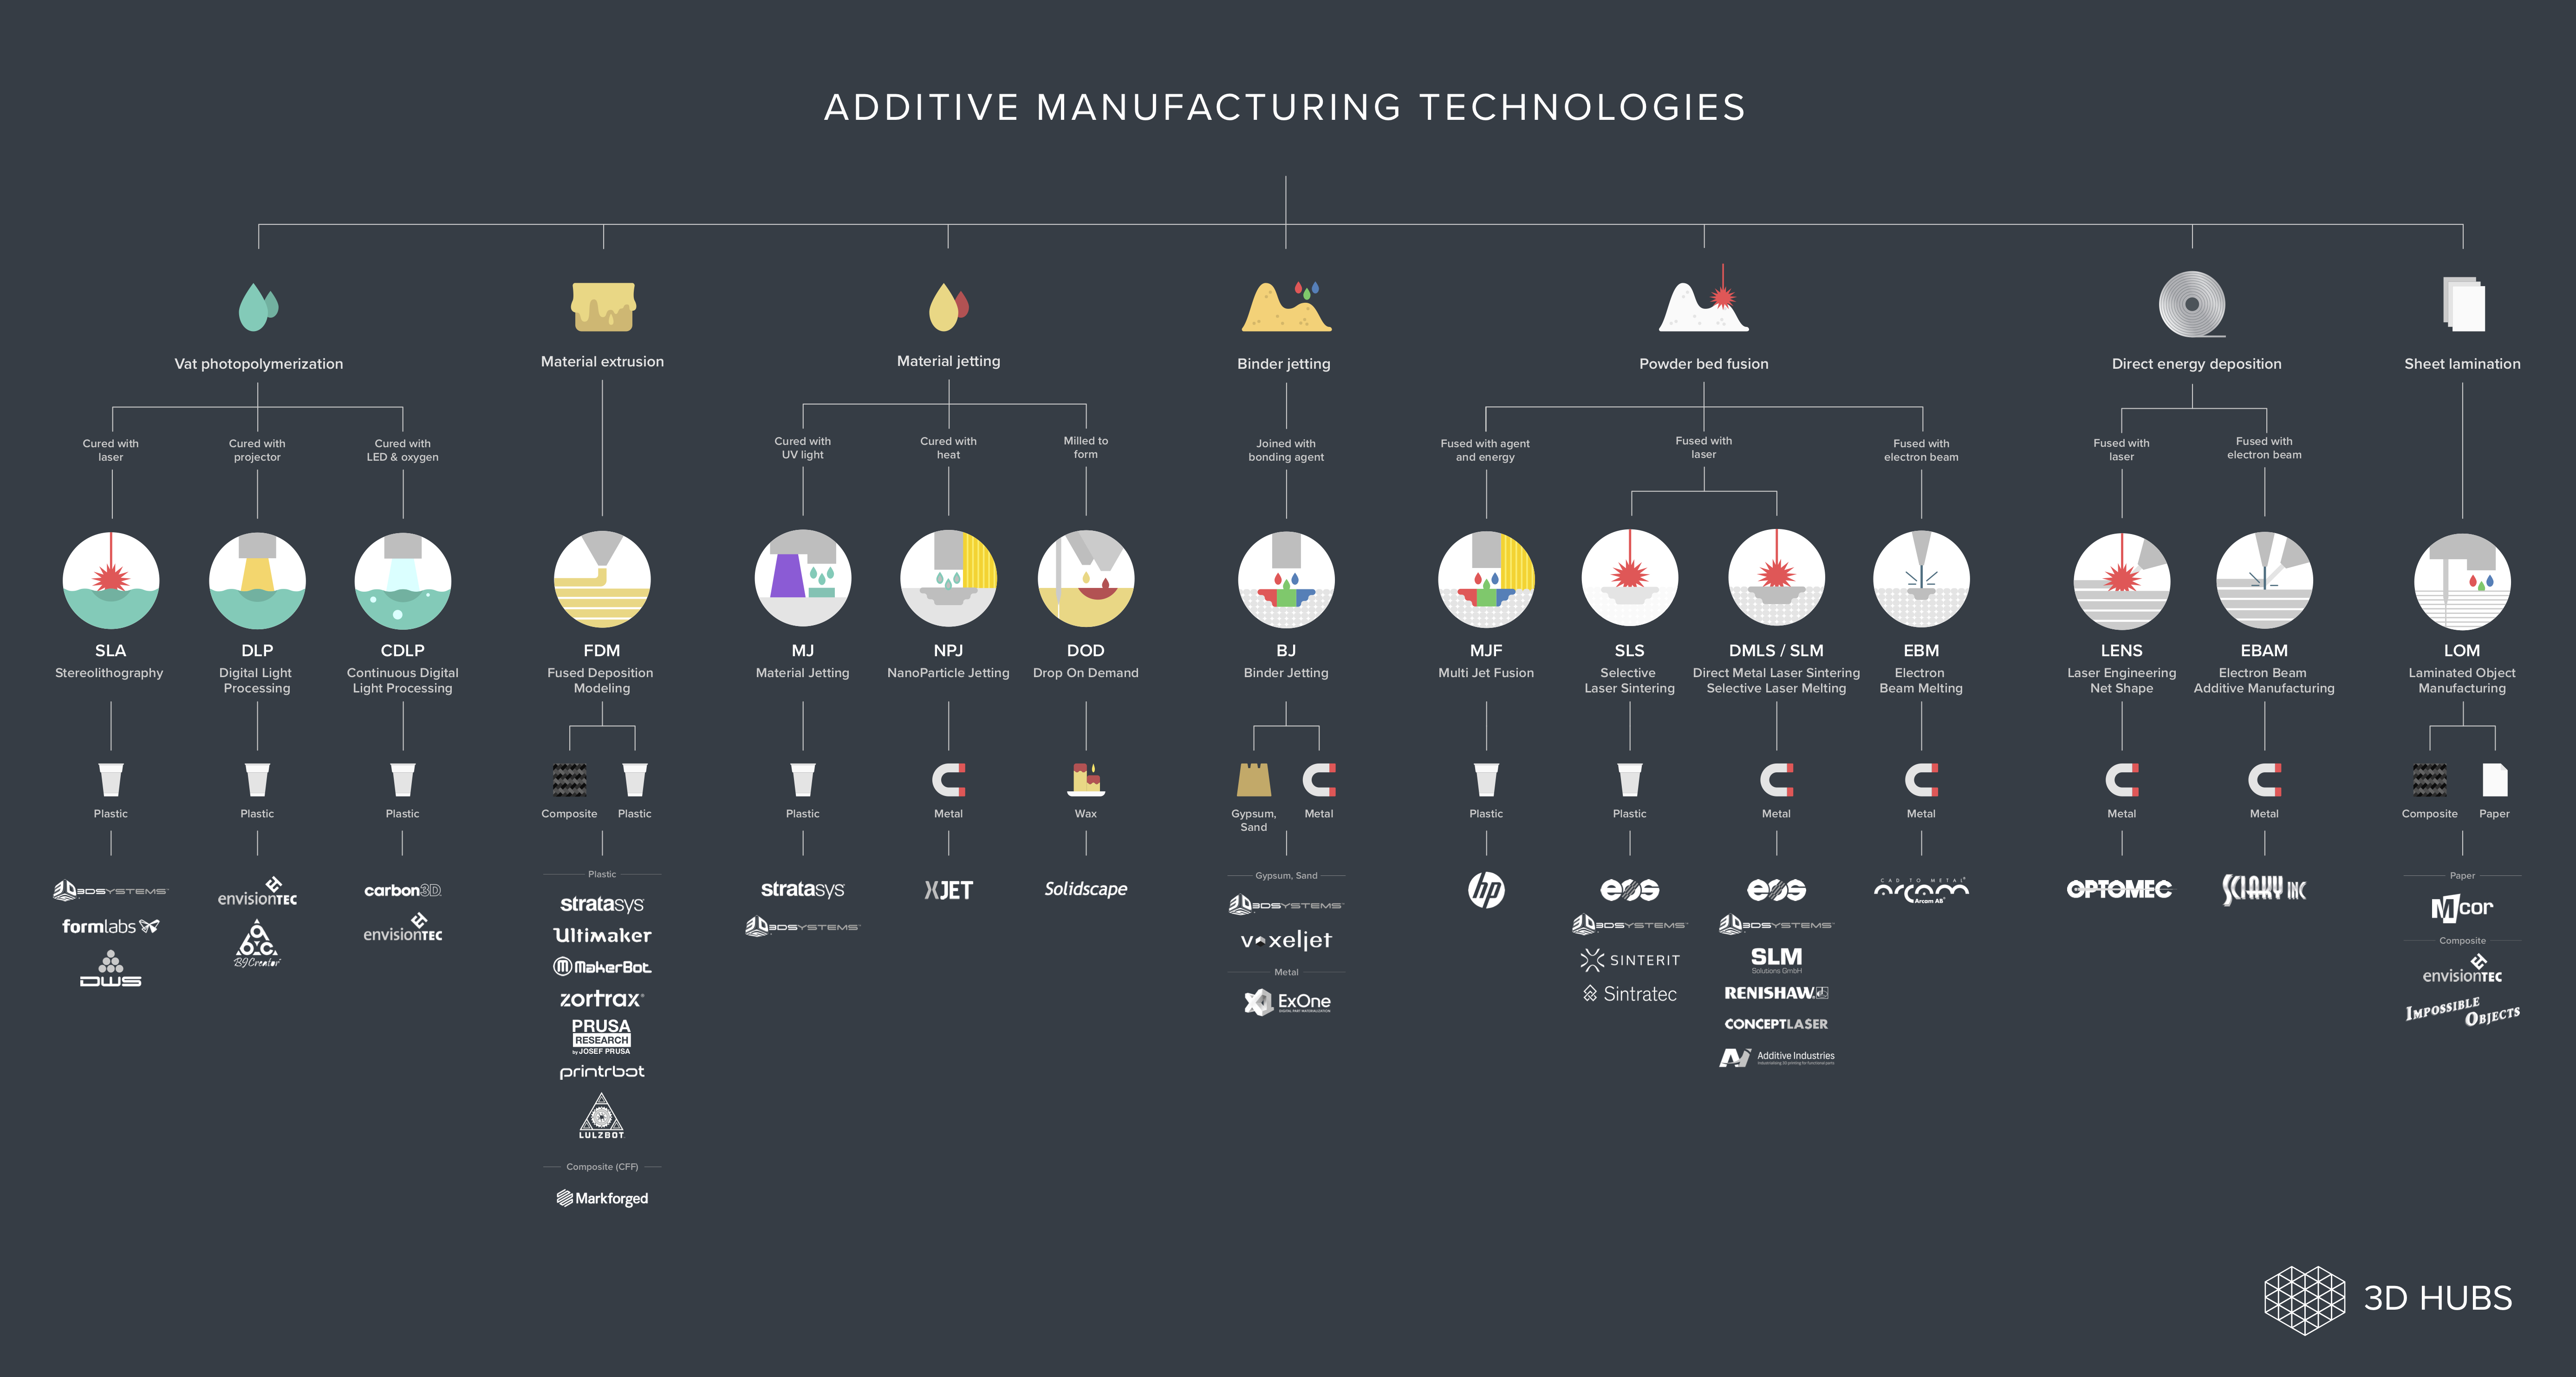
Additive manufacturing has revolutionized the production landscape with its distinctive capabilities and inherent constraints. In terms of technological advantages, this manufacturing method excels in creating intricate geometrical designs and enables rapid prototype development while minimizing material wastage through its layer-by-layer construction approach.
Different methodologies within the 3D printing spectrum offer unique benefits:
- Fused Deposition Modeling (FDM) stands out for its accessibility and versatile material options, making it a cost-efficient choice for many applications
- Stereolithography (SLA) and Selective Laser Sintering (SLS) excel in producing high-resolution components with exceptional detail accuracy
- Direct Metal Laser Sintering (DMLS) enables the creation of robust metal components with superior structural integrity
However, several challenges need consideration:
- Material Constraints: While versatile, certain materials (particularly metals) can be cost-prohibitive
- Performance Trade-offs: Higher precision often requires longer production times
- Additional Processing: Most printed items require post-production work, such as removing support structures
- Investment Requirements: Professional-grade systems often represent significant capital expenditure
- Design Parameters: Specific technical limitations (like maximum overhang angles and minimum feature sizes) must be carefully considered during the design phase
 Rference:https://gitlab.com/picbed/bed/uploads/f2fde33c0971363a778ec835432f4f62/Additive_Manufacturing_Technologies_Poster.jpg
Introduction to Bambu Lab X1 Carbon 3D Printer
The Bambu Lab X1 Carbon is a high-performance FDM (Fused Deposition Modeling) 3D printer that employs multiple innovative technologies to achieve high-speed and high-precision printing. 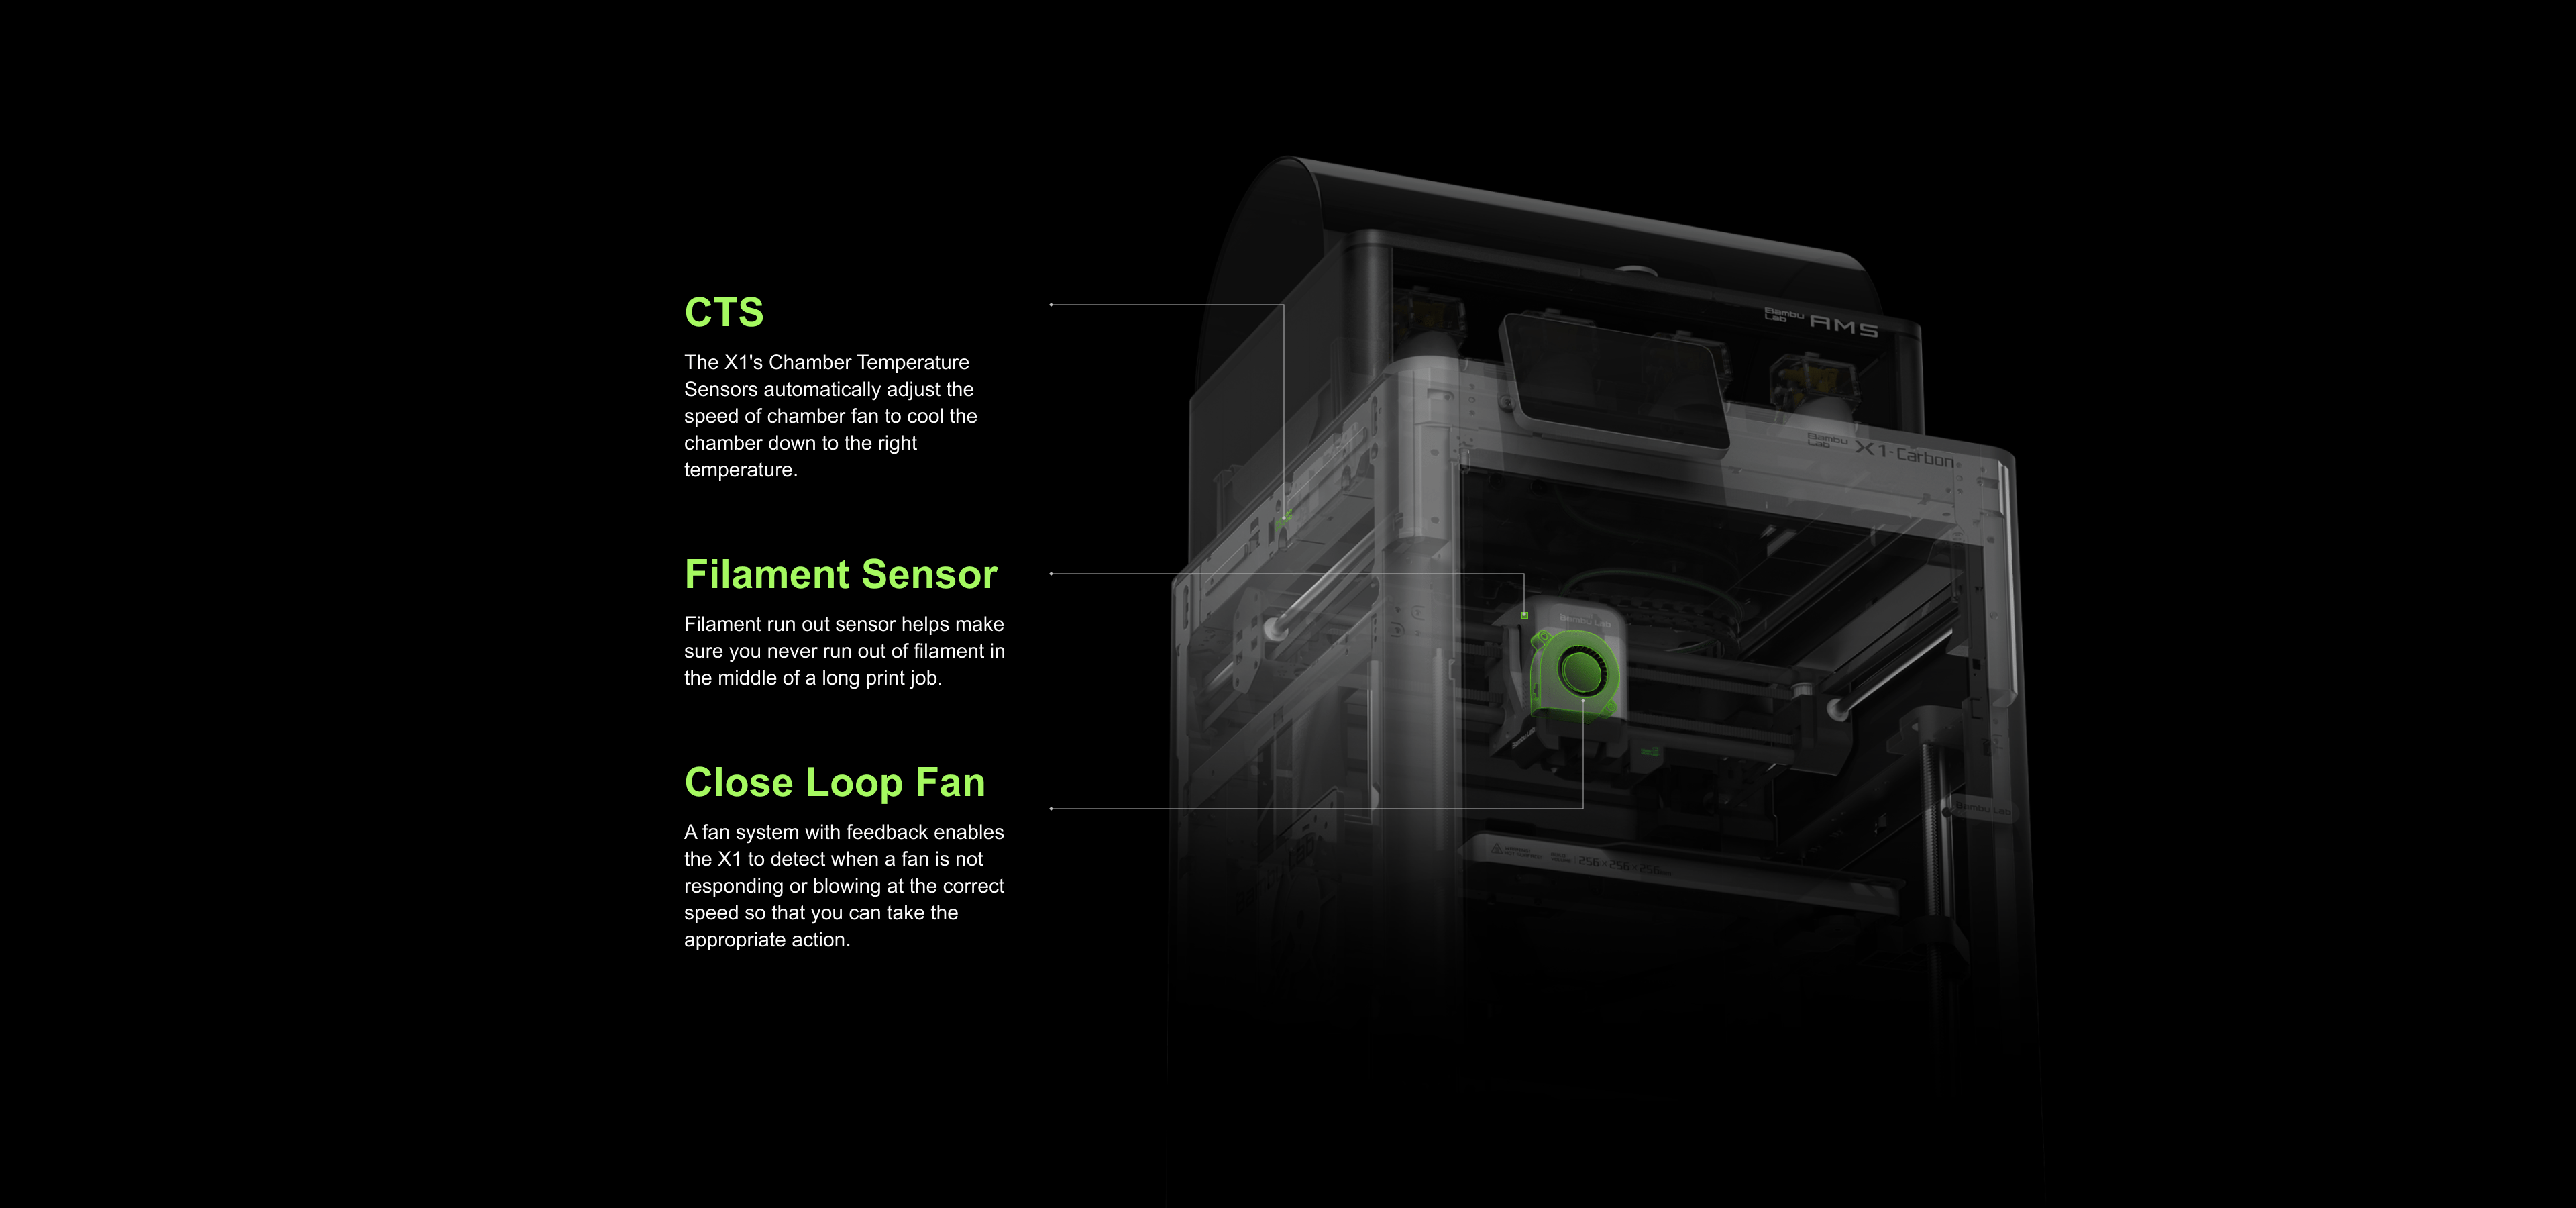 Reference:https://bambulab.cn/zh-cn
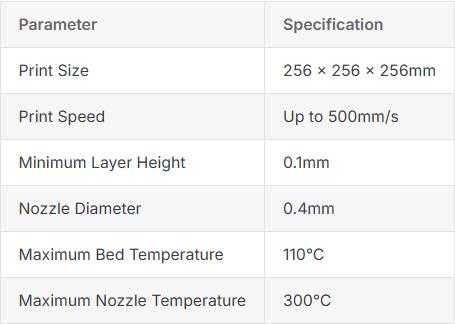
- Main techinical specifications are as follows:
- Core Technical Features:
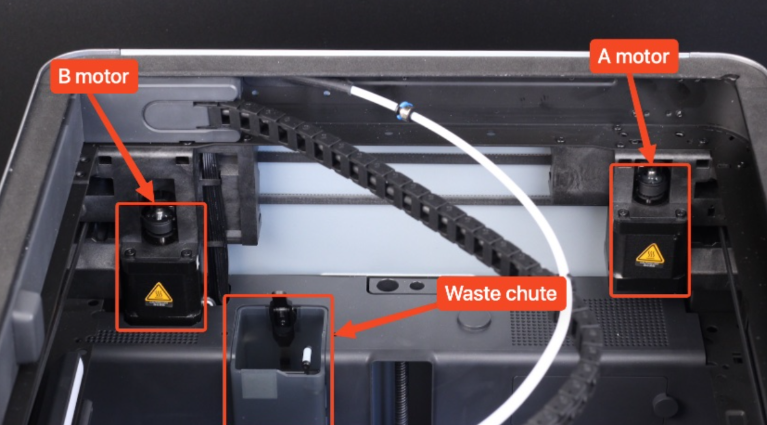
- Motion System The Bambu Lab X1 uses a CoreXY motion system, consisting of two stepper motors that work together to control the toolhead movement. Each stepper motor has an independent belt connected to the toolhead, and the system uses a pair of belts to control the toolhead position. Compared to traditional Cartesian printers, the X1 with CoreXY system achieves faster printing speeds.
 Reference:https://wiki.bambulab.com/en/x1
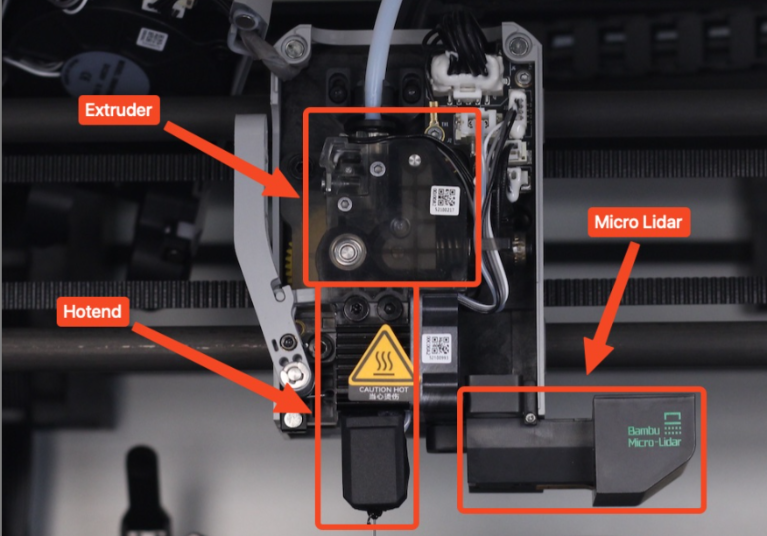
 - Hot End System The hot end is responsible for heating the filament to a specified temperature, melting and depositing it in layers to create the model. Different materials require different heating temperatures. The Bambu Lab X1 printer features an integrated hot end design, combining the nozzle and heat block, connected to the heat sink via a thin metal tube for optimal performance.
 Reference:https://wiki.bambulab.com/en/x1
3D Printing Workflow
Material Preparation
Before initiating the print job, verify the material specifications by examining the selected PLA filament. Begin with a thorough inspection of the filament spool to assess material quantity and quality. Prior to loading, evaluate the filament's condition for any signs of moisture absorption or physical deterioration that could compromise print quality. Finally, ensure adequate material volume is available to complete the intended print job without interruption. 
Slicer Software Installation and Parameter Settings
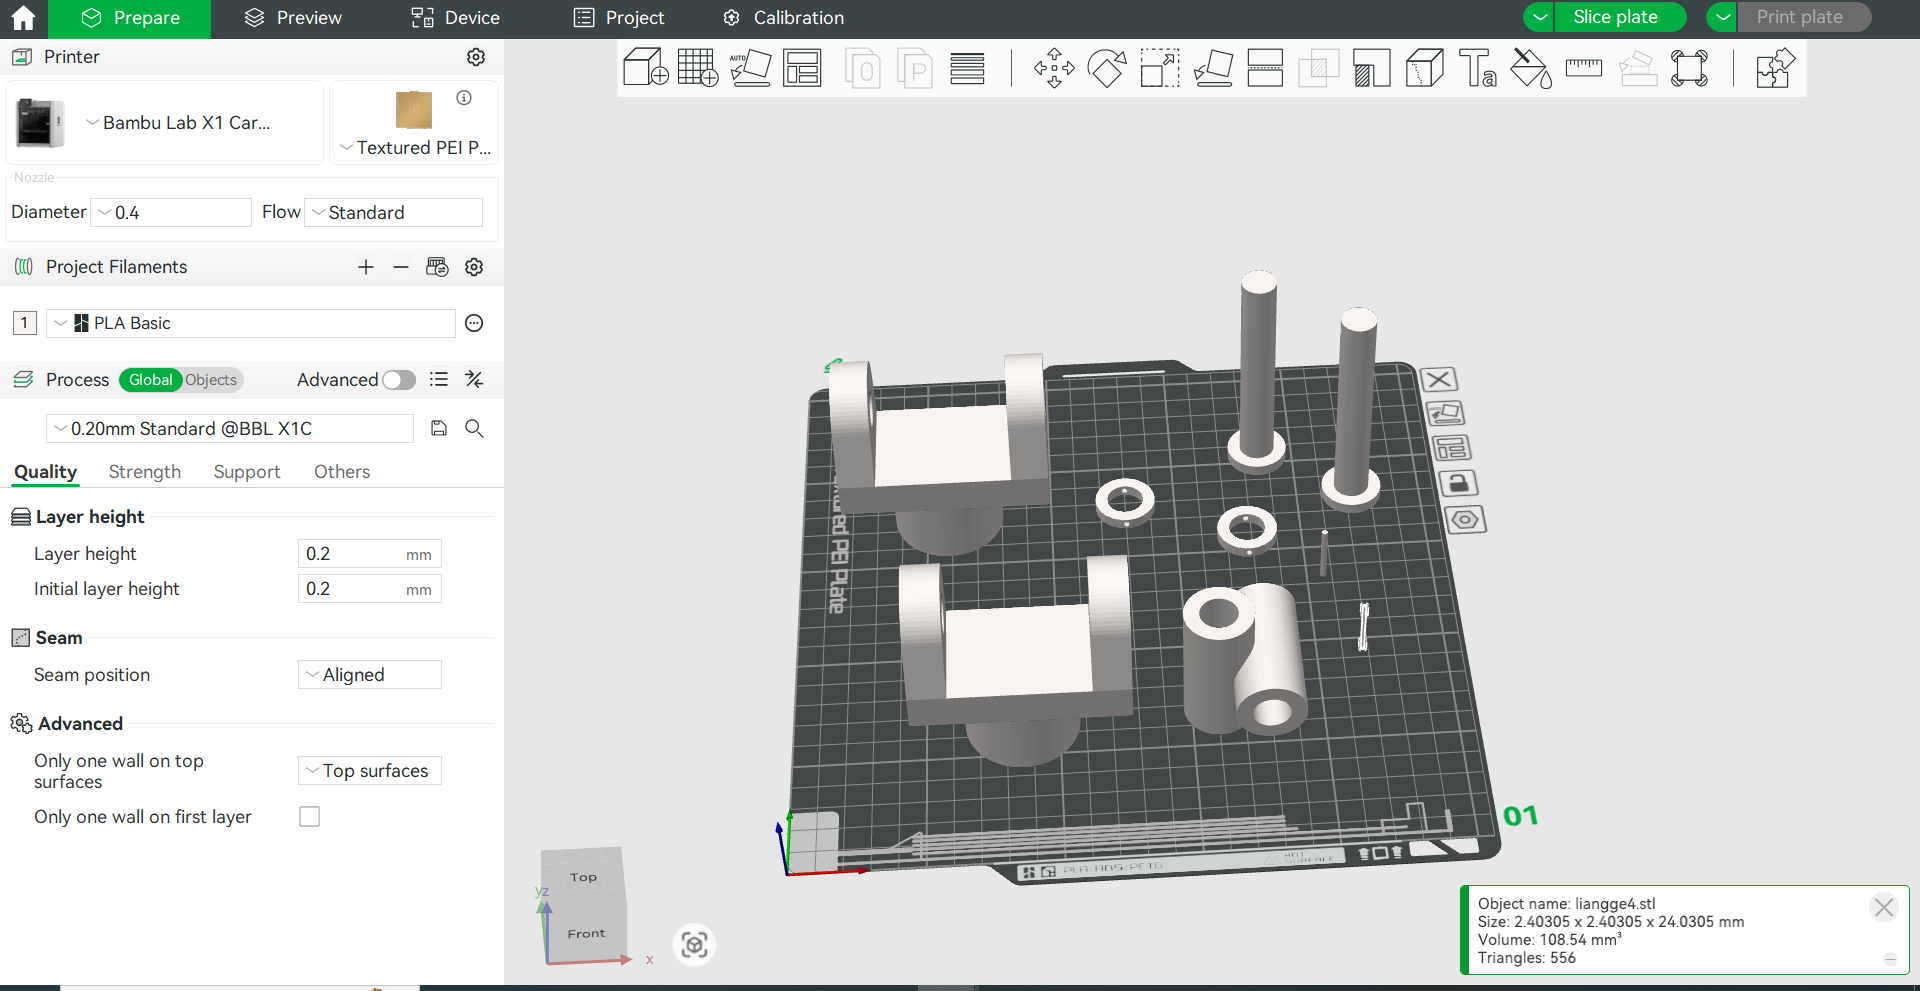
InstallUsing Bambu Lab's officially recommended slicer software Bambu Studio, it has hundreds of slicing parameters, mainly divided into three categories: printer, filament, and process.
- Parameter Settings
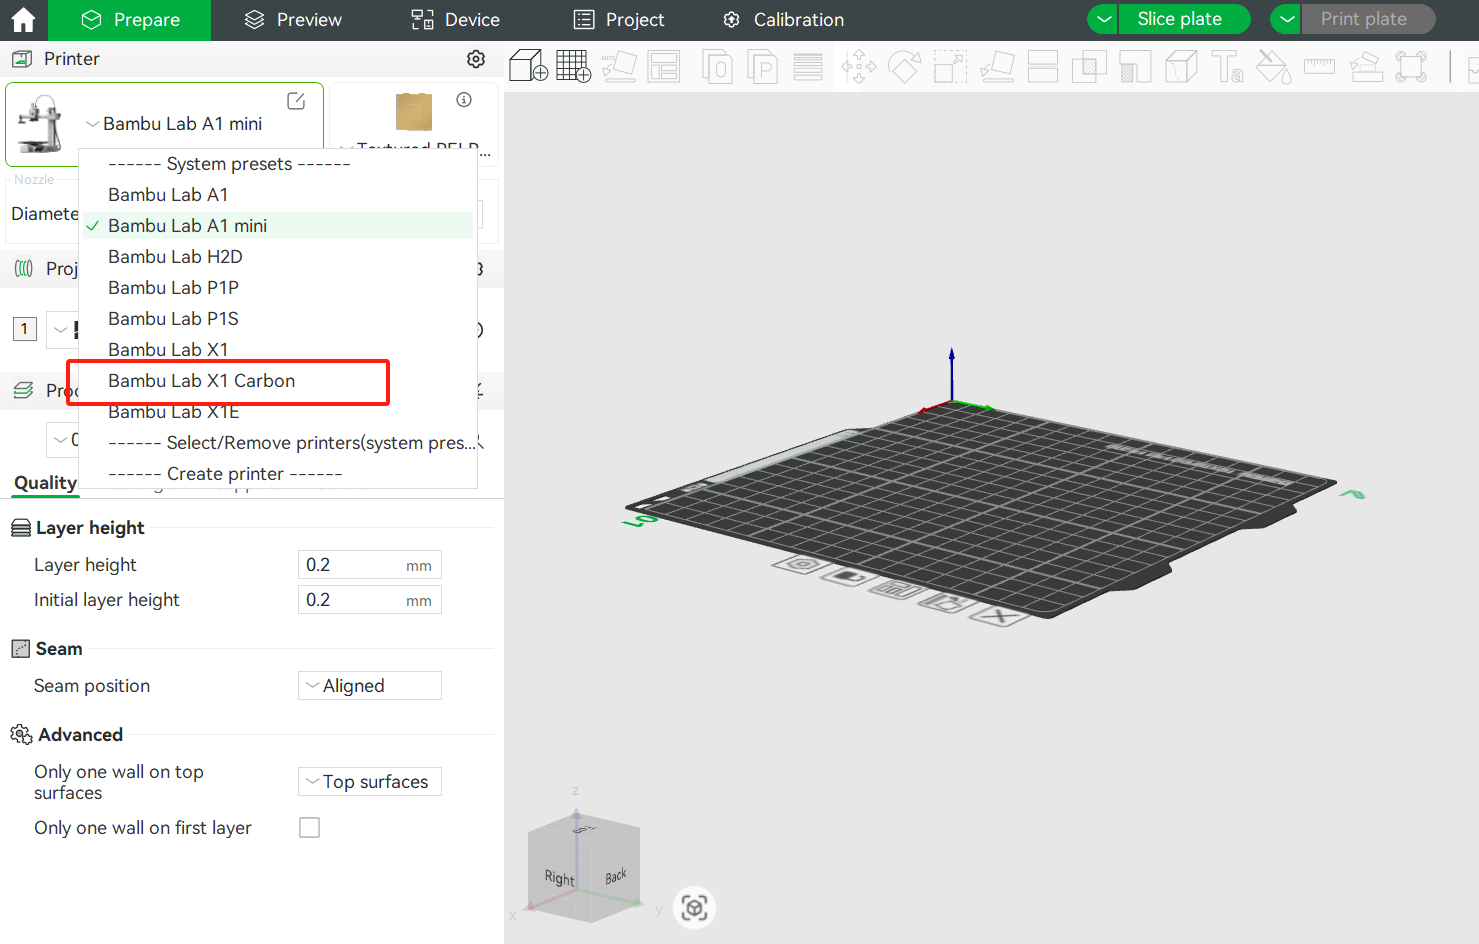
- Printer Parameters Selected printer configuration: Bambu Lab X1 Carbon equipped with a 0.4mm nozzle diameter specification. The nozzle diameter is crucial as it determines print resolution - while reduced diameters enable more detailed prints, they typically extend the overall production duration.
 Print Platform: The build surface features a textured PEI sheet, engineered to impart distinctive surface patterns onto the initial layer of printed objects.
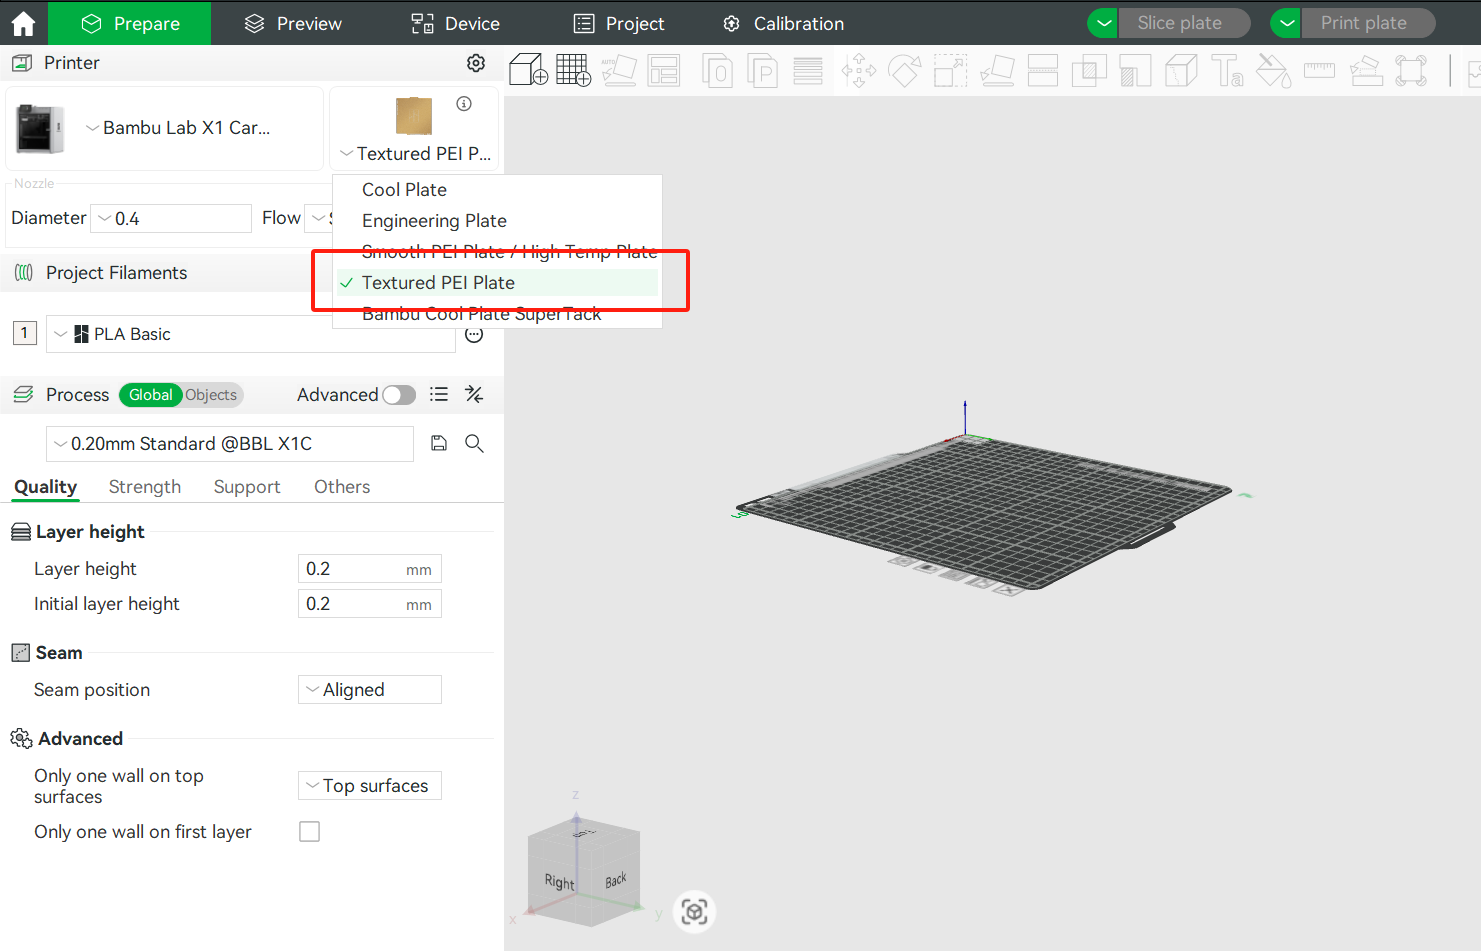
- Filament Parameters Using the "+" "-" buttons to add or remove filament.
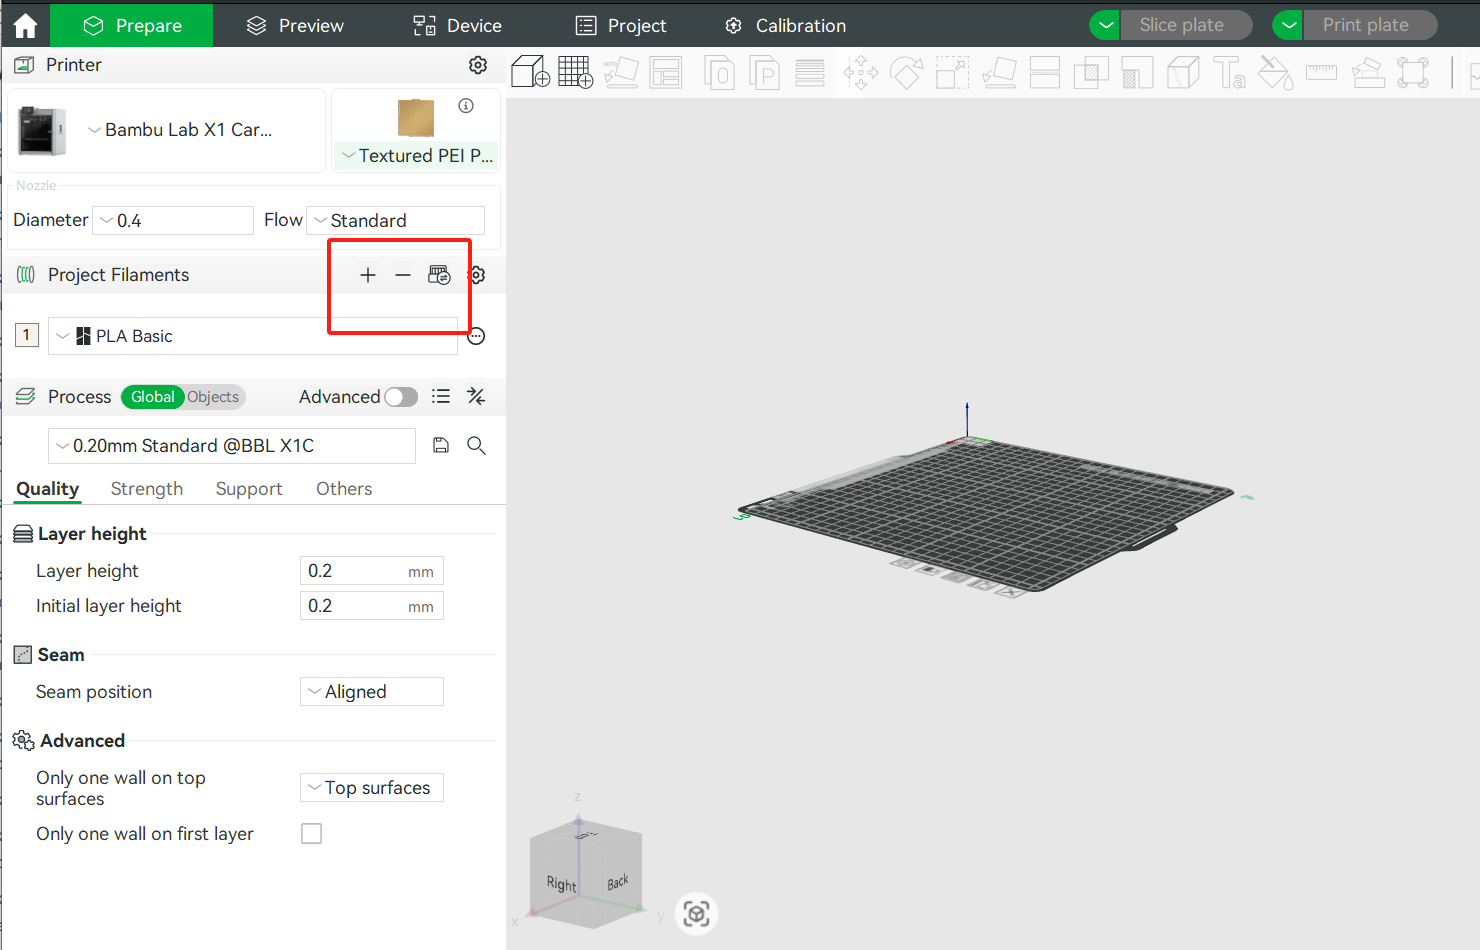 Click color blocks to modify filament color
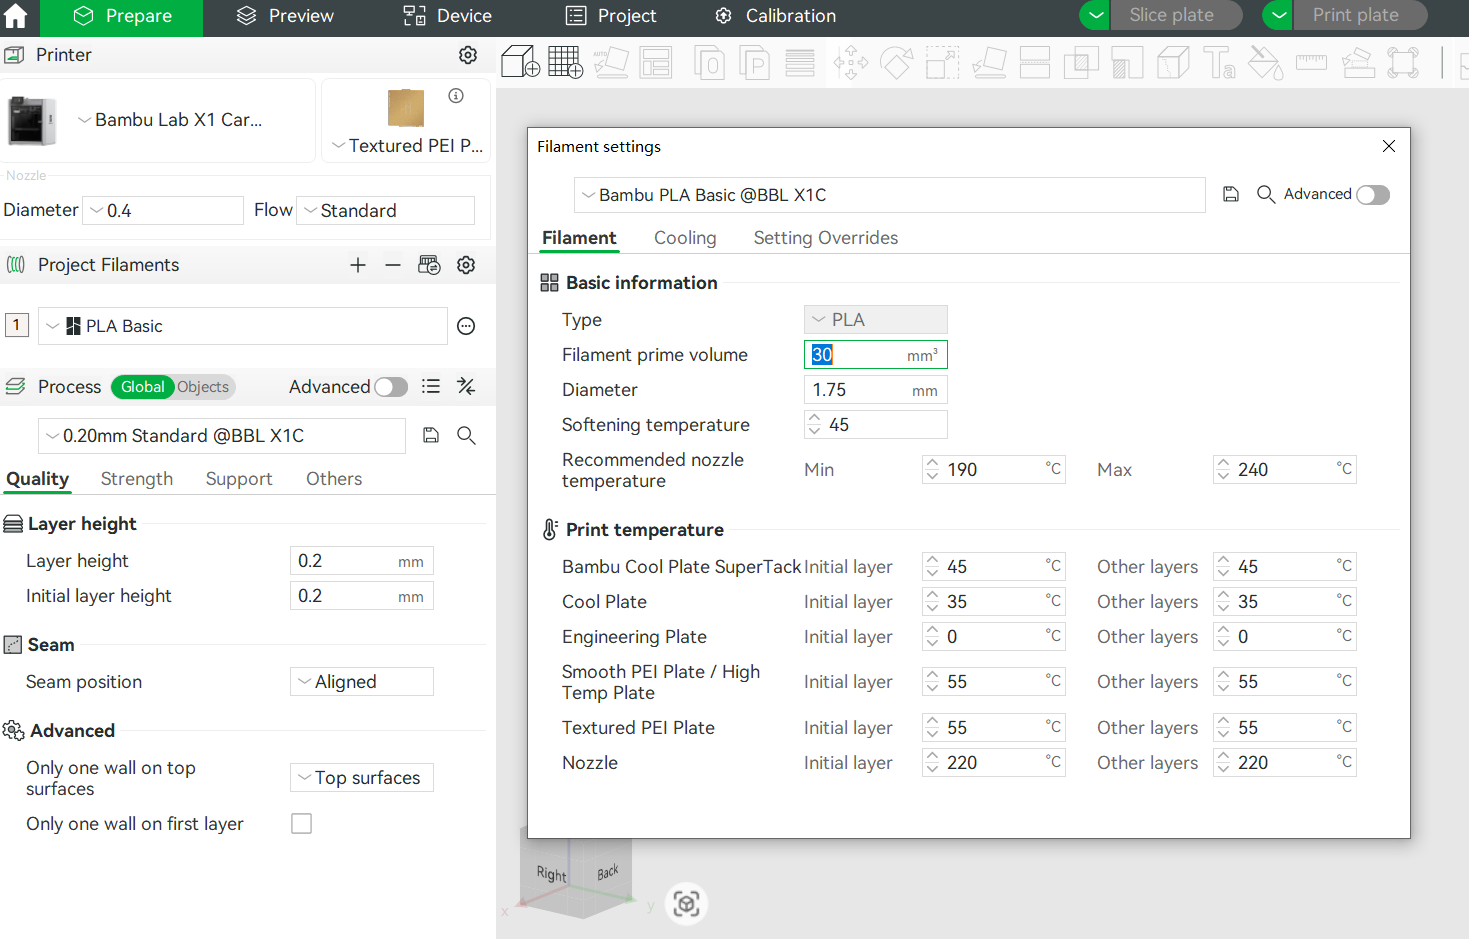
 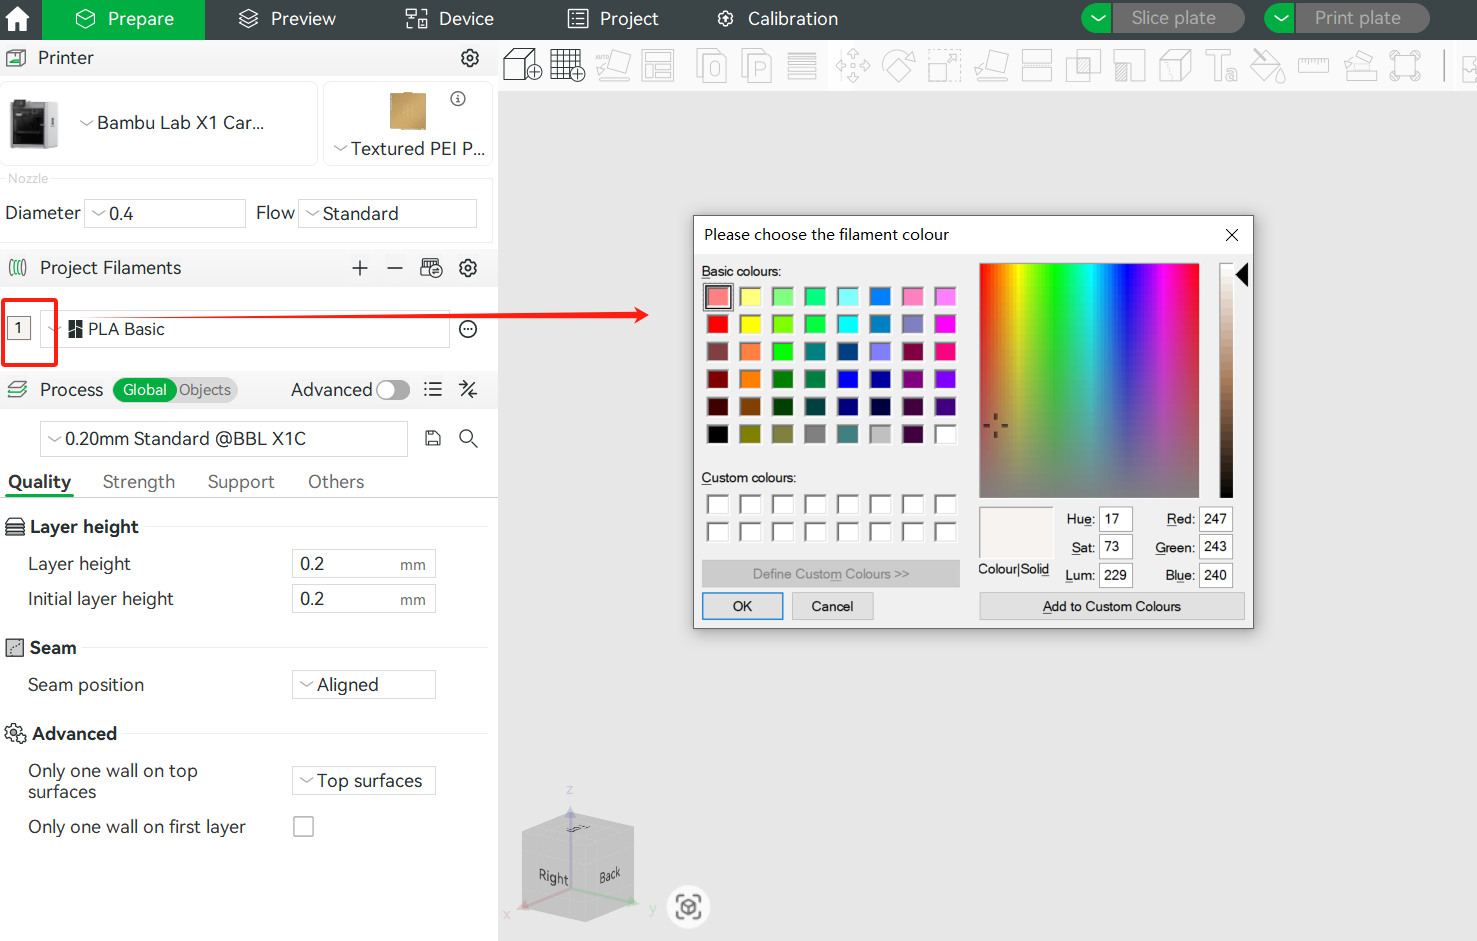 Click the edit icon to adjust filament configuration parameters.
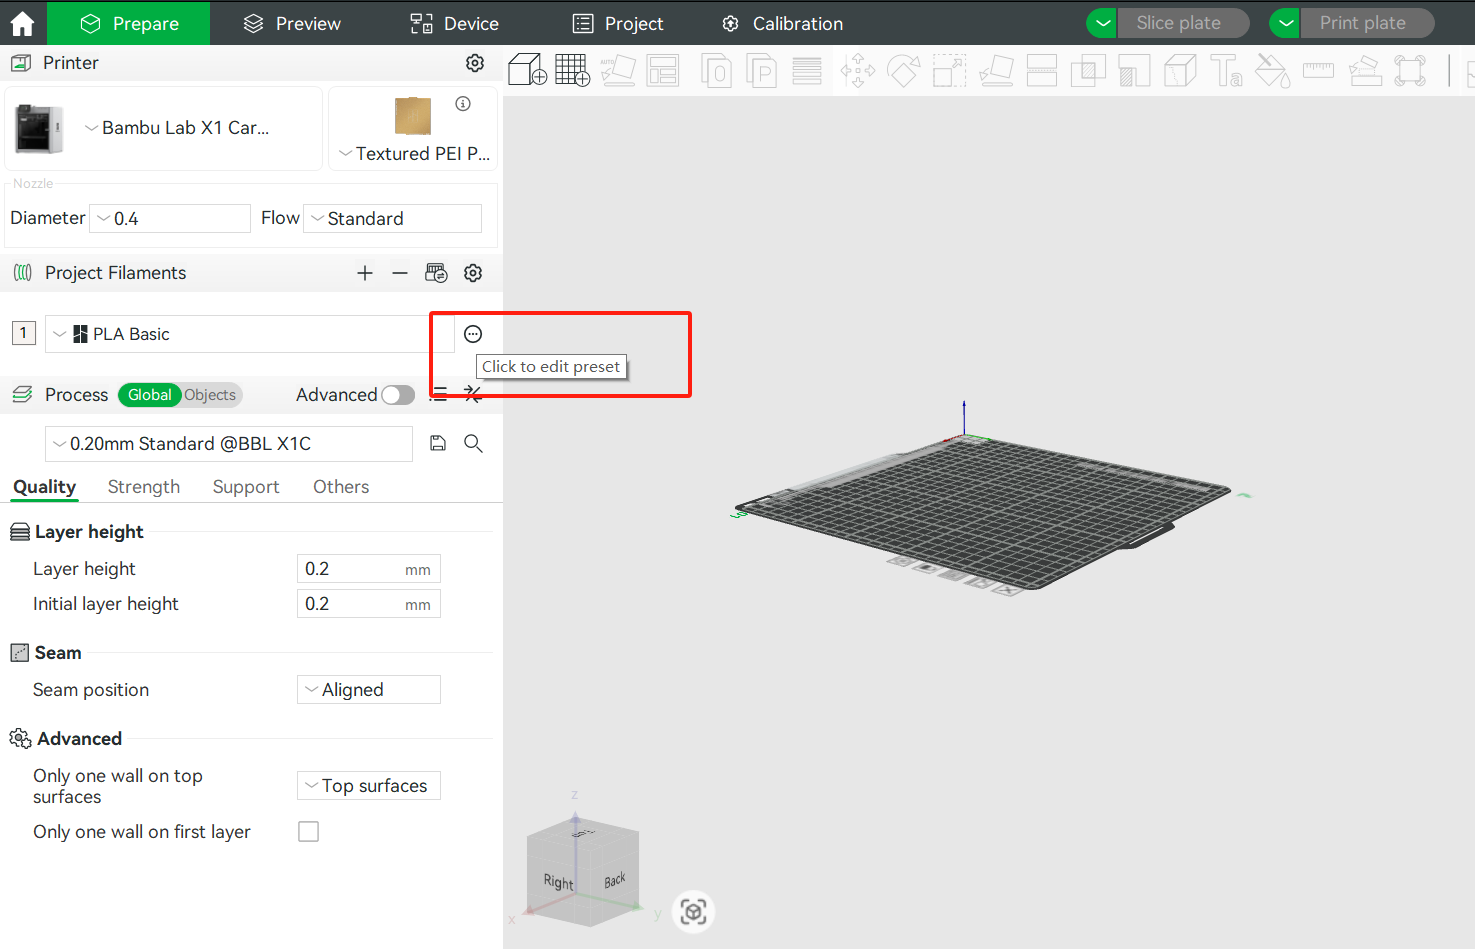
- Process Parameters
| Parameter Type | Range | Description |
|---|---|---|
| Layer Height | 0.08-0.28mm | - Small layer height (0.08-0.12mm) suitable for fine models, good surface quality - Medium layer height (0.2mm) suitable for daily printing - Large layer height (0.28mm) suitable for quick printing, sacrificing surface quality |
| Infill Density | 5-100% | - 5-15%: Decorative items, non-load bearing parts= - 20-50%: General functional parts= - 50-100%: High-strength requirements |
| Print Temperature | Material dependent | - PLA: 190-220℃ - ABS: 230-250℃ - PETG: 230-240℃ - TPU: 220-235℃ |
| Support Settings | Optional | - Support needed for overhang angles >60° - Support density typically set to 15-30% - Tree or normal support options available |
| Speed Control | 20-150mm/s | - Outer walls: 20-40mm/s - Inner walls: 40-60mm/s - Infill: 60-150mm/s - Supports: 60-120mm/s |
| Cooling Parameter | 0-100% | - PLA: 100% fan - ABS: 0-30% fan - PETG: 50-70% fan - TPU: 30-50% fan |
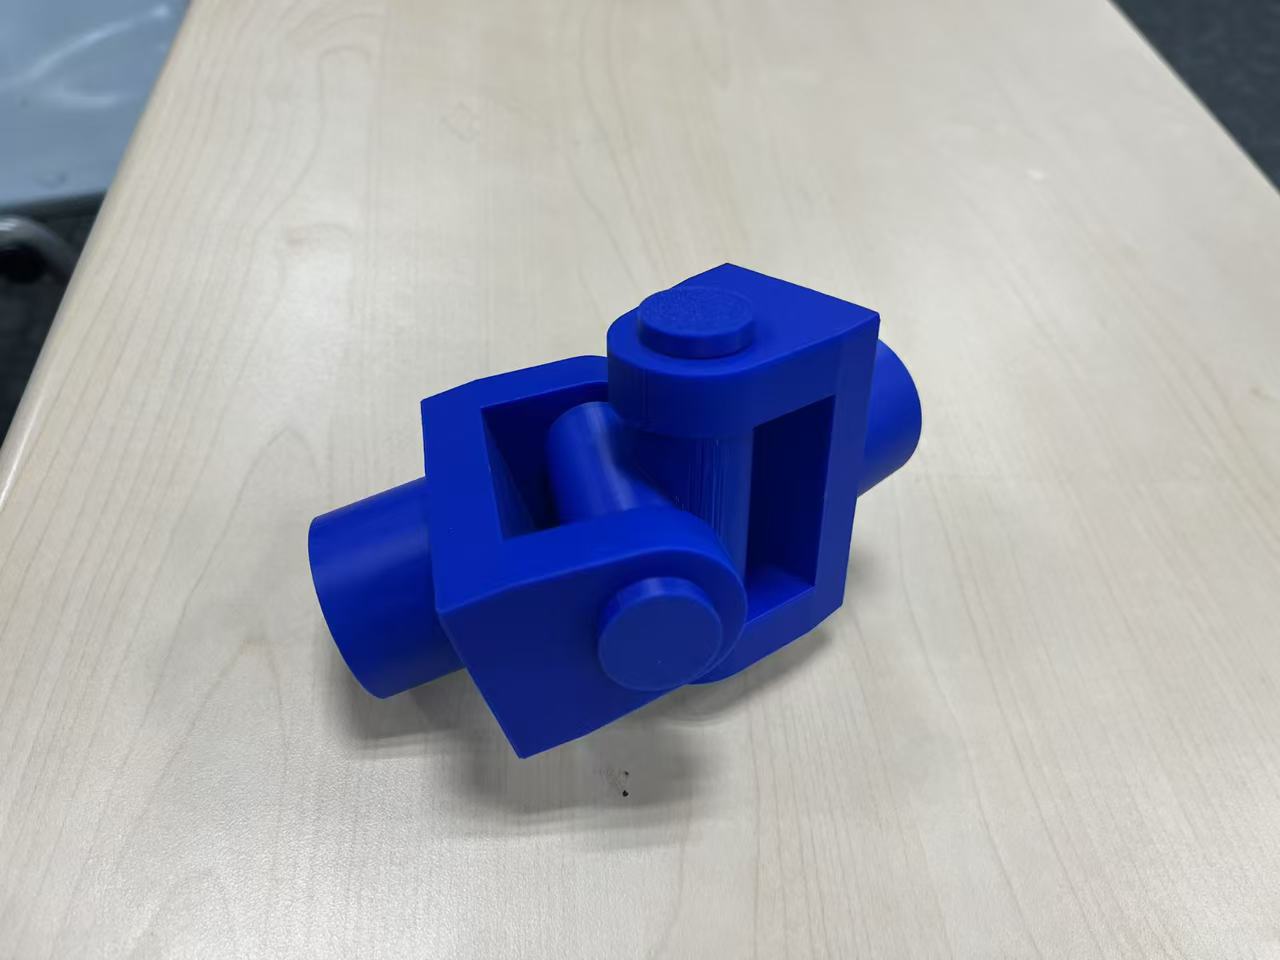
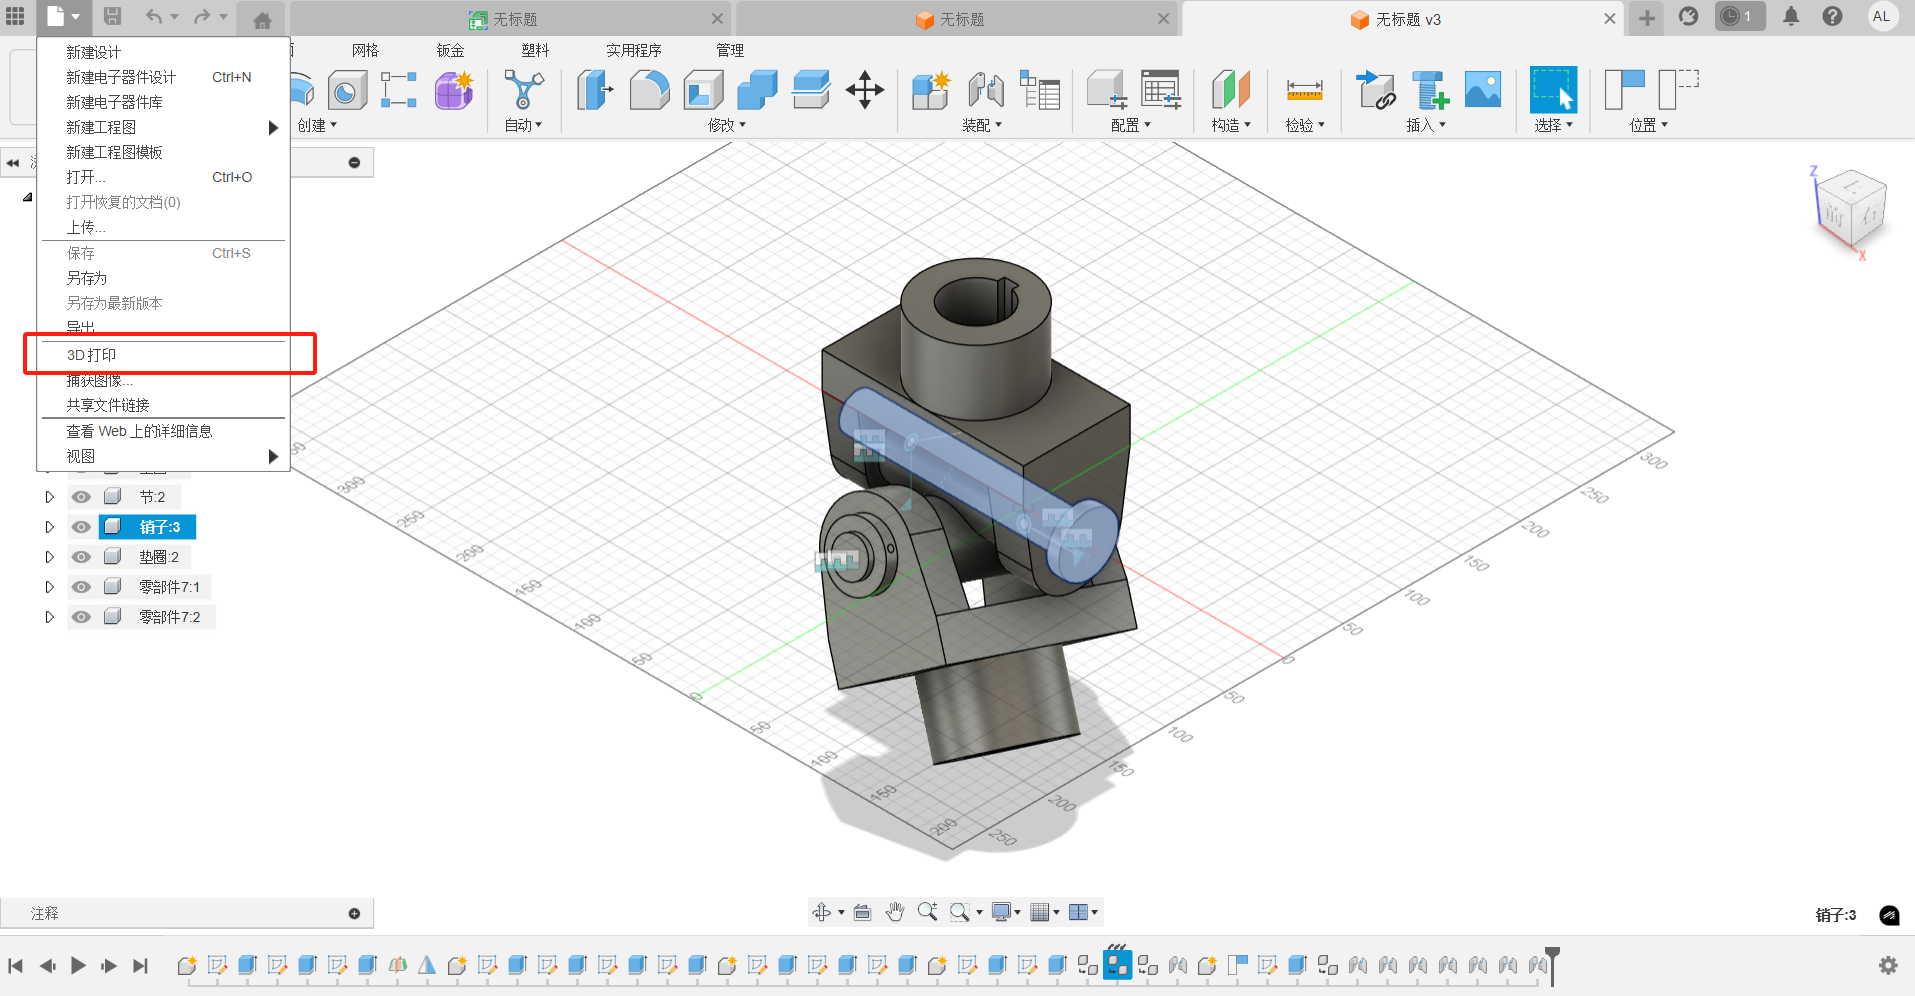
Week 4 Design Implementation
- Model Import Export stl files of all components from Fushion360.
- Model Slice Preview
- Support Removal
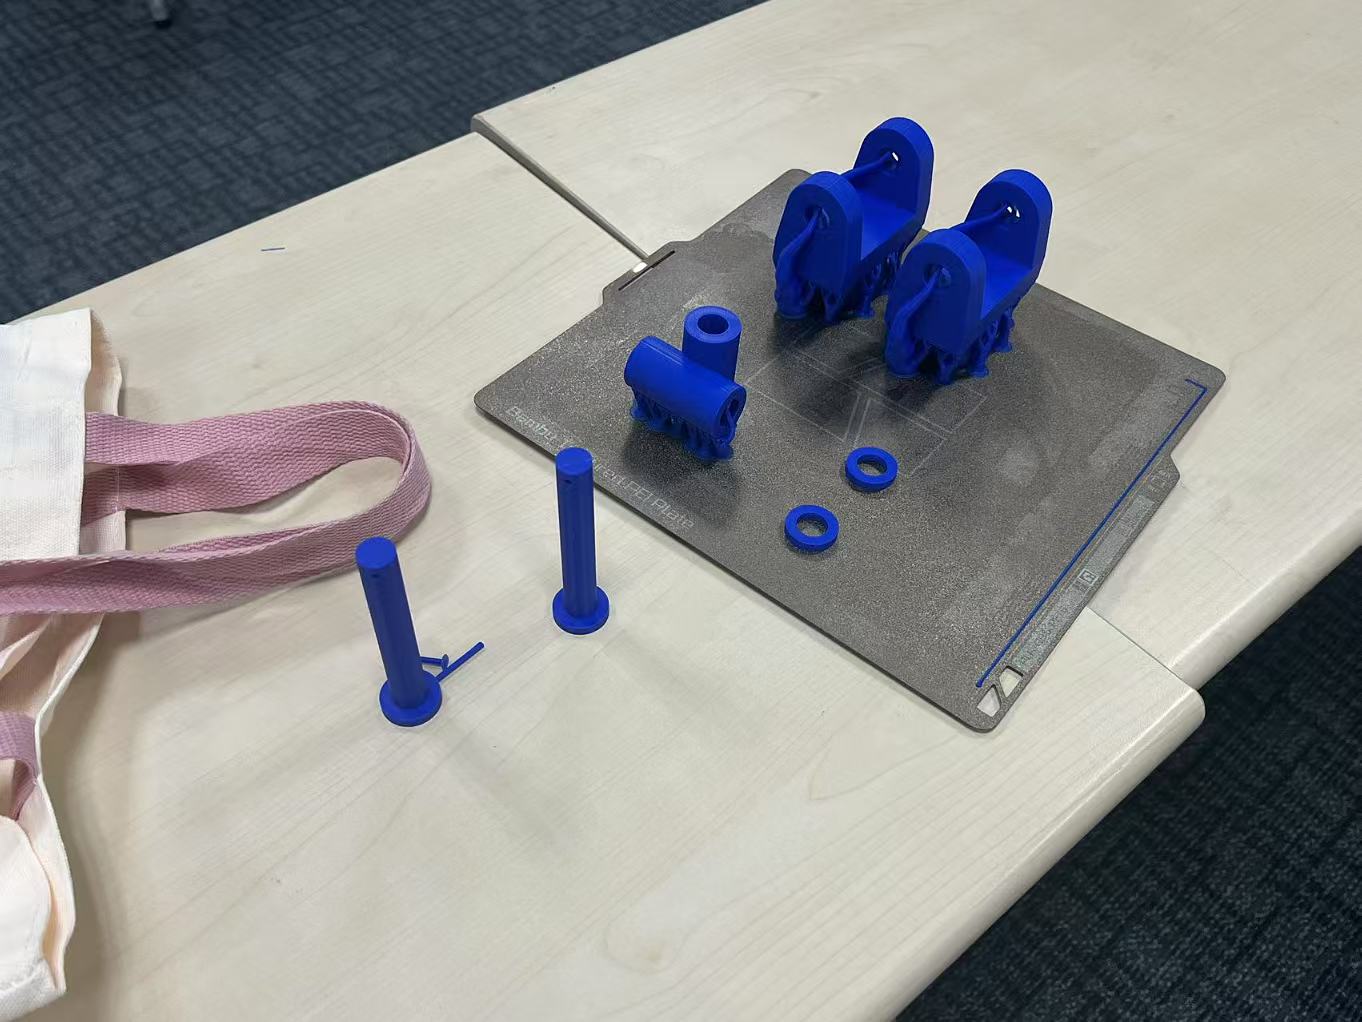
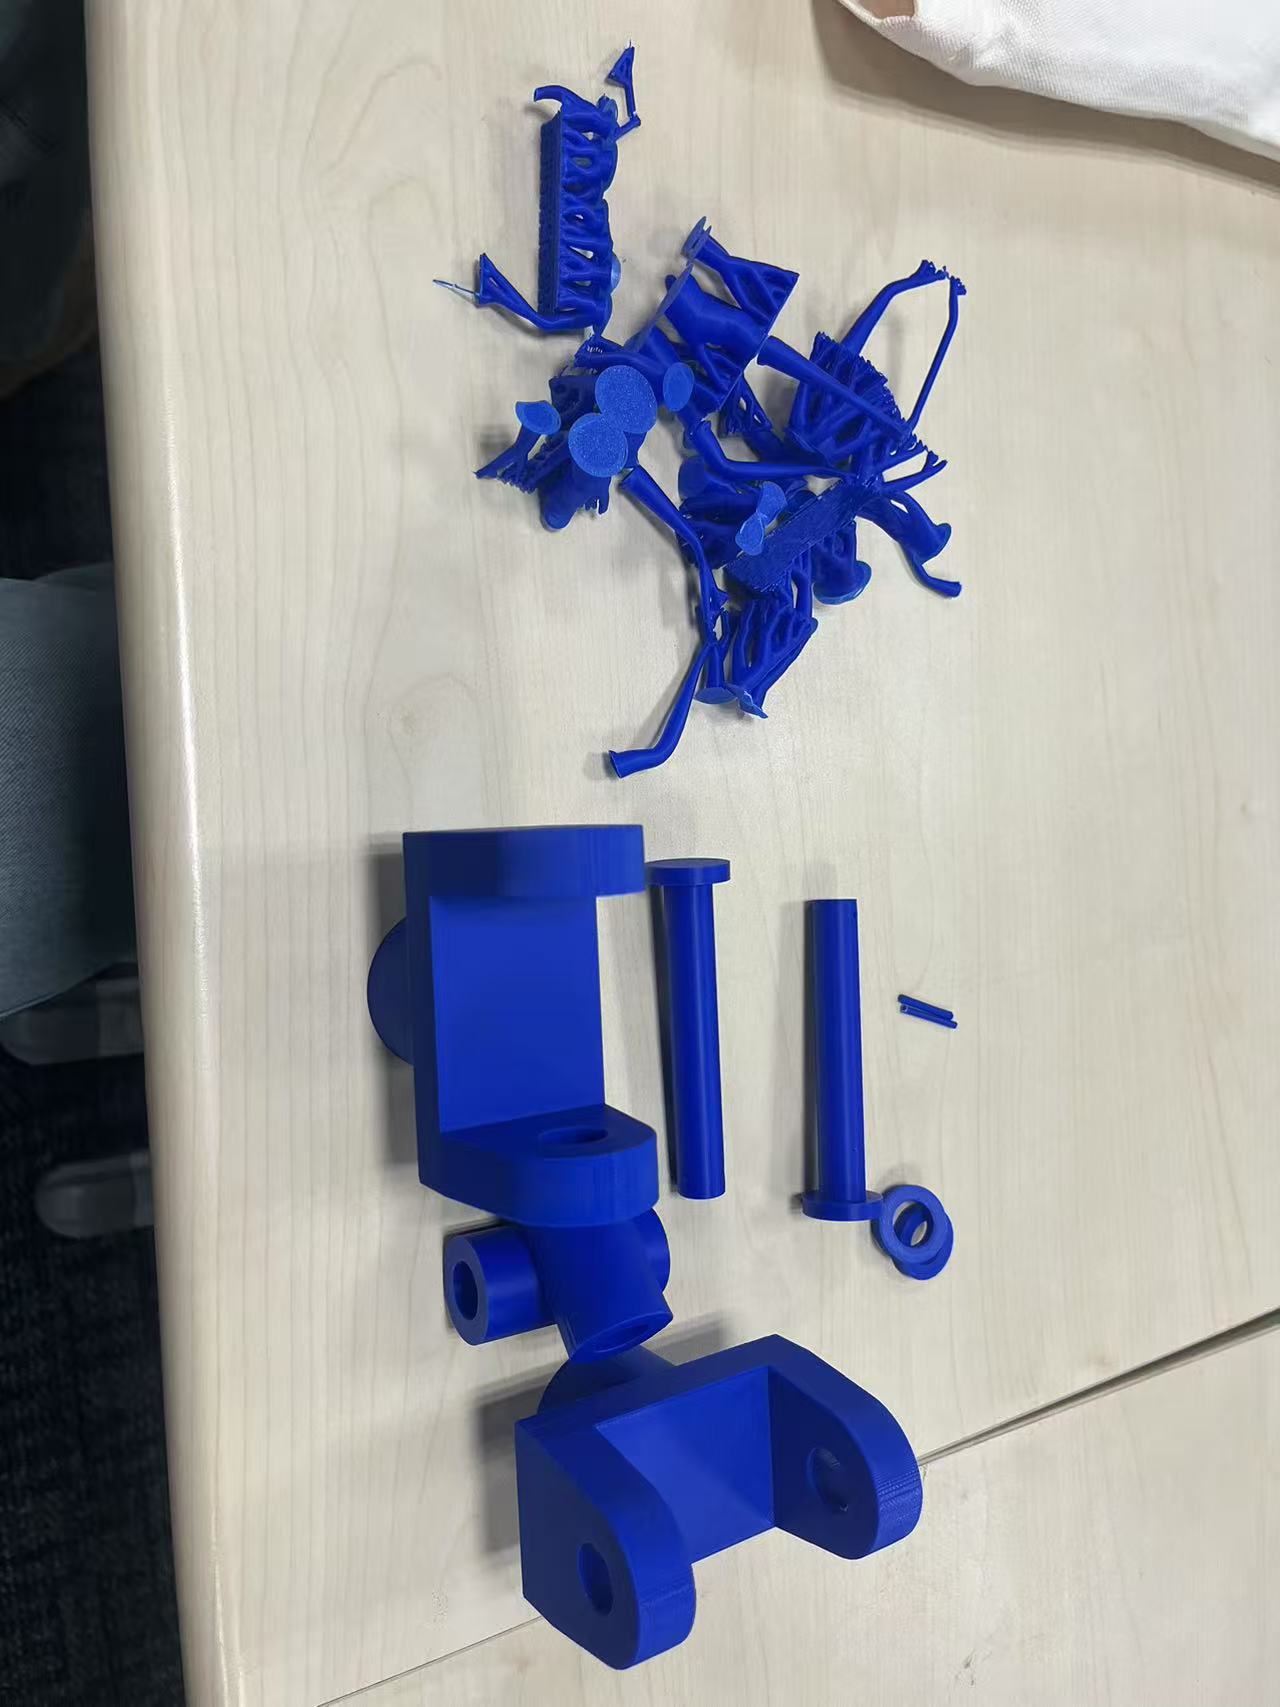
- Final Product Display