IOT and Interaction
During this week, I focused on studying Internet of Things (IoT) technologies, with a primary emphasis on integrating Arduino-based hardware with mobile devices. The objective was to explore how physical sensors and actuators can be controlled and monitored through smartphone interfaces, enabling real-time interaction and data exchange.
1. Define
The IoT brings together all kinds of connected devices into a global network of distributed intelligence that opens up a new world of innovation and creativity. Many organizations are already reaping significant benefits by harnessing the data created by large-scale IoT deployments to pursue new opportunities and improve operations.Learn more about IoT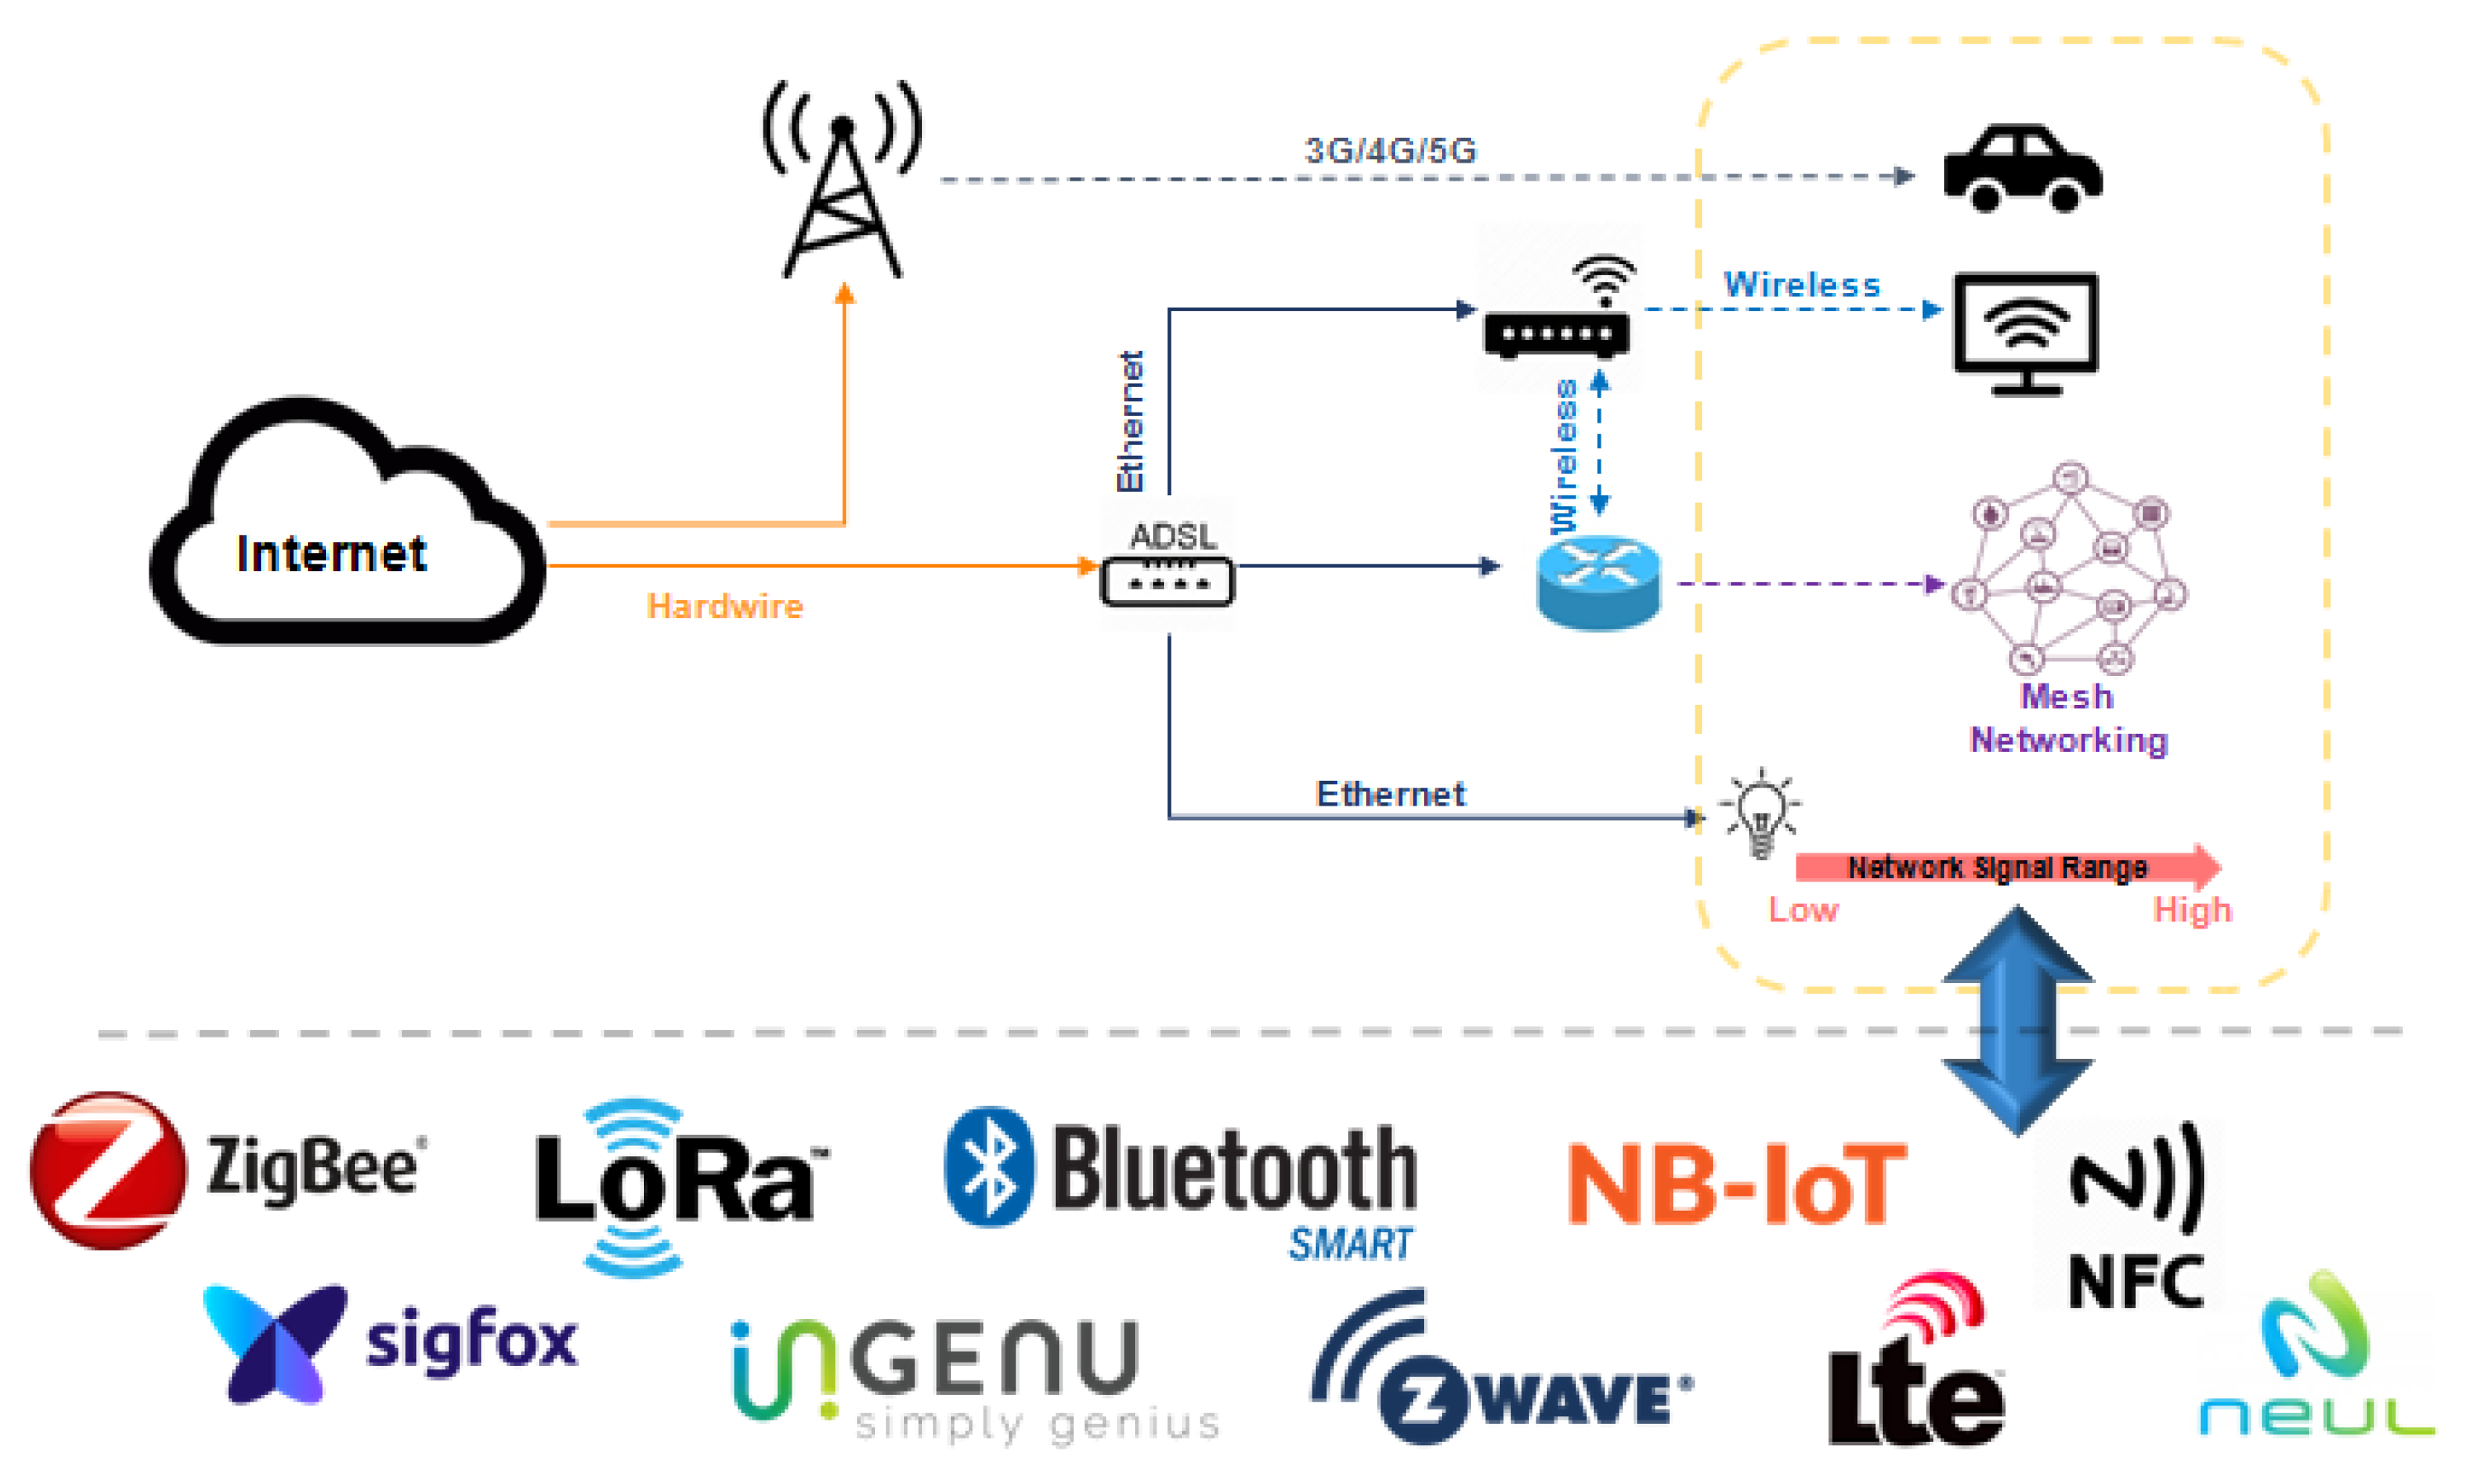
2. Arduino Cloud
Arduino Cloud is an online platform developed by Arduino that enables users to build, deploy, and manage IoT applications with ease. It allows seamless connection between Arduino-compatible devices and the internet, enabling real-time data monitoring, remote control, and cloud-based automation. Users can create dashboards to visualize sensor data, configure devices over-the-air, and integrate with services like Amazon Alexa, Google Assistant, or IFTTT for smart home or industrial applications. It supports both no-code workflows and more advanced programming for flexible project development.
2.1 IOT Project
This project collects temperature, humidity, and distance data using an Arduino-compatible board (e.g. xiao esp32c3), and uploads it to Arduino Cloud for real-time display on a mobile dashboard.
Step 1: Set Up Arduino Cloud Project
· Go to https://cloud.arduino.cc and sign in. 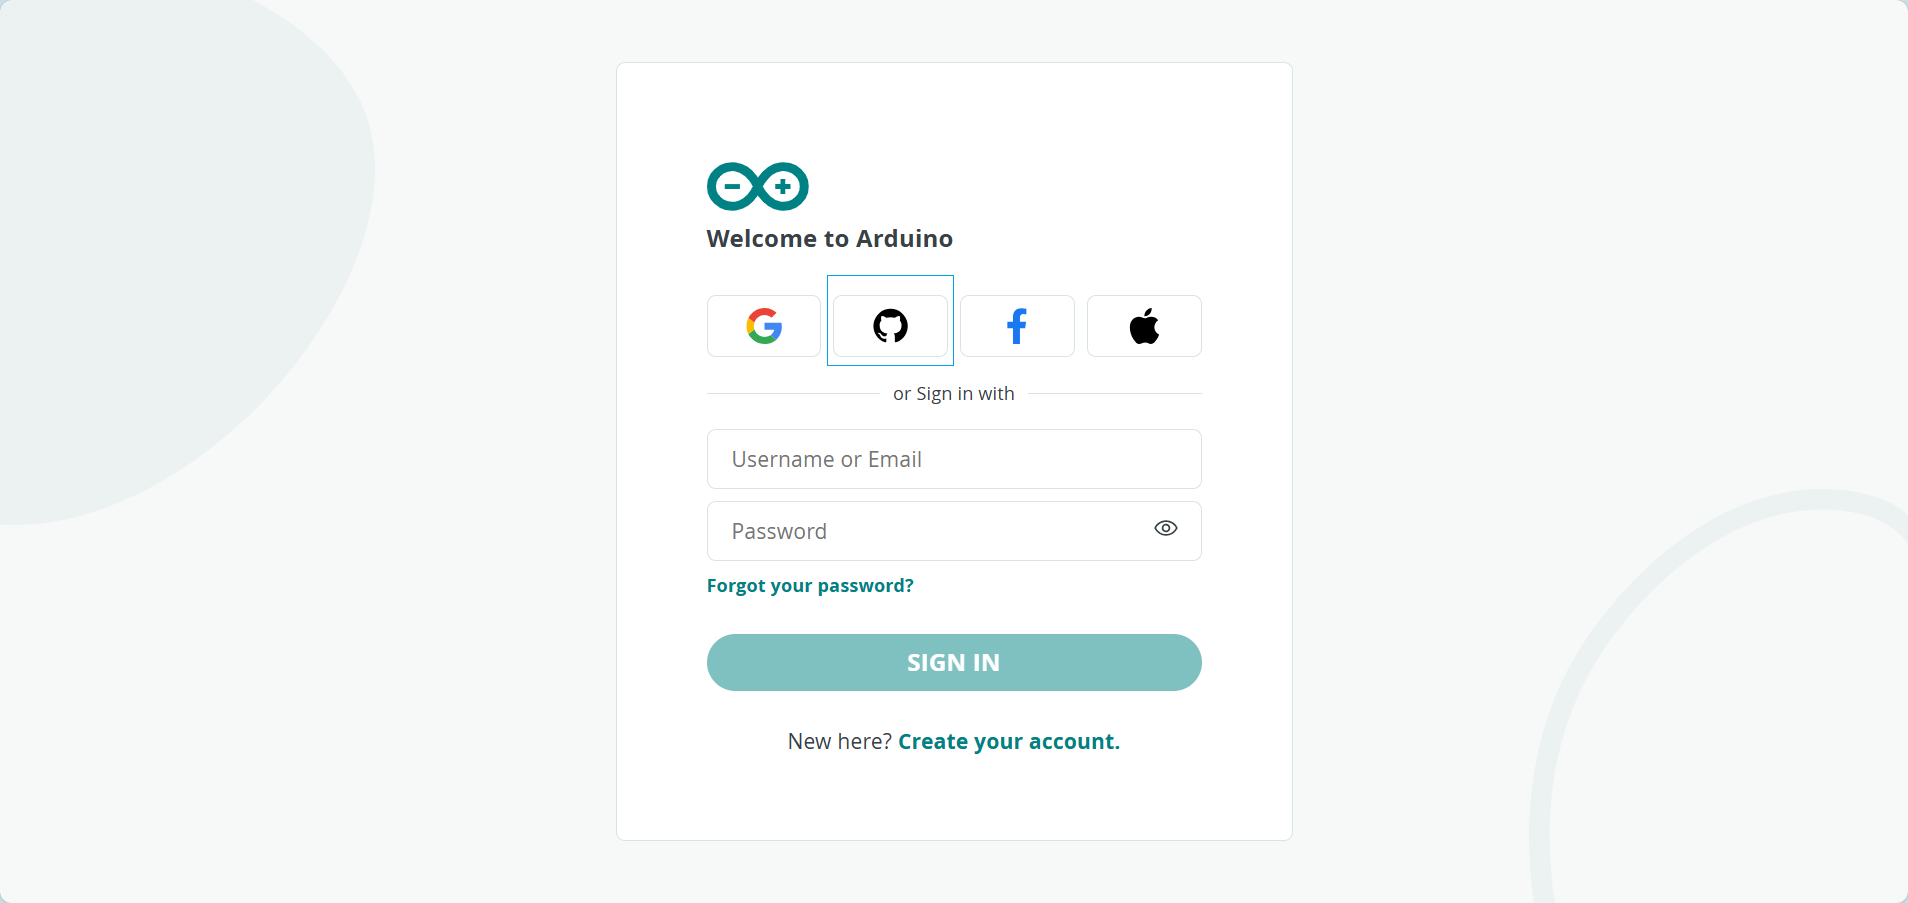
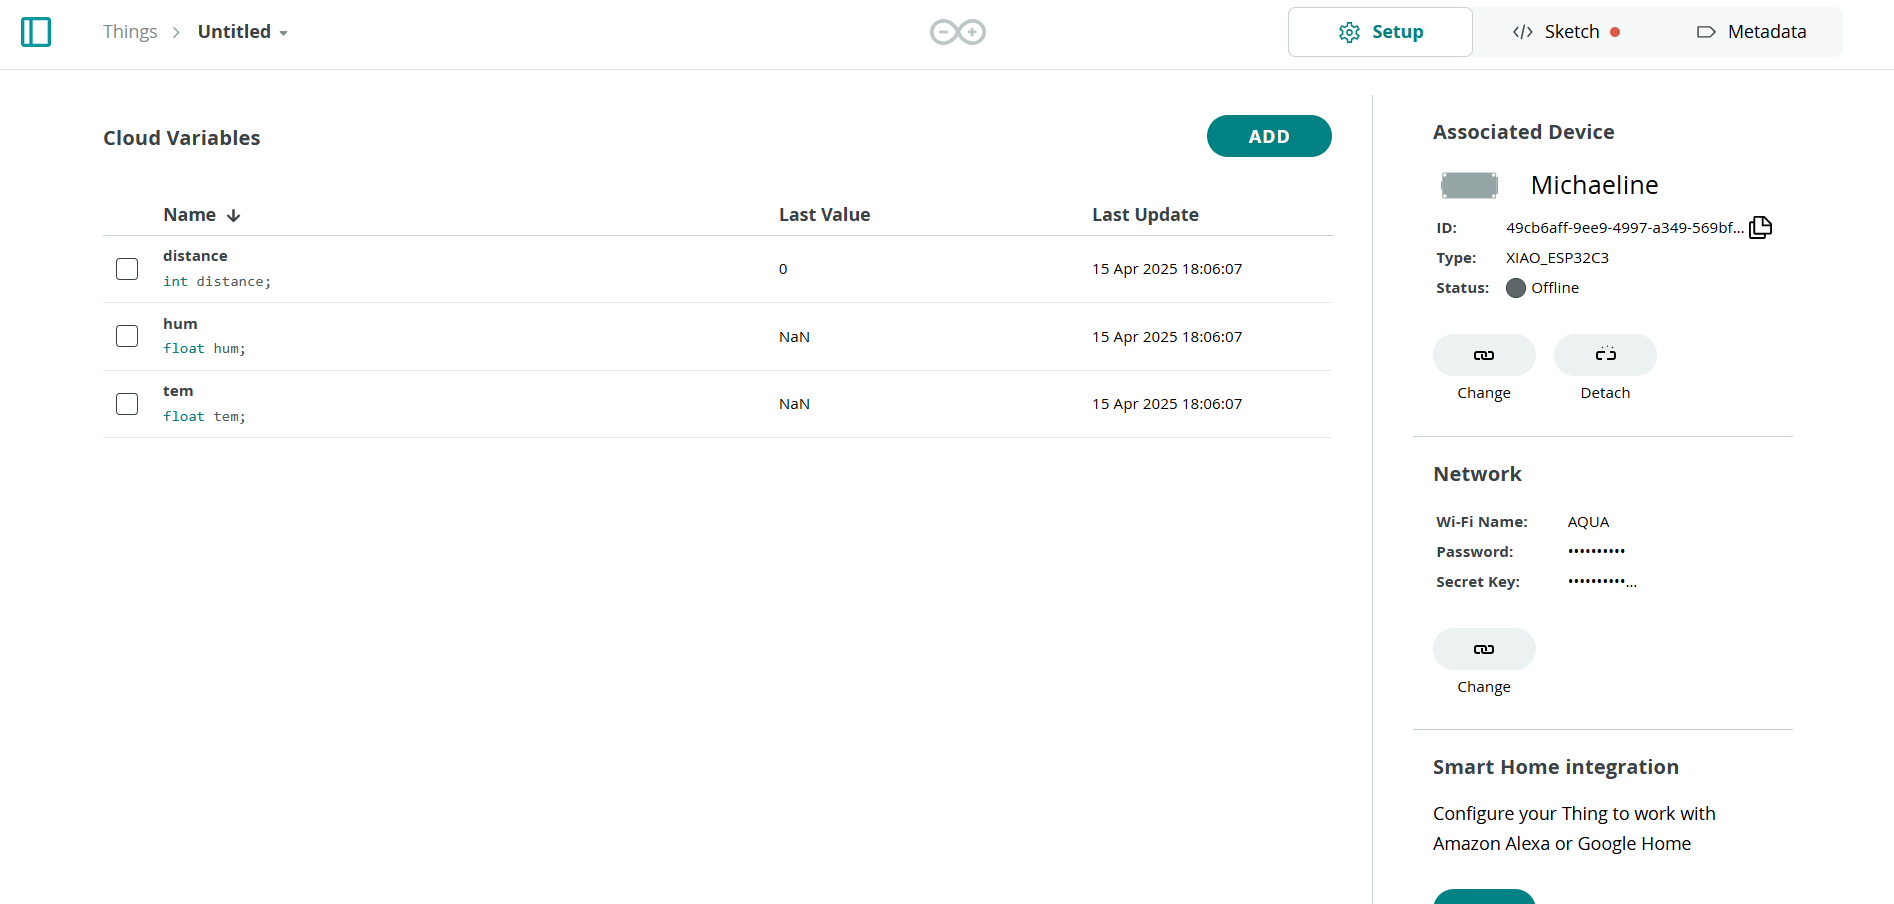
· Create a new "Thing" in Arduino Cloud. 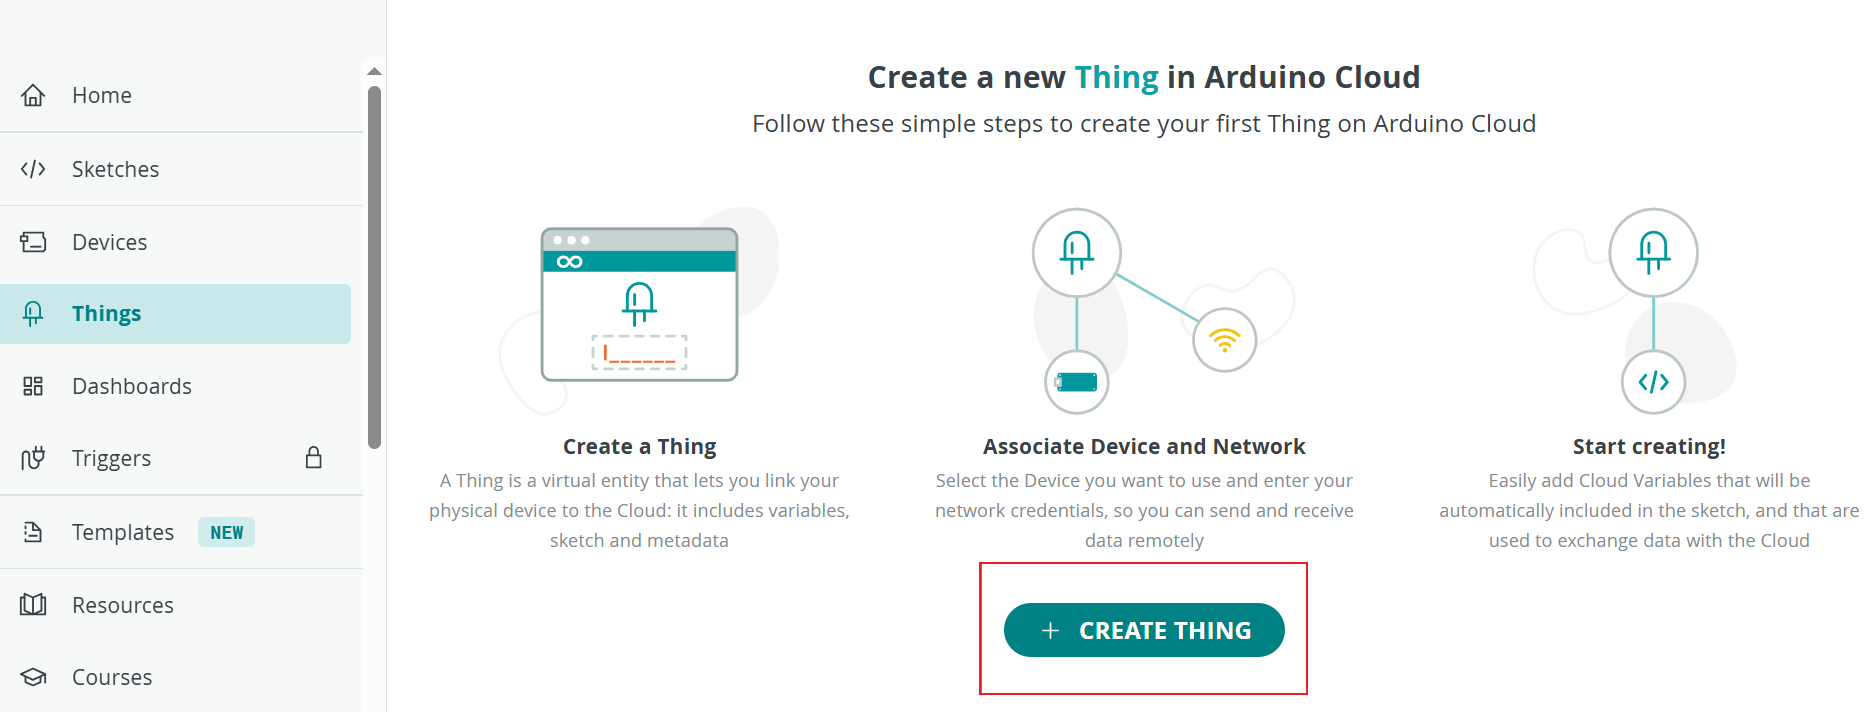 · Add three variables:
○ tem (Temperature, type: float, read) ○ hum (Humidity, type: float, read) ○ distance (Distance, type: int, read) 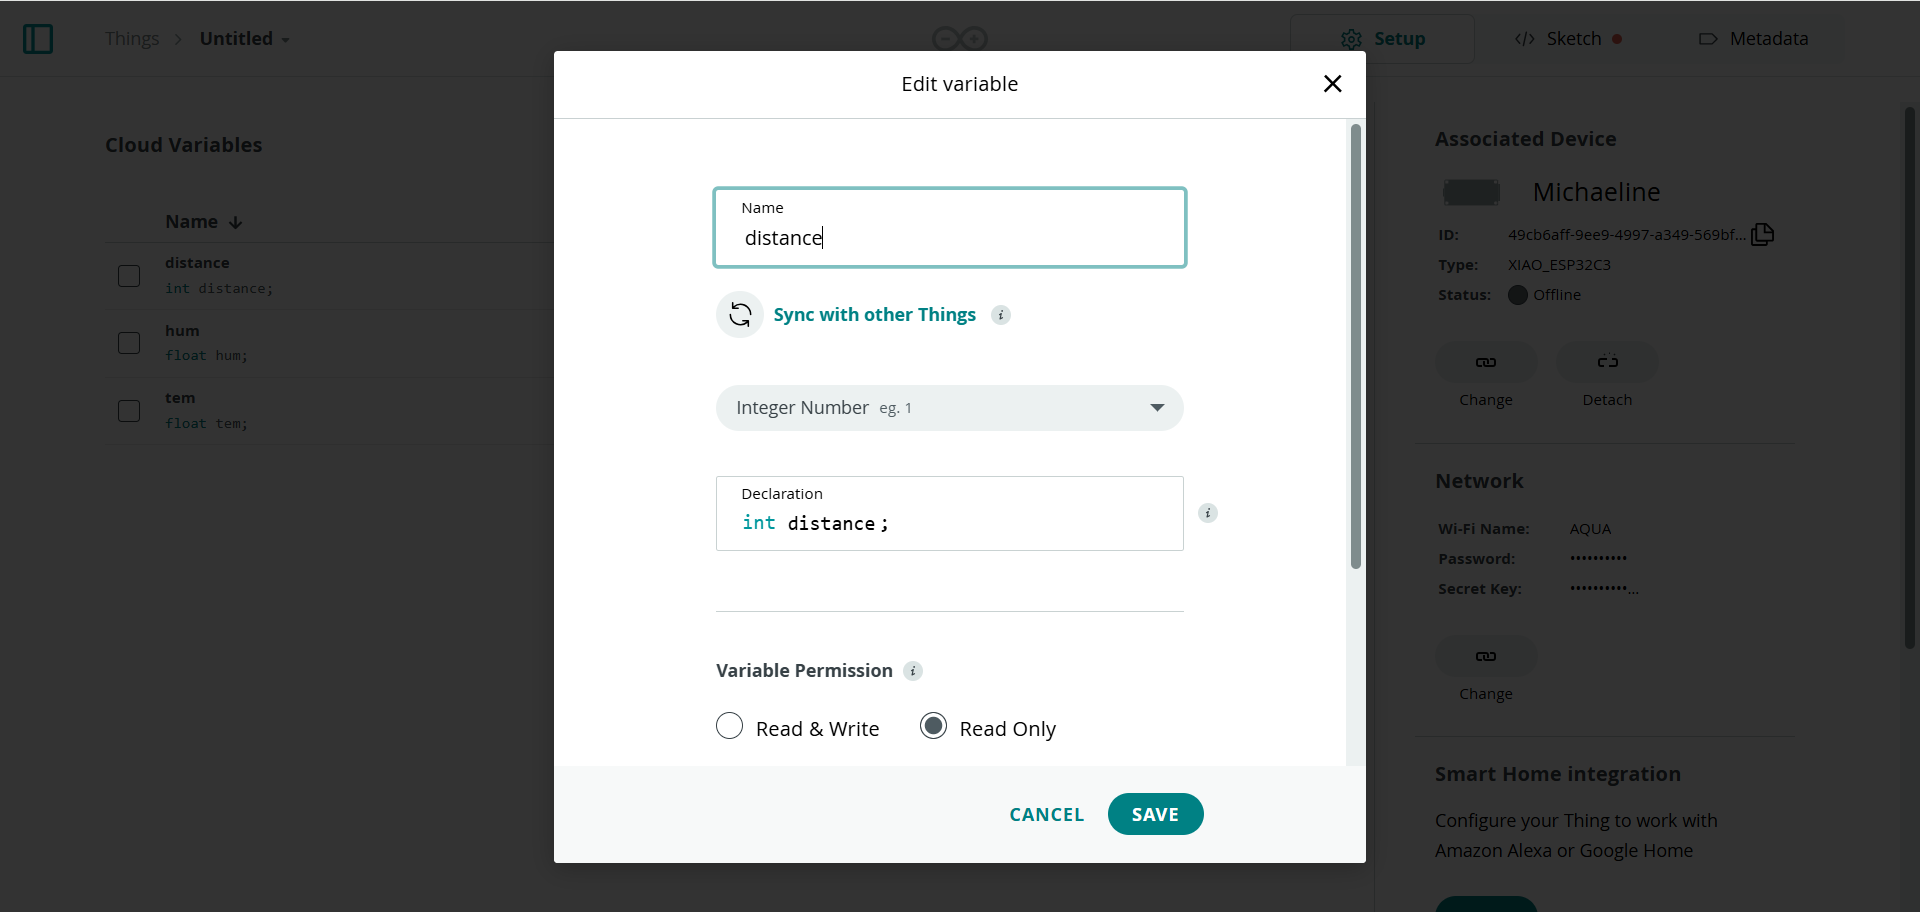
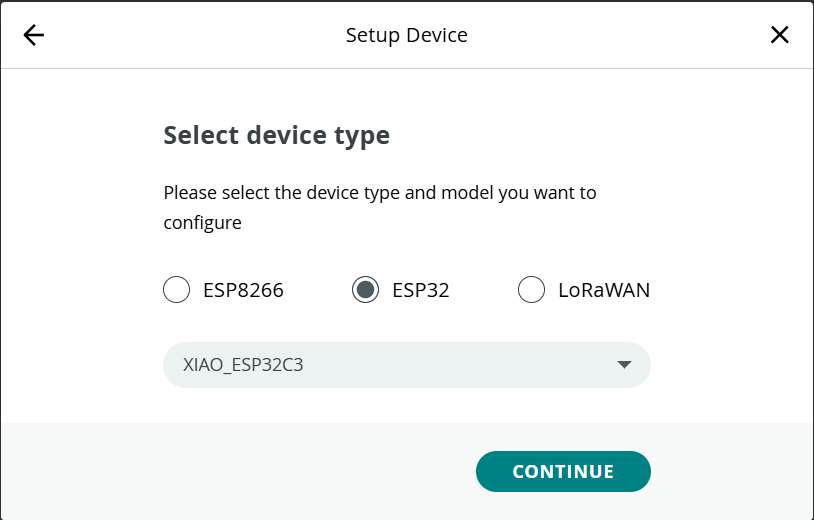
 · Choose a supported board (e.g., xiao esp32) and configure the network credentials in arduino_secrets.h.
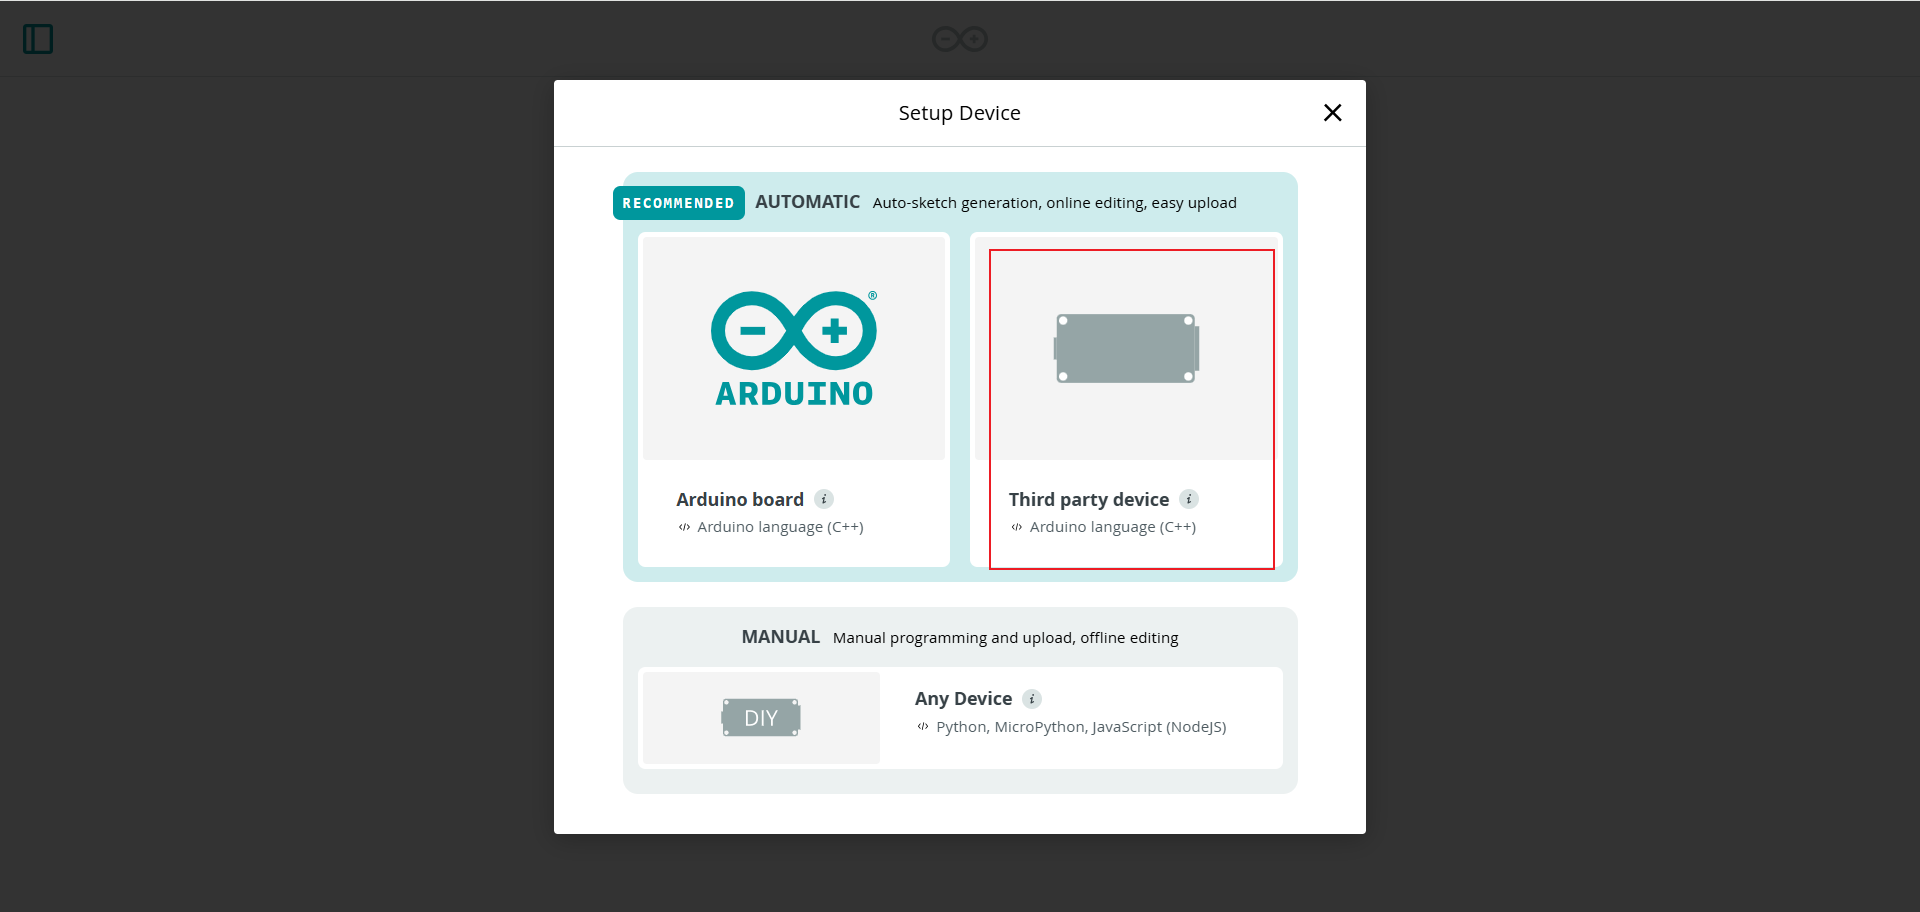
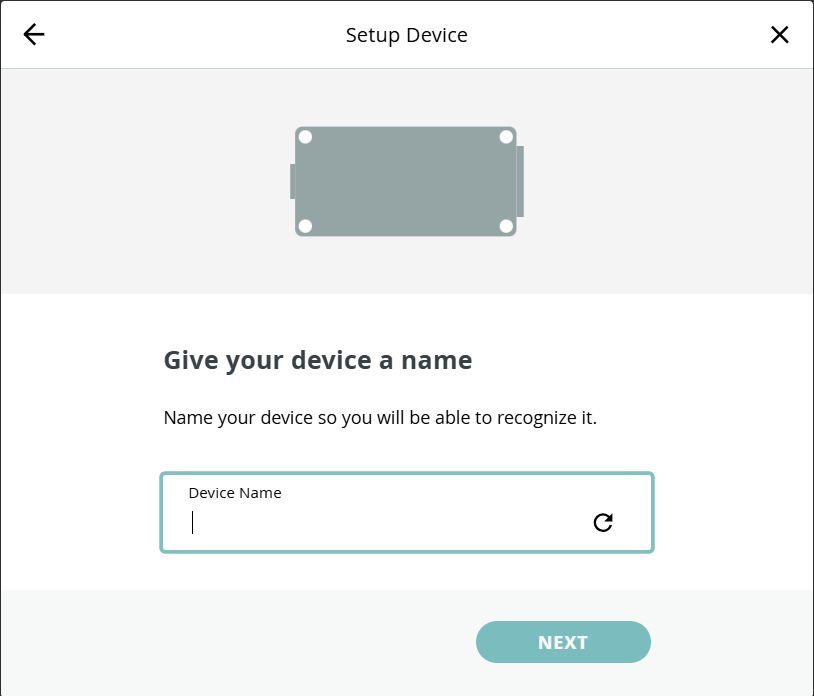 ·When you successfully set up the network, you will see the following screen.
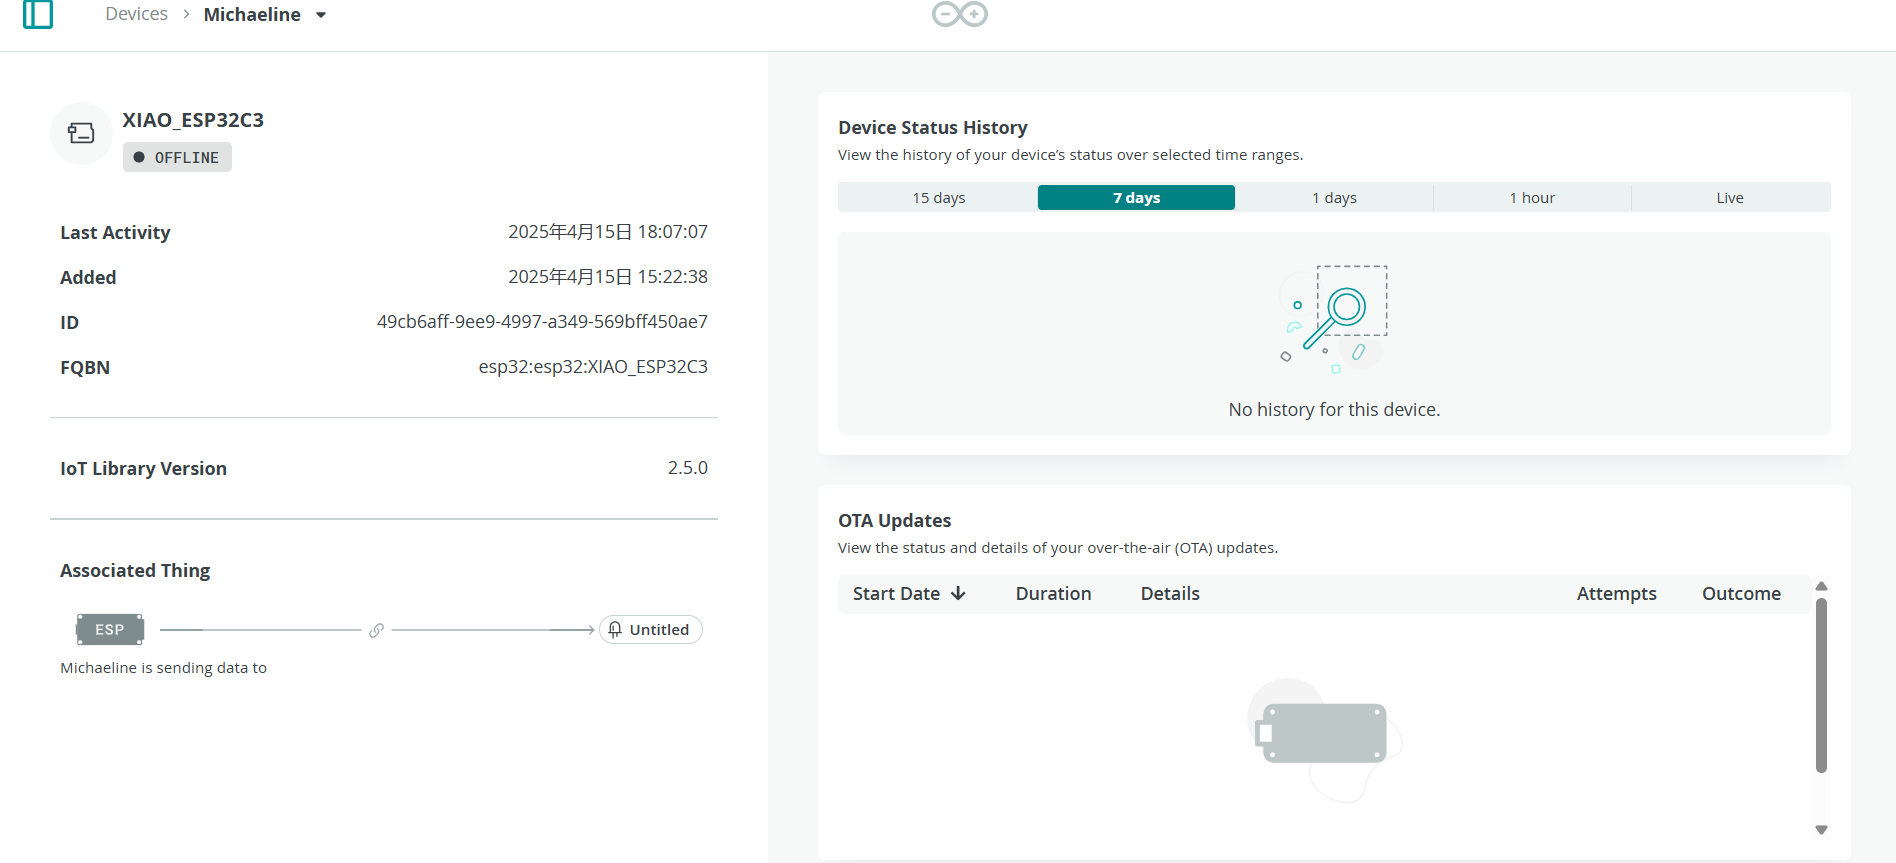
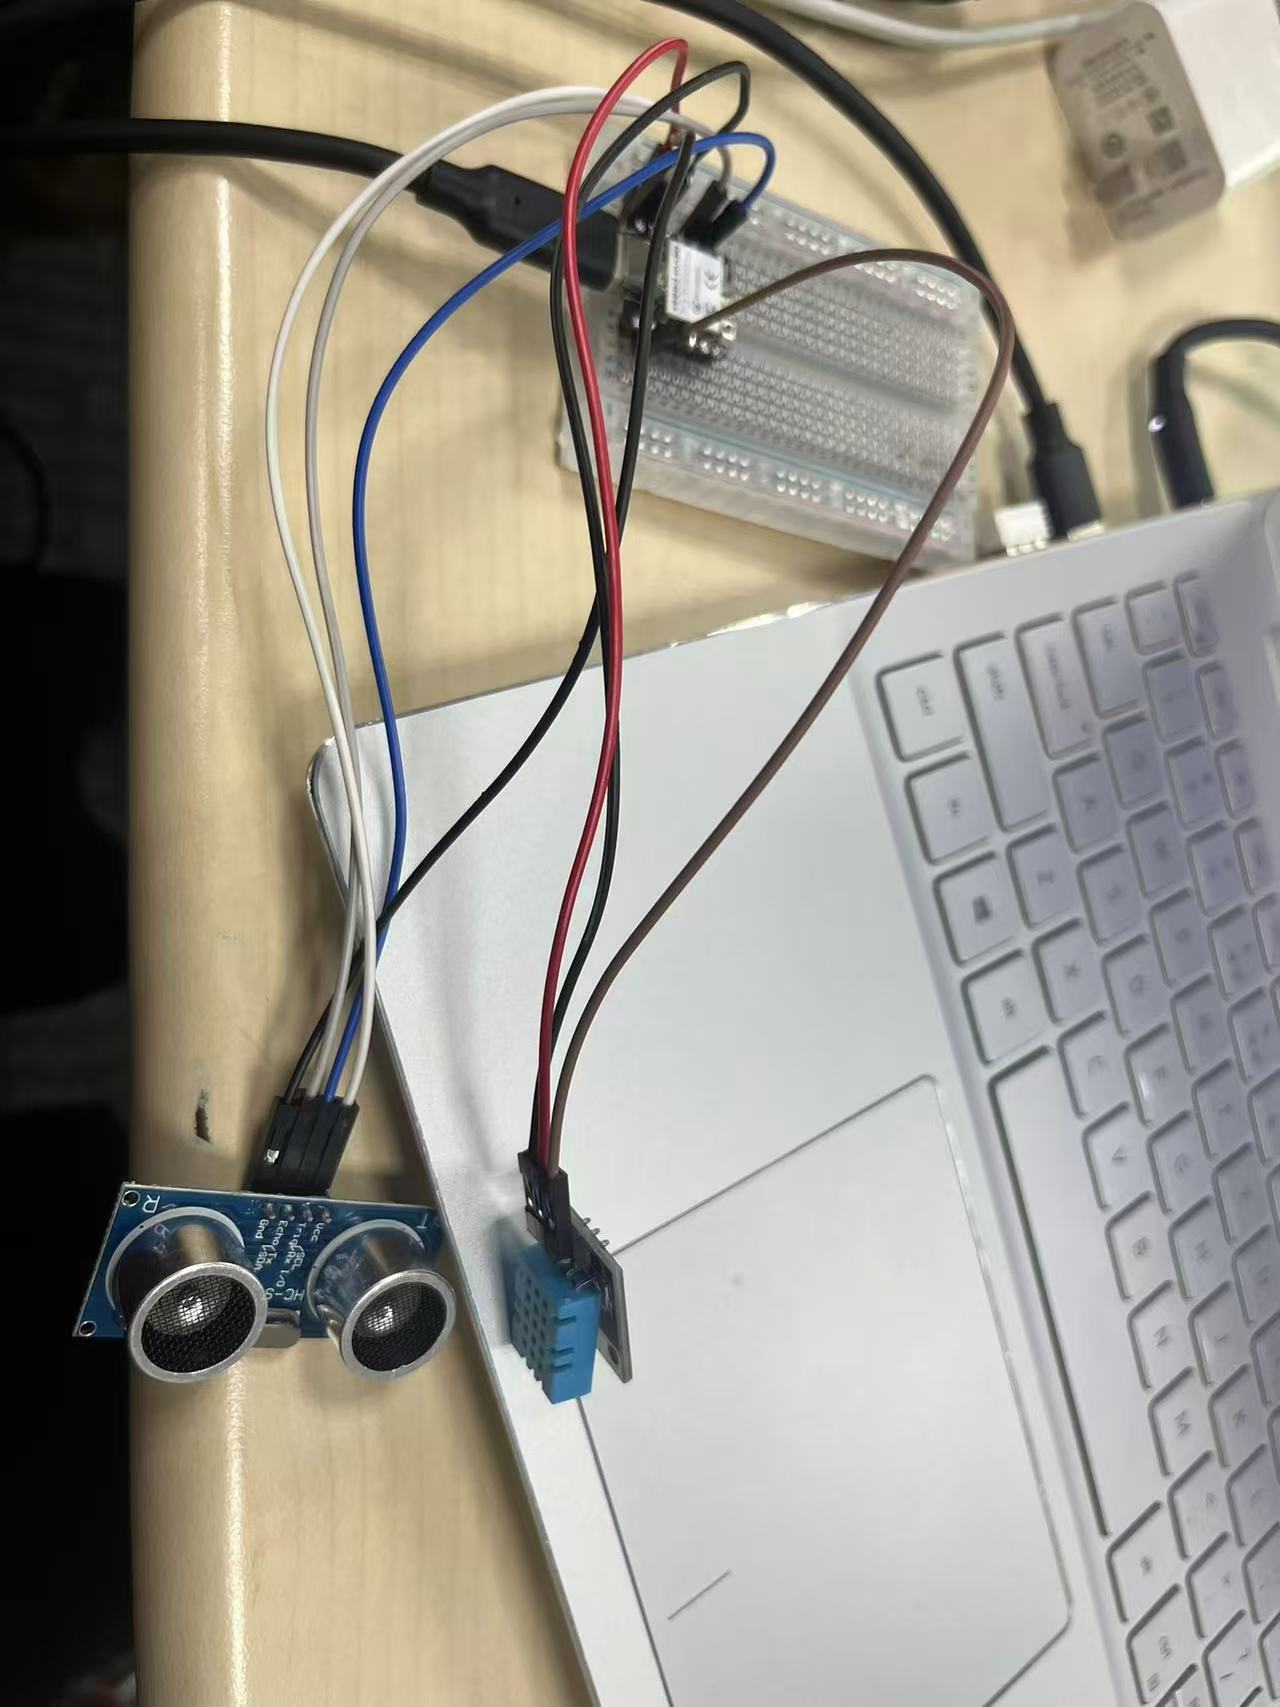
Step 2: Hardware Connections
· DHT11 sensor: ○ Signal → D1 ○ VCC → 3.3V ○ GND → GND
· Ultrasonic sensor (HC-SR04): ○ TRIG → D8 ○ ECHO → D9 ○ VCC → 5V (or 3.3V if supported) ○ GND → GND
Step 3: Code Overview
· Install Arduino Cloud Agent to develop the environment set up. 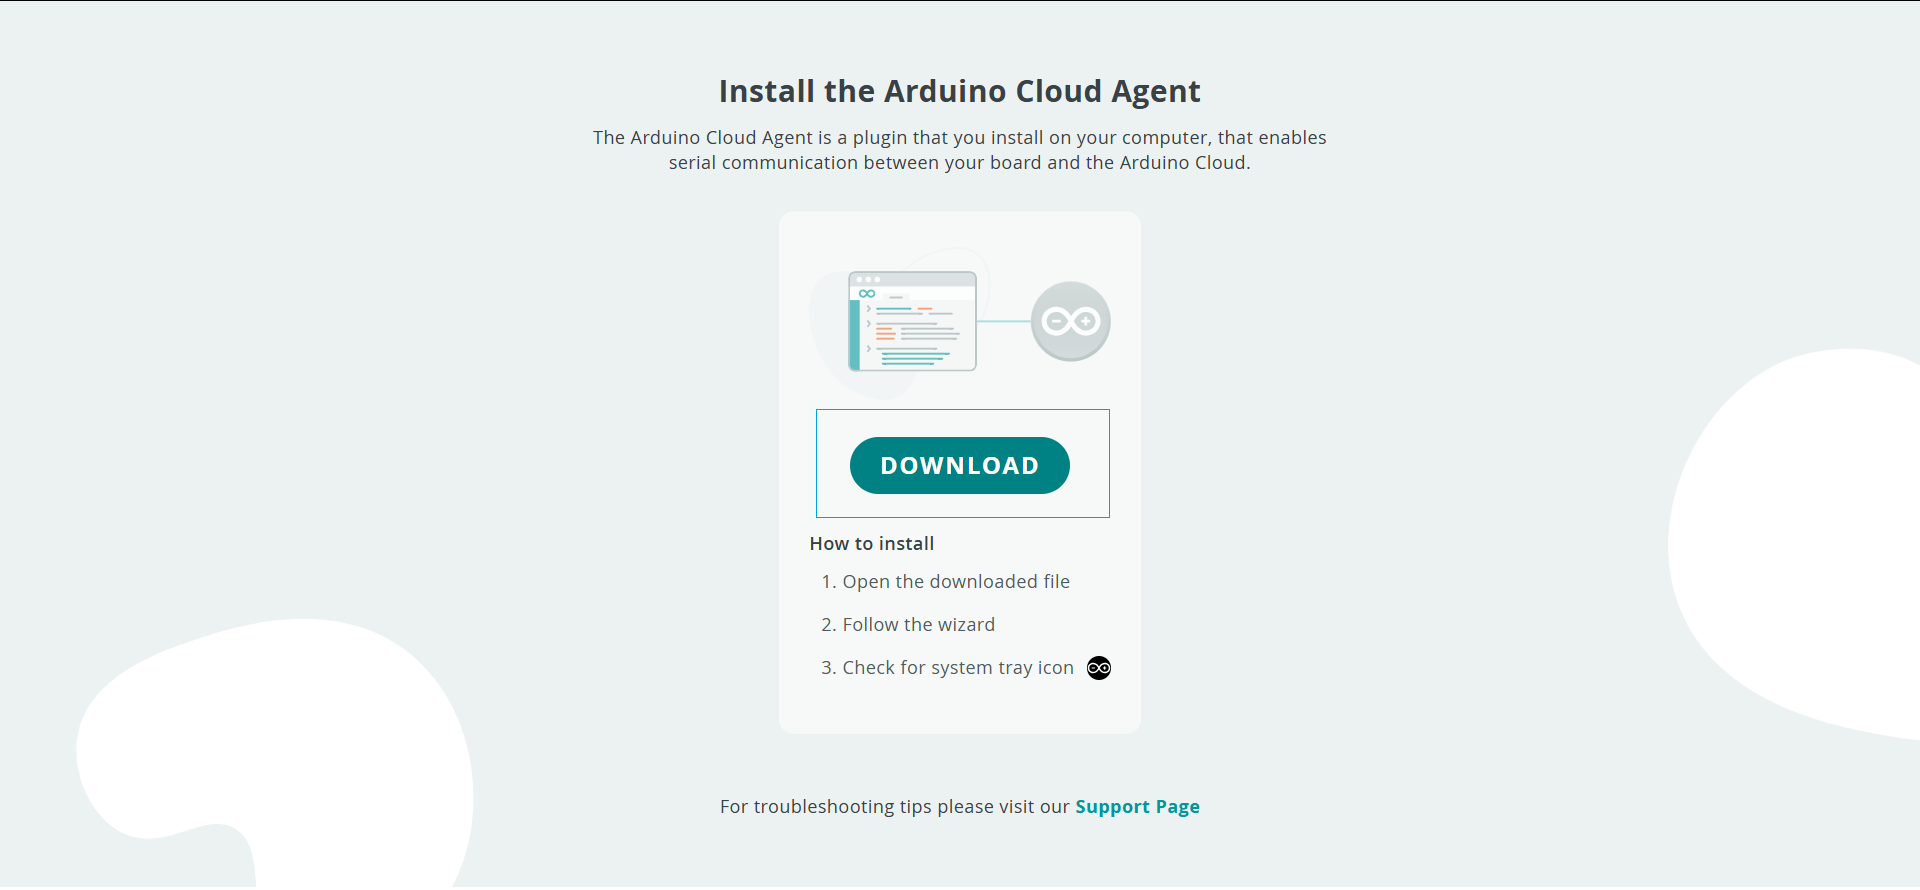 · In the Arduino IDE, you can find four files are automatically generated.
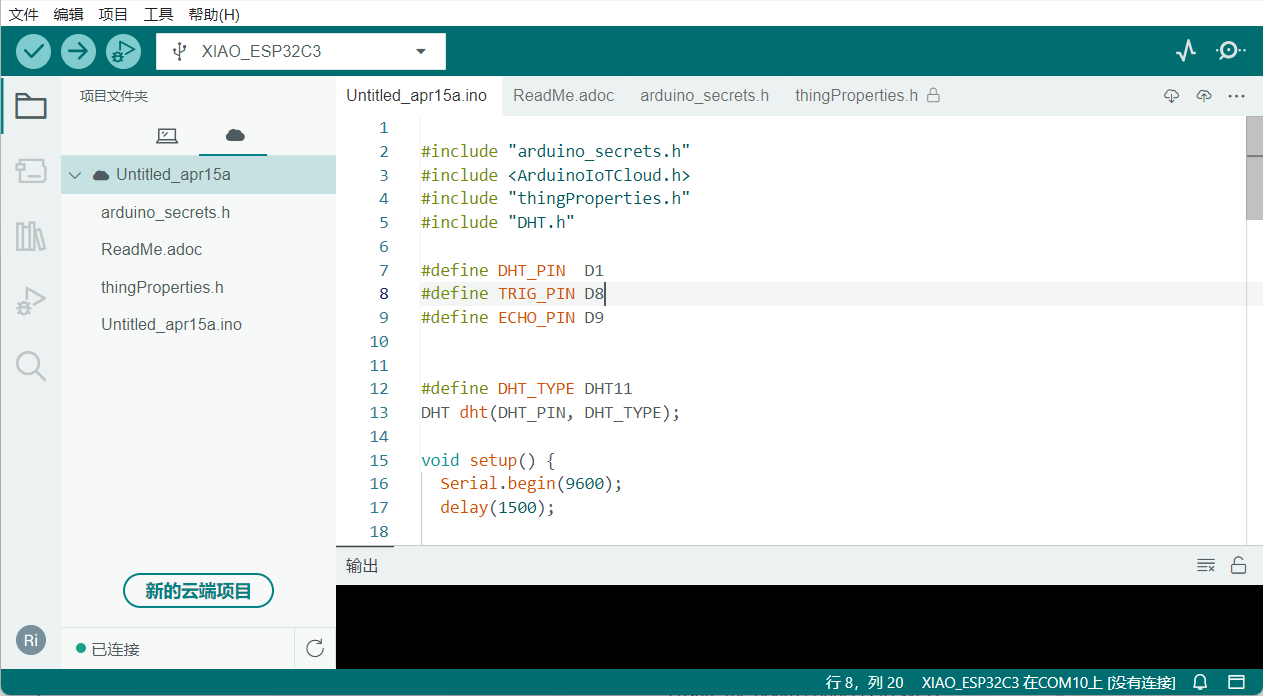
· Add necessary library dependencies:
ArduinoIoTCloud (v1.x) DHT sensor library 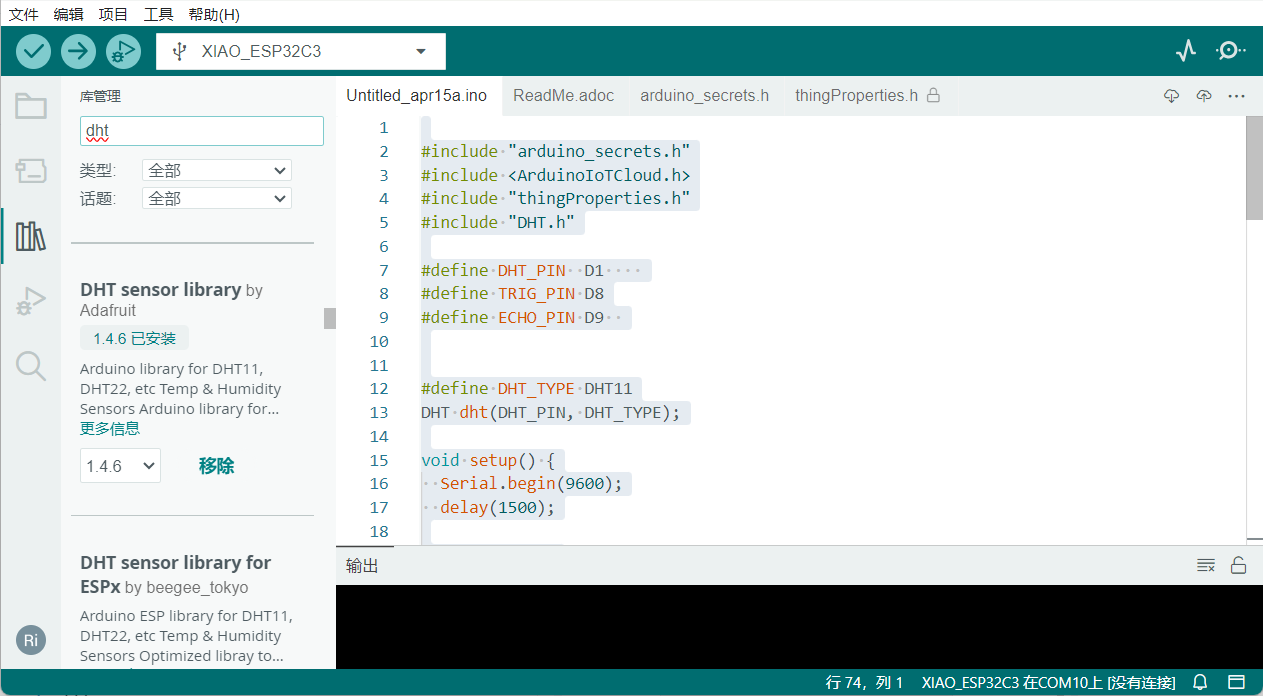 · Below is the main code in
 .ino.
#include "arduino_secrets.h"
#include <ArduinoIoTCloud.h>
#include "thingProperties.h"
#include "DHT.h"

#define DHT_PIN  D1
#define TRIG_PIN D8
#define ECHO_PIN D9


#define DHT_TYPE DHT11
DHT dht(DHT_PIN, DHT_TYPE);

void setup() {
  Serial.begin(9600);
  delay(1500);

  dht.begin();
  pinMode(TRIG_PIN, OUTPUT);
  pinMode(ECHO_PIN, INPUT);

  initProperties();
  ArduinoCloud.begin(ArduinoIoTPreferredConnection);

  setDebugMessageLevel(2);
  ArduinoCloud.printDebugInfo();
  digitalWrite(TRIG_PIN, LOW);
  delay(1);
}

void loop() {
  ArduinoCloud.update();

  long dist = getDistance();
  distance = (int)dist;

  // 打印距离
  Serial.print("Distance: ");
  Serial.print(distance);
  Serial.println(" cm");

  // 读取温湿度
  tem= dht.readTemperature();
  hum = dht.readHumidity();

  // 打印温湿度
  Serial.print("Temperature: ");
  Serial.print(tem);
  Serial.println(" °C");

  Serial.print("Humidity: ");
  Serial.print(hum);
  Serial.println(" %");

  Serial.println("-------------------------");

  delay(1000);
}


long getDistance() {
  digitalWrite(TRIG_PIN, LOW);
  delayMicroseconds(2);
  digitalWrite(TRIG_PIN, HIGH);
  delayMicroseconds(10);
  digitalWrite(TRIG_PIN, LOW);

  long duration = pulseIn(ECHO_PIN, HIGH, 30000);
  return (duration * 0.034) / 2;
}
Step 4: Upload and Connect
· Use the Arduino IDE or Web Editor to upload the code to the board. 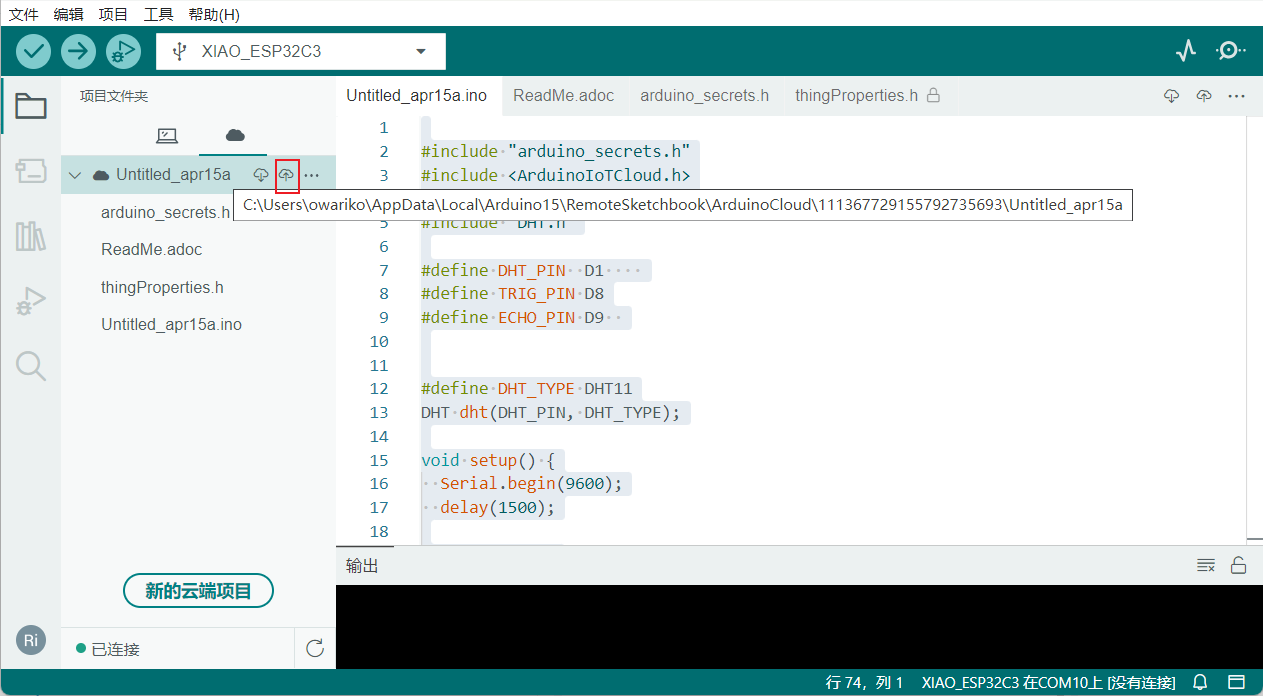 · Ensure the board connects to Wi-Fi and Arduino Cloud successfully. ○ Monitor connection status via Serial Monitor. · Cloud variables start updating in real time.
Step 5: View on Mobile Dashboard
· Install the Arduino IoT Remote app on your smartphone (iOS/Android). · Sign in using the same Arduino account.
· Customize widgets in Dashboard page (e.g., gauge, value display, chart) for tem, hum, and distance. 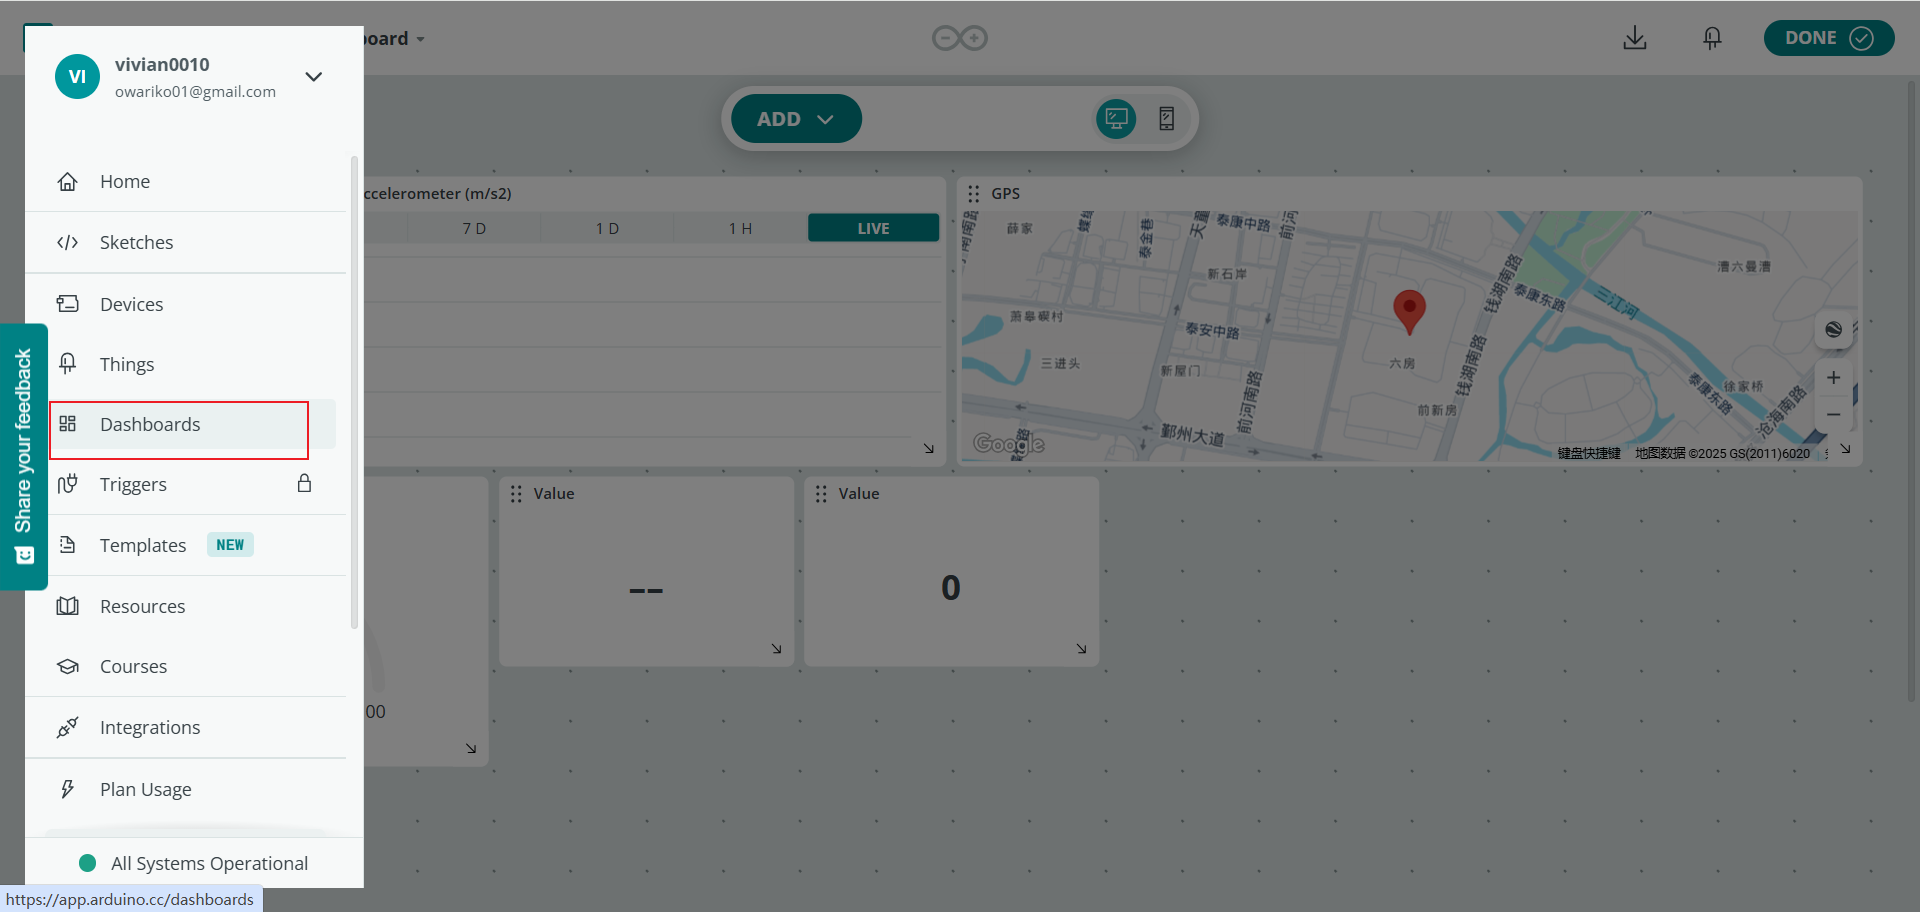

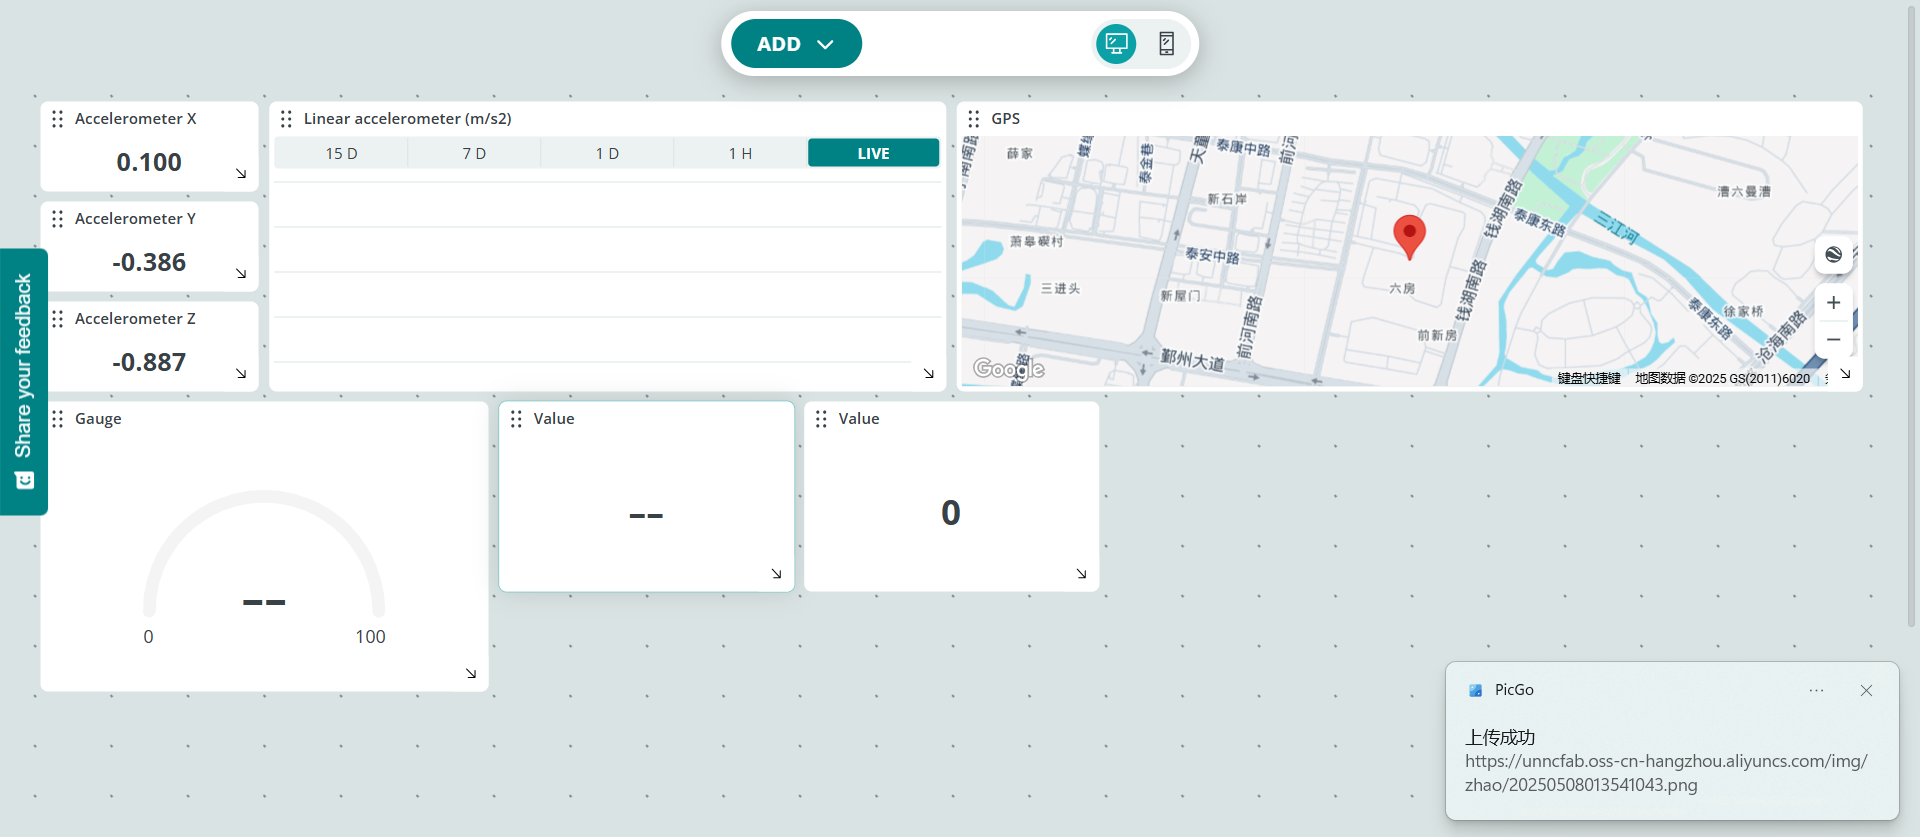 · Open your Thing’s dashboard to view the synced variables.