Appearance
3D Printing
FDM Printing
1. FDM introduction
Fused deposition modeling, or FDM for short, is a material extrusion method of additive manufacturing where materials are extruded through a nozzle and joined together to create 3D objects.
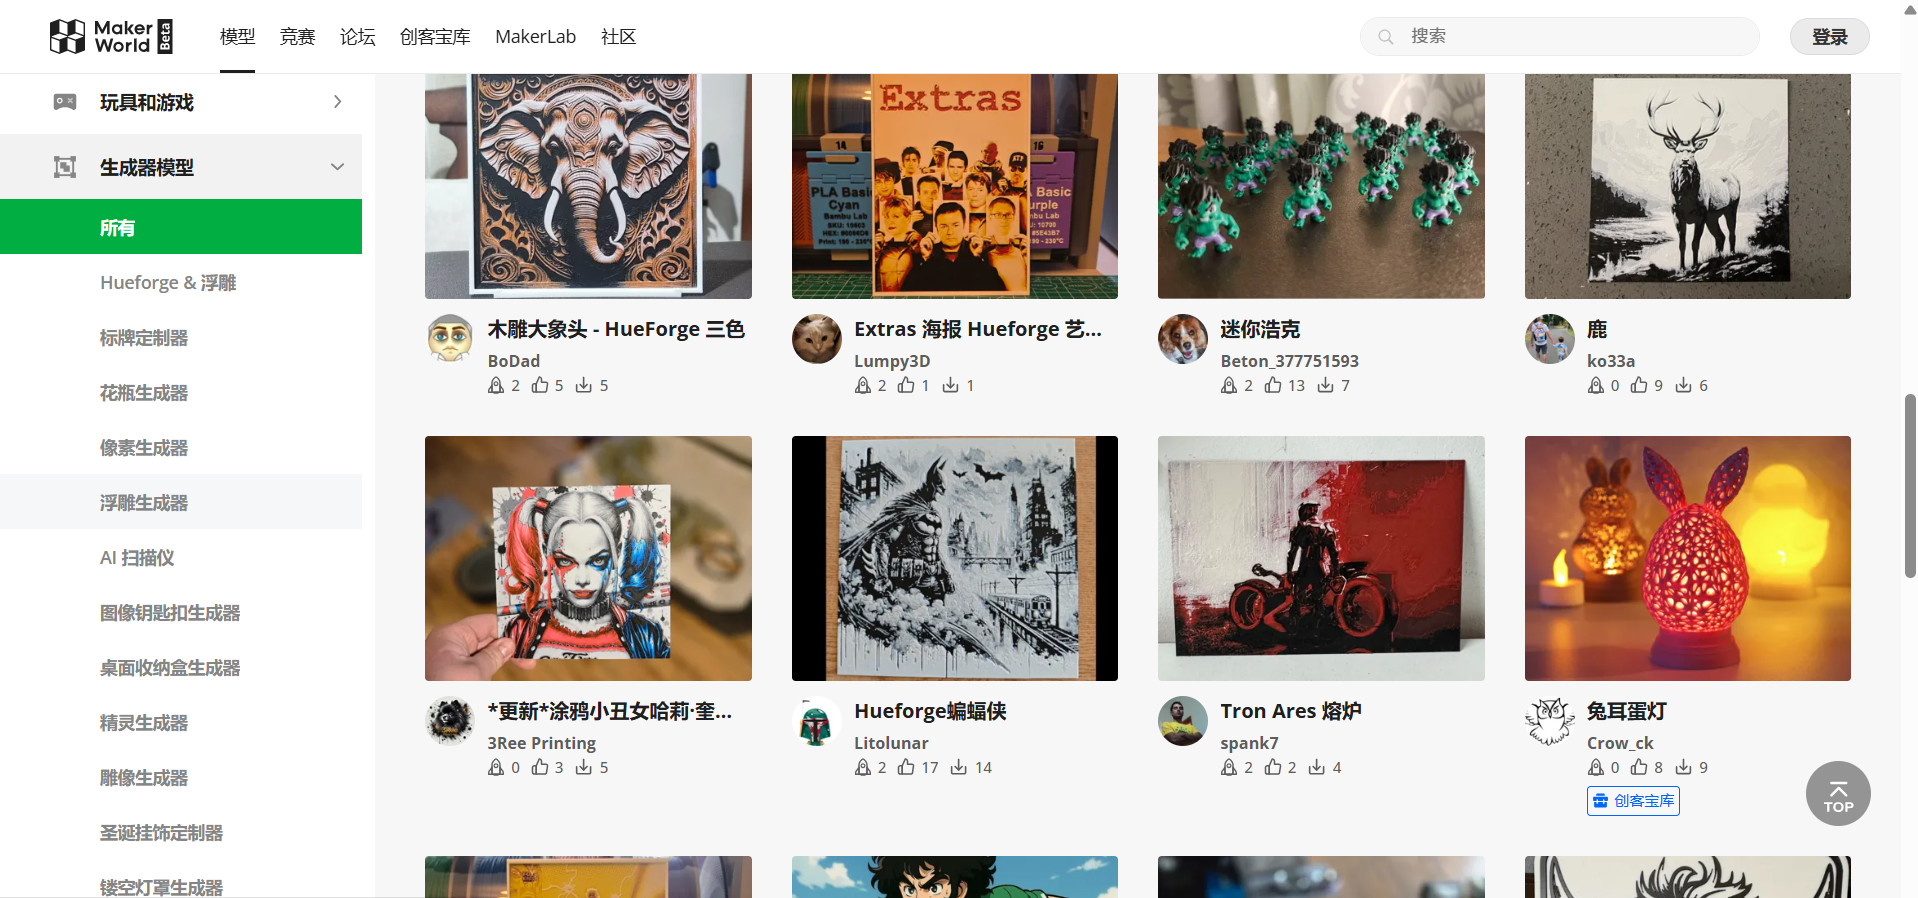
To participate the 3D modeling competetion and lear more 3D printing modeling. please click here. To try intreseting modeling develop,please click here. This community will provide open source code and modeling resources.
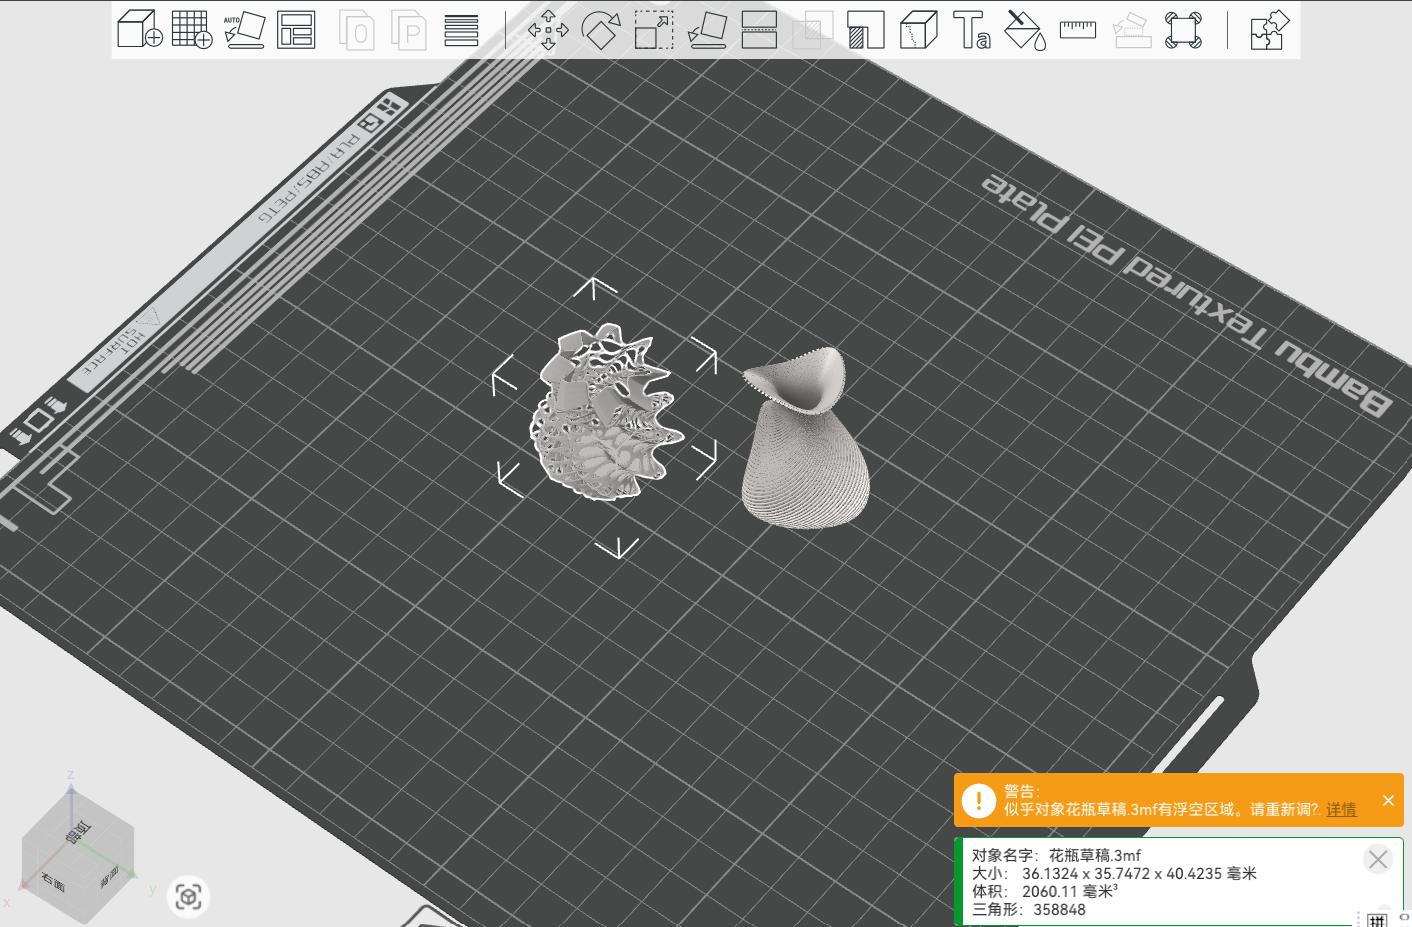
Now, we will use the Vase generator to design a vase.

Adjust the parameters of the vase, DIY your favourite vase.
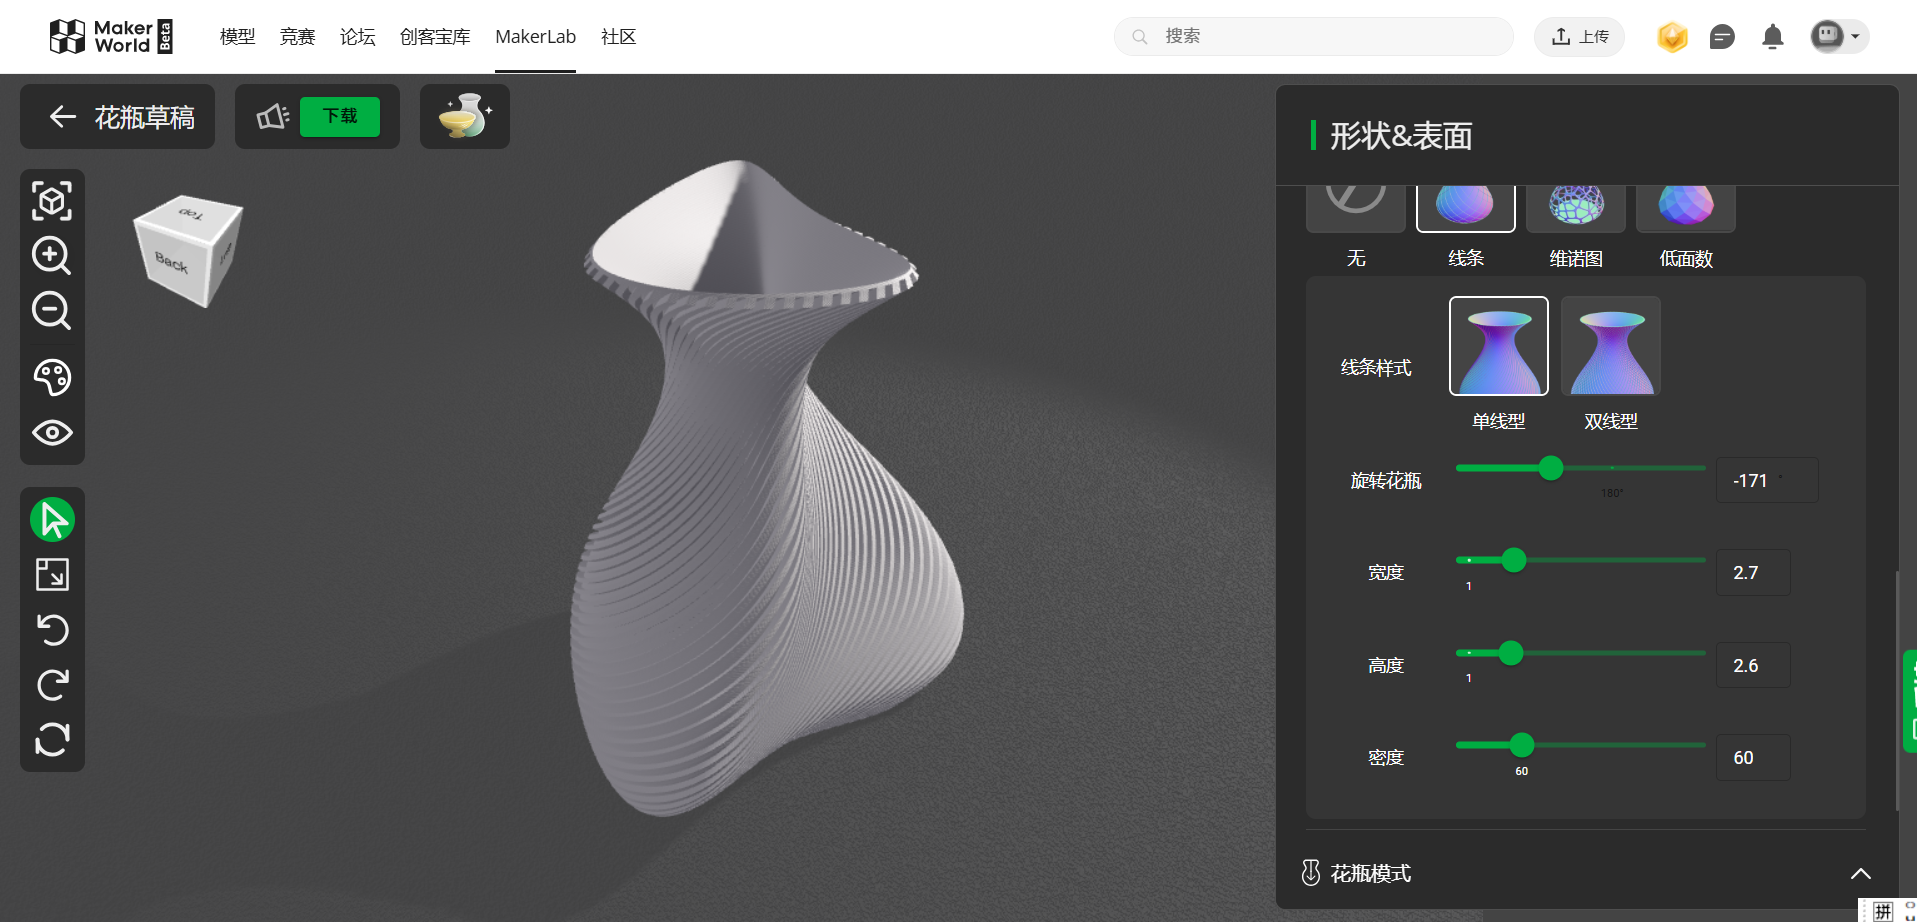
Finally, download the design and open it with Bambu Studio.
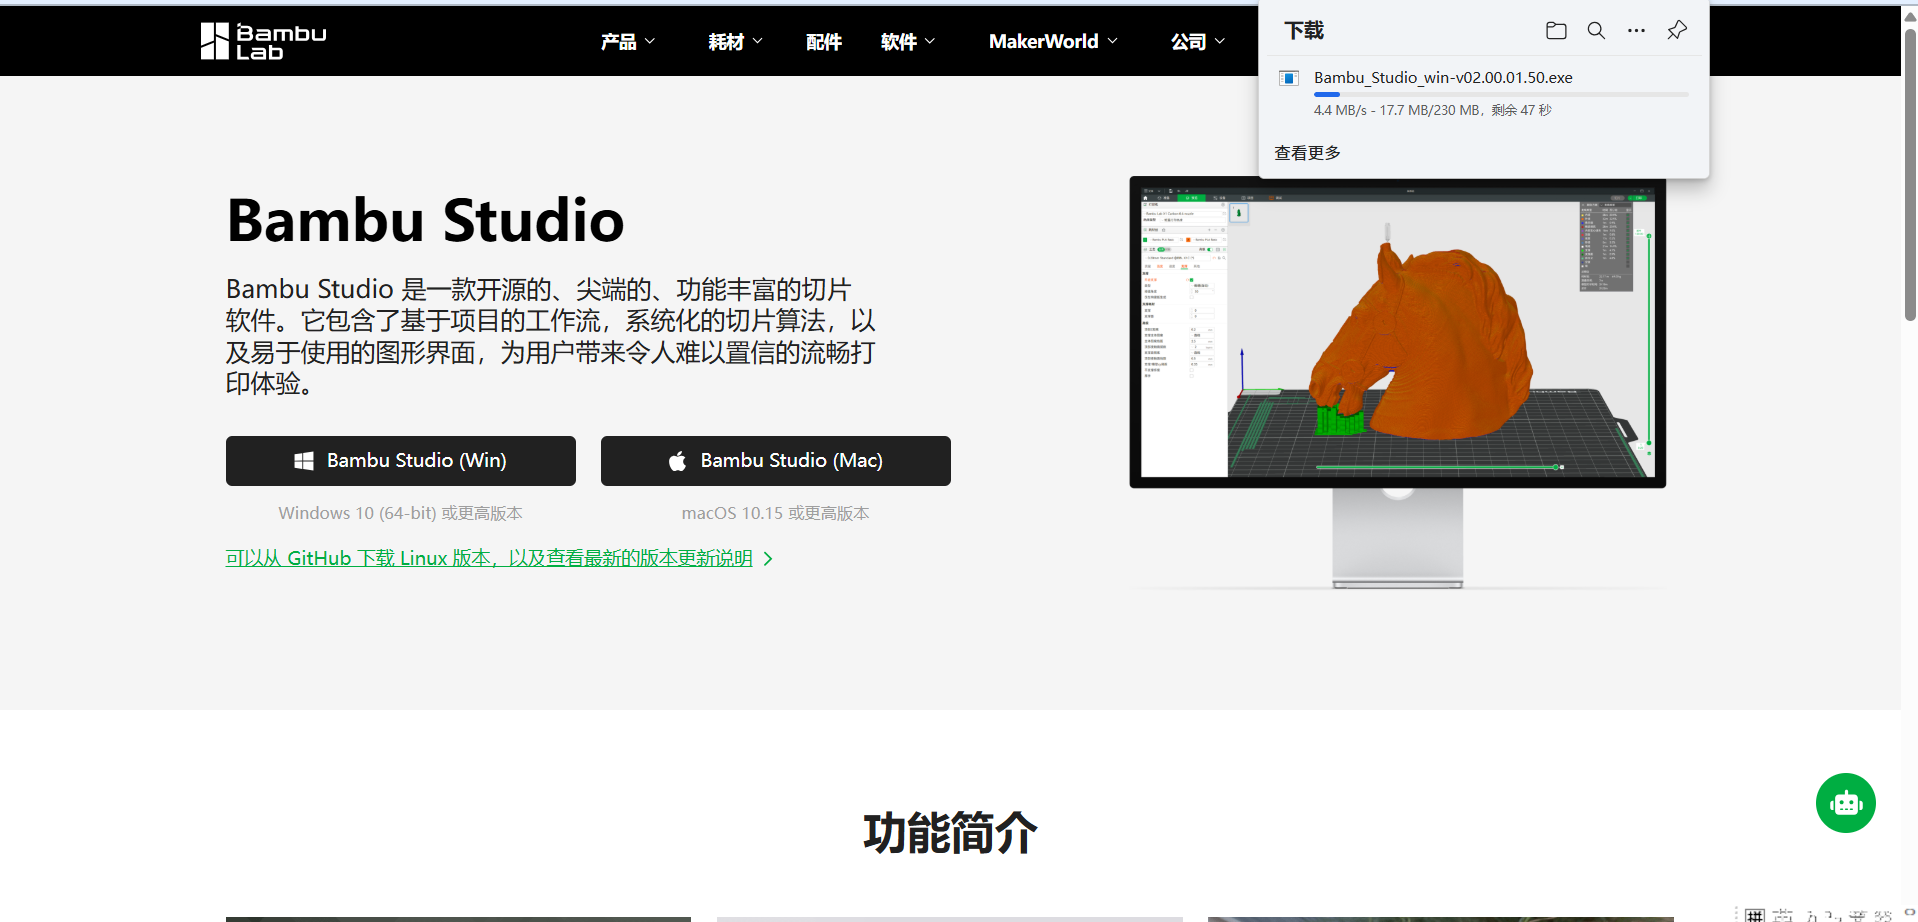
2. Bambu Studio download
Download the Bambu Studio from the website: https://bambulab.cn/zh-cn/download/studio
Firtly. open the model file in Bambu Studio.
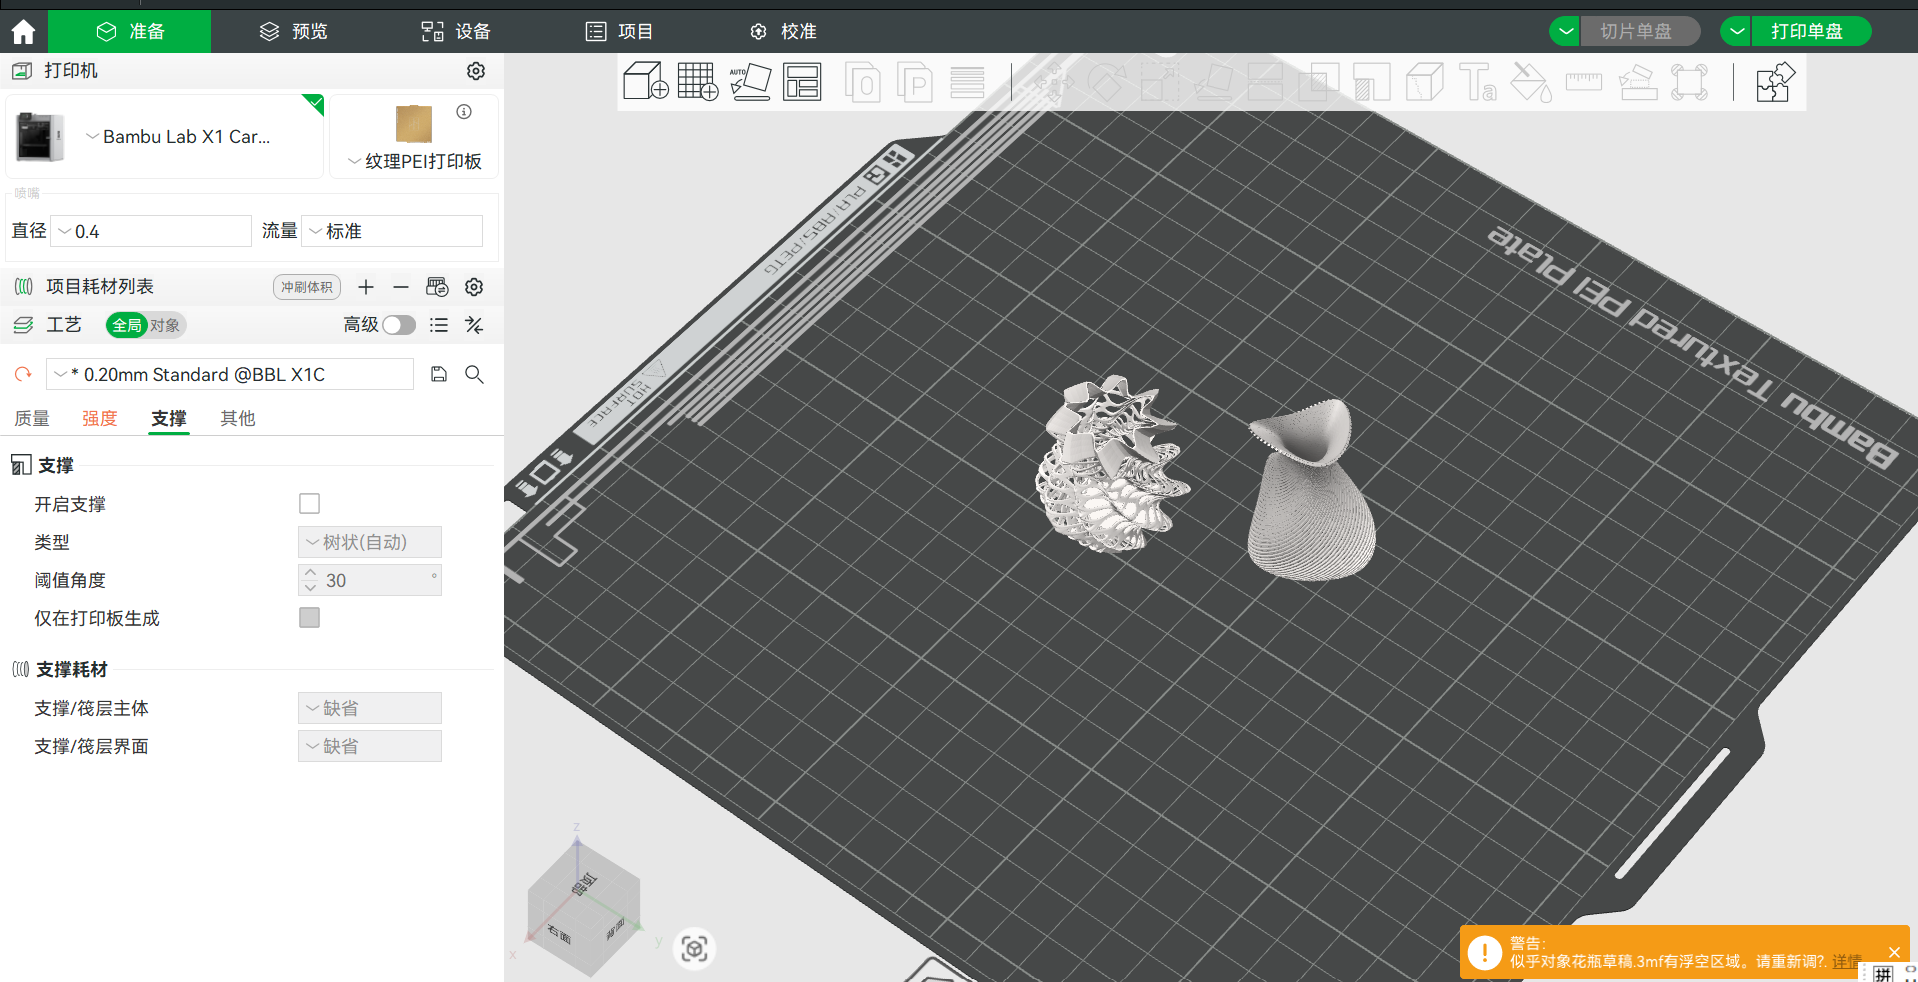
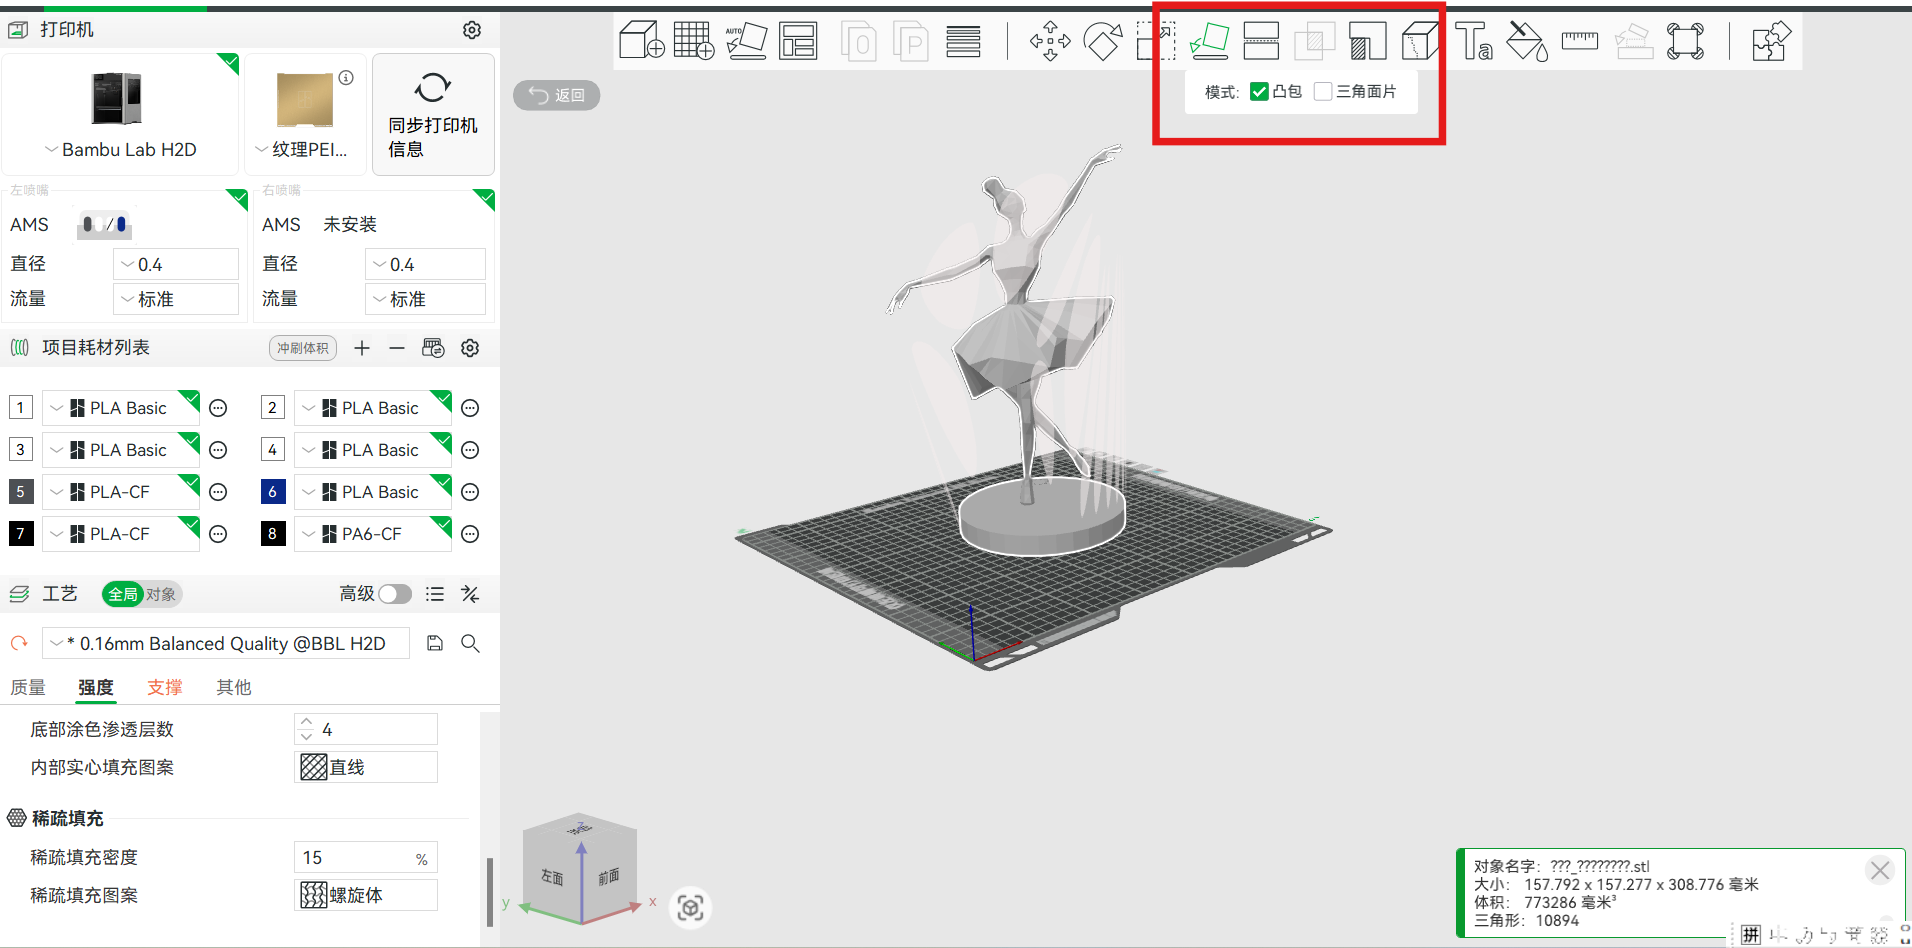
To finish the 3D printing successfully. we need to set the parameters of the printing.
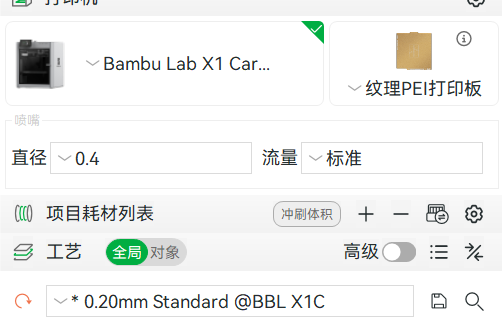
(1) Set the nozzle scale
According to the target of design, the normal appearance of the 3D model set the nozzle scale to 0.2mm. For the engennering application, the nozzle scale should be set to 0.4-0.6mm.
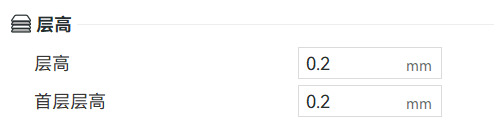
(2) Layer height: standard height should more than 0.2mm, the need for mechanical strength could be set to 0.4mm.
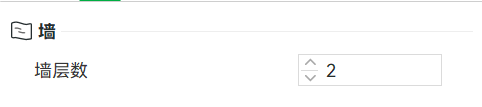
(3) Layer number: Set it with the level of mechanical strength. Normal design for 2 layers, special design for more than 4 layers.
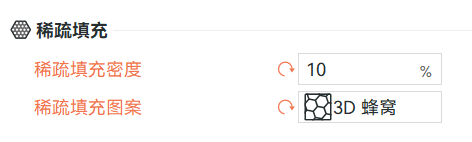
(4) Inner hatch patterns: honeycomb pattern is strong, with angle of 45°.
(5) Adjust the model to fit the printing bed
Such as: zoom, moving, rootate, cut, text add, material color selection, measure etc.
Choose the underside to print.
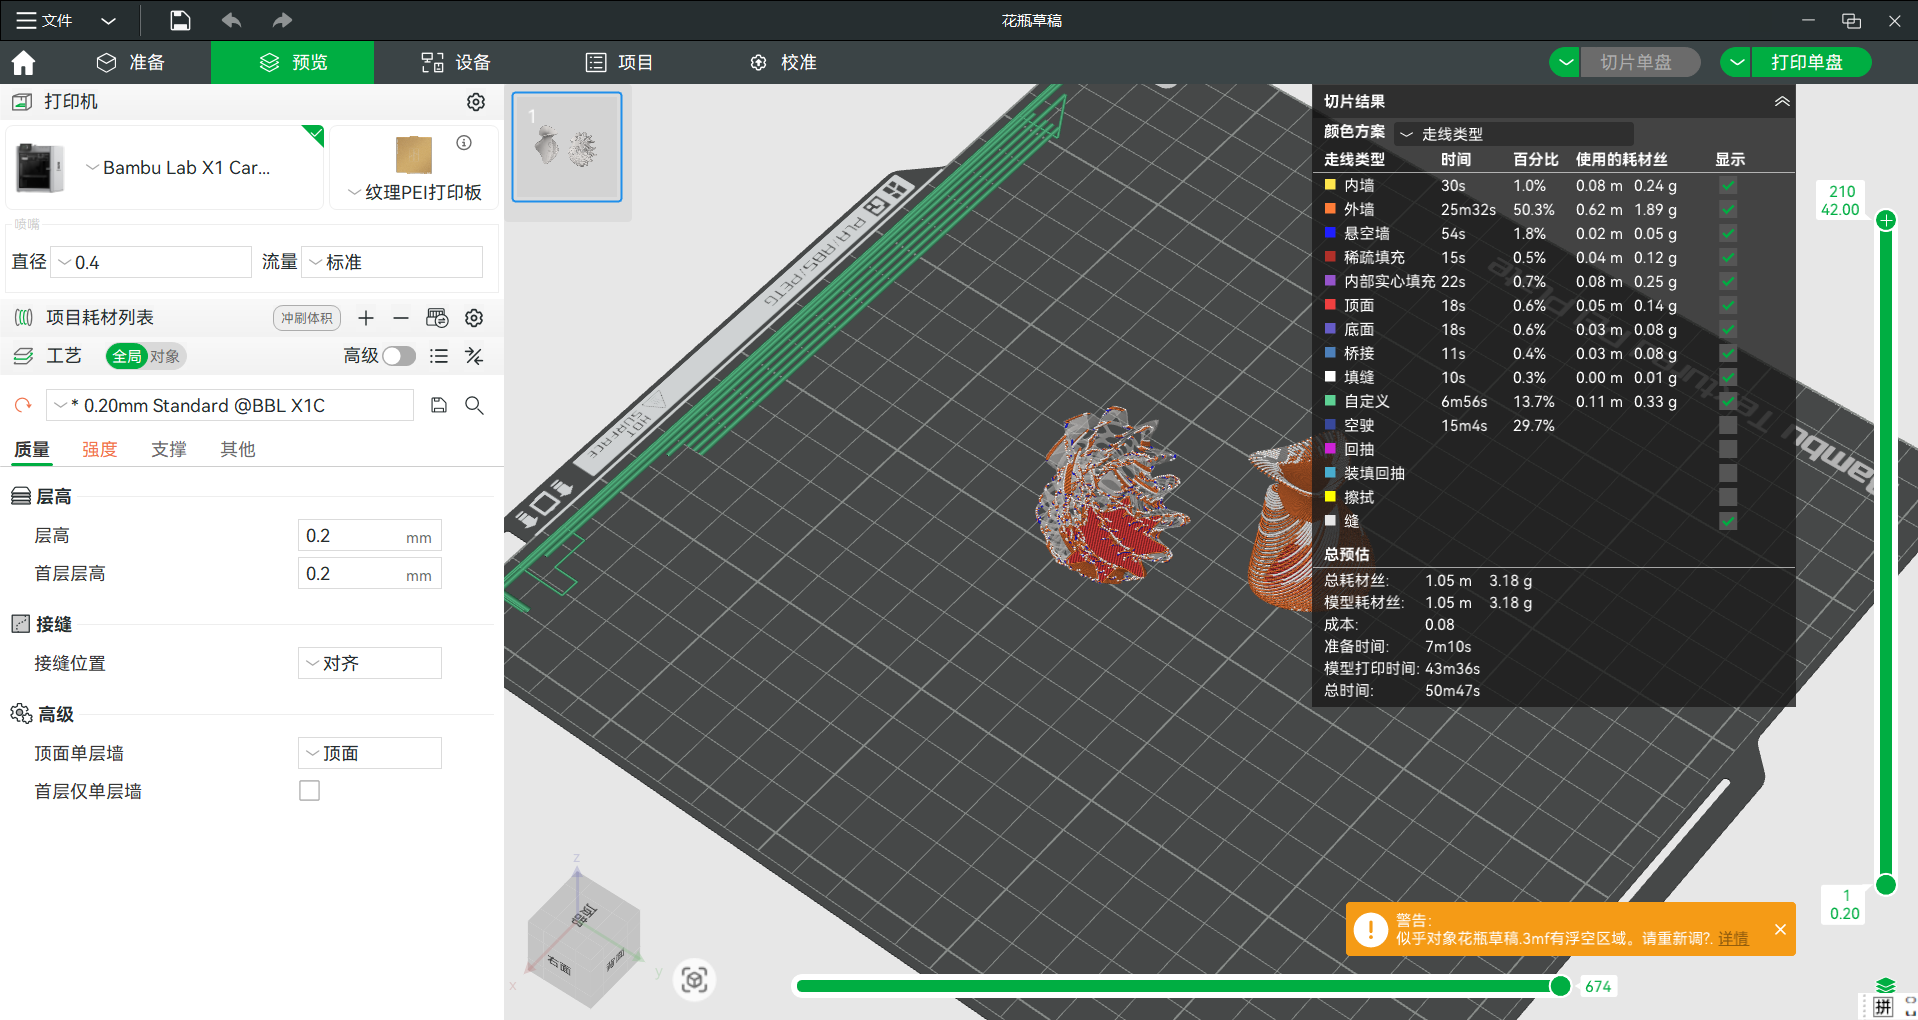
(6) Slice preview
To print the model, we need to slice the model and preview the slice effect. In this page, the material consumption can be estimated. The warning will point out the potential problems of the design.
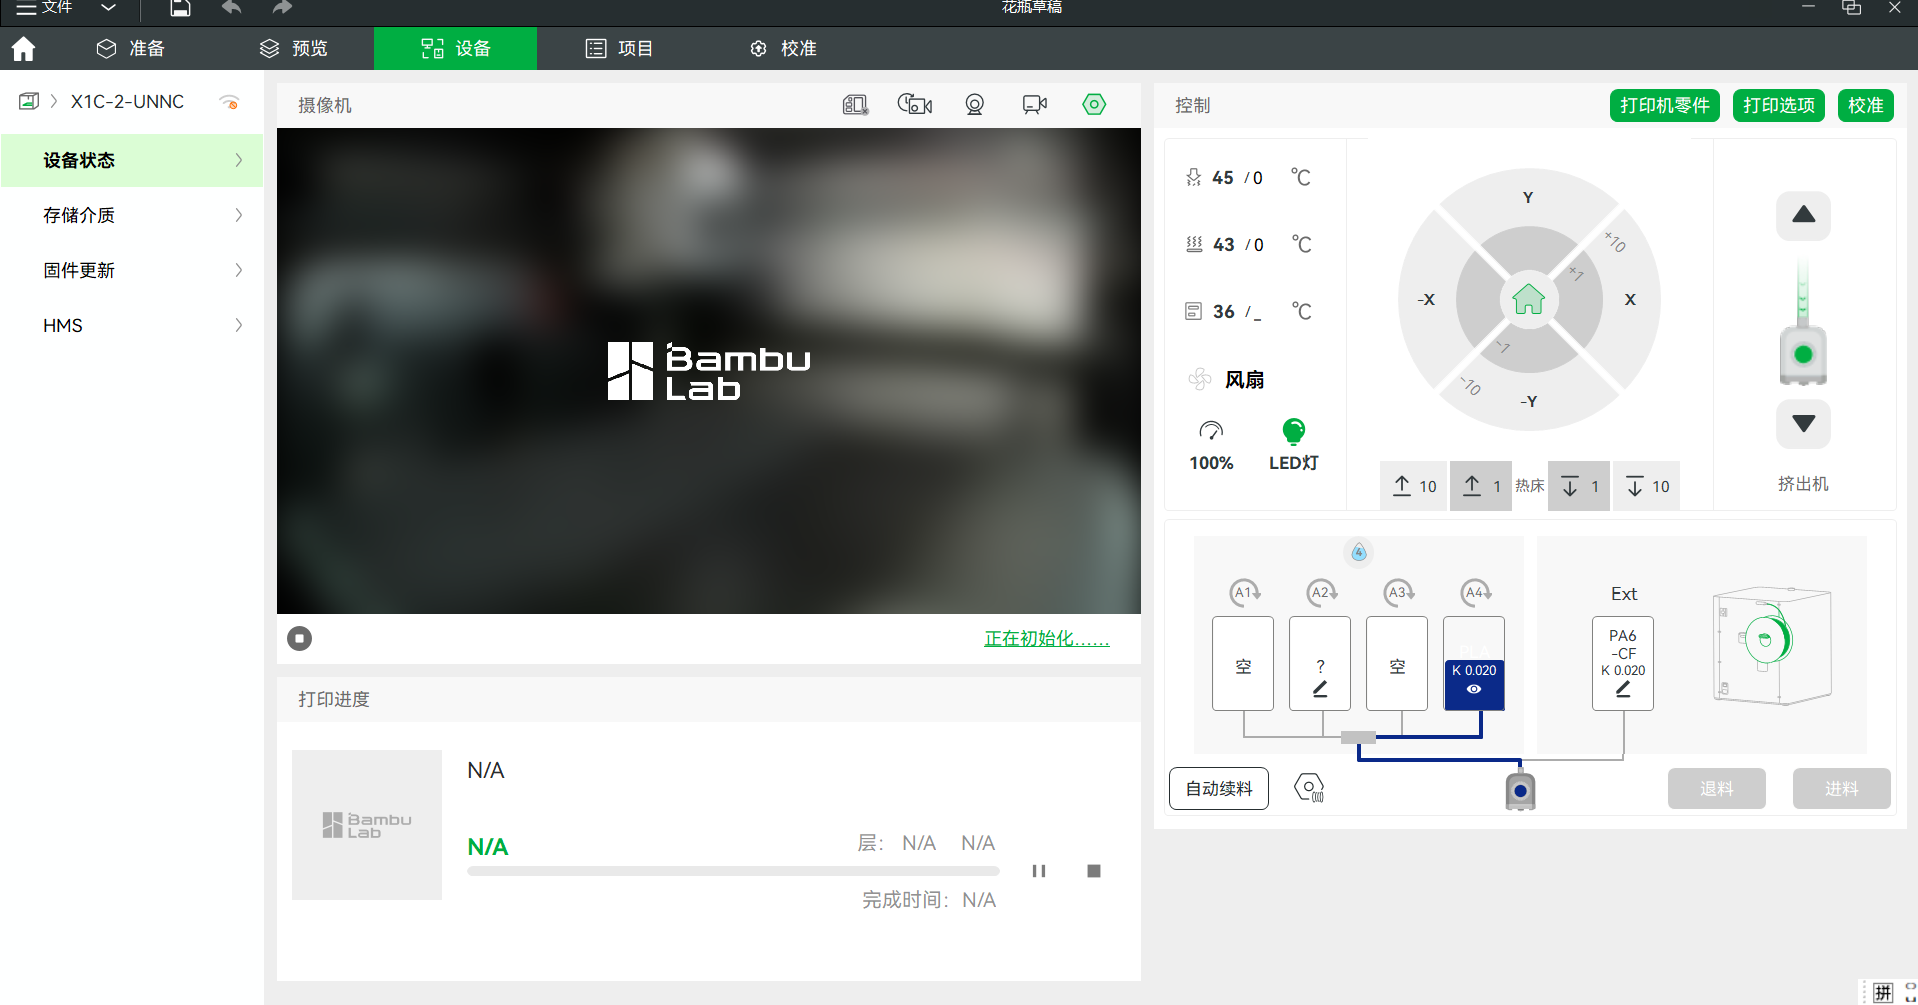
(7) Print
Update the printer information, choose the suitiable printer model amd material color. It should be noticed that the material needs to be put in dry environment to advoid the stringing phenomenon while printing.

Connect the printer with the computer and upload the design file.
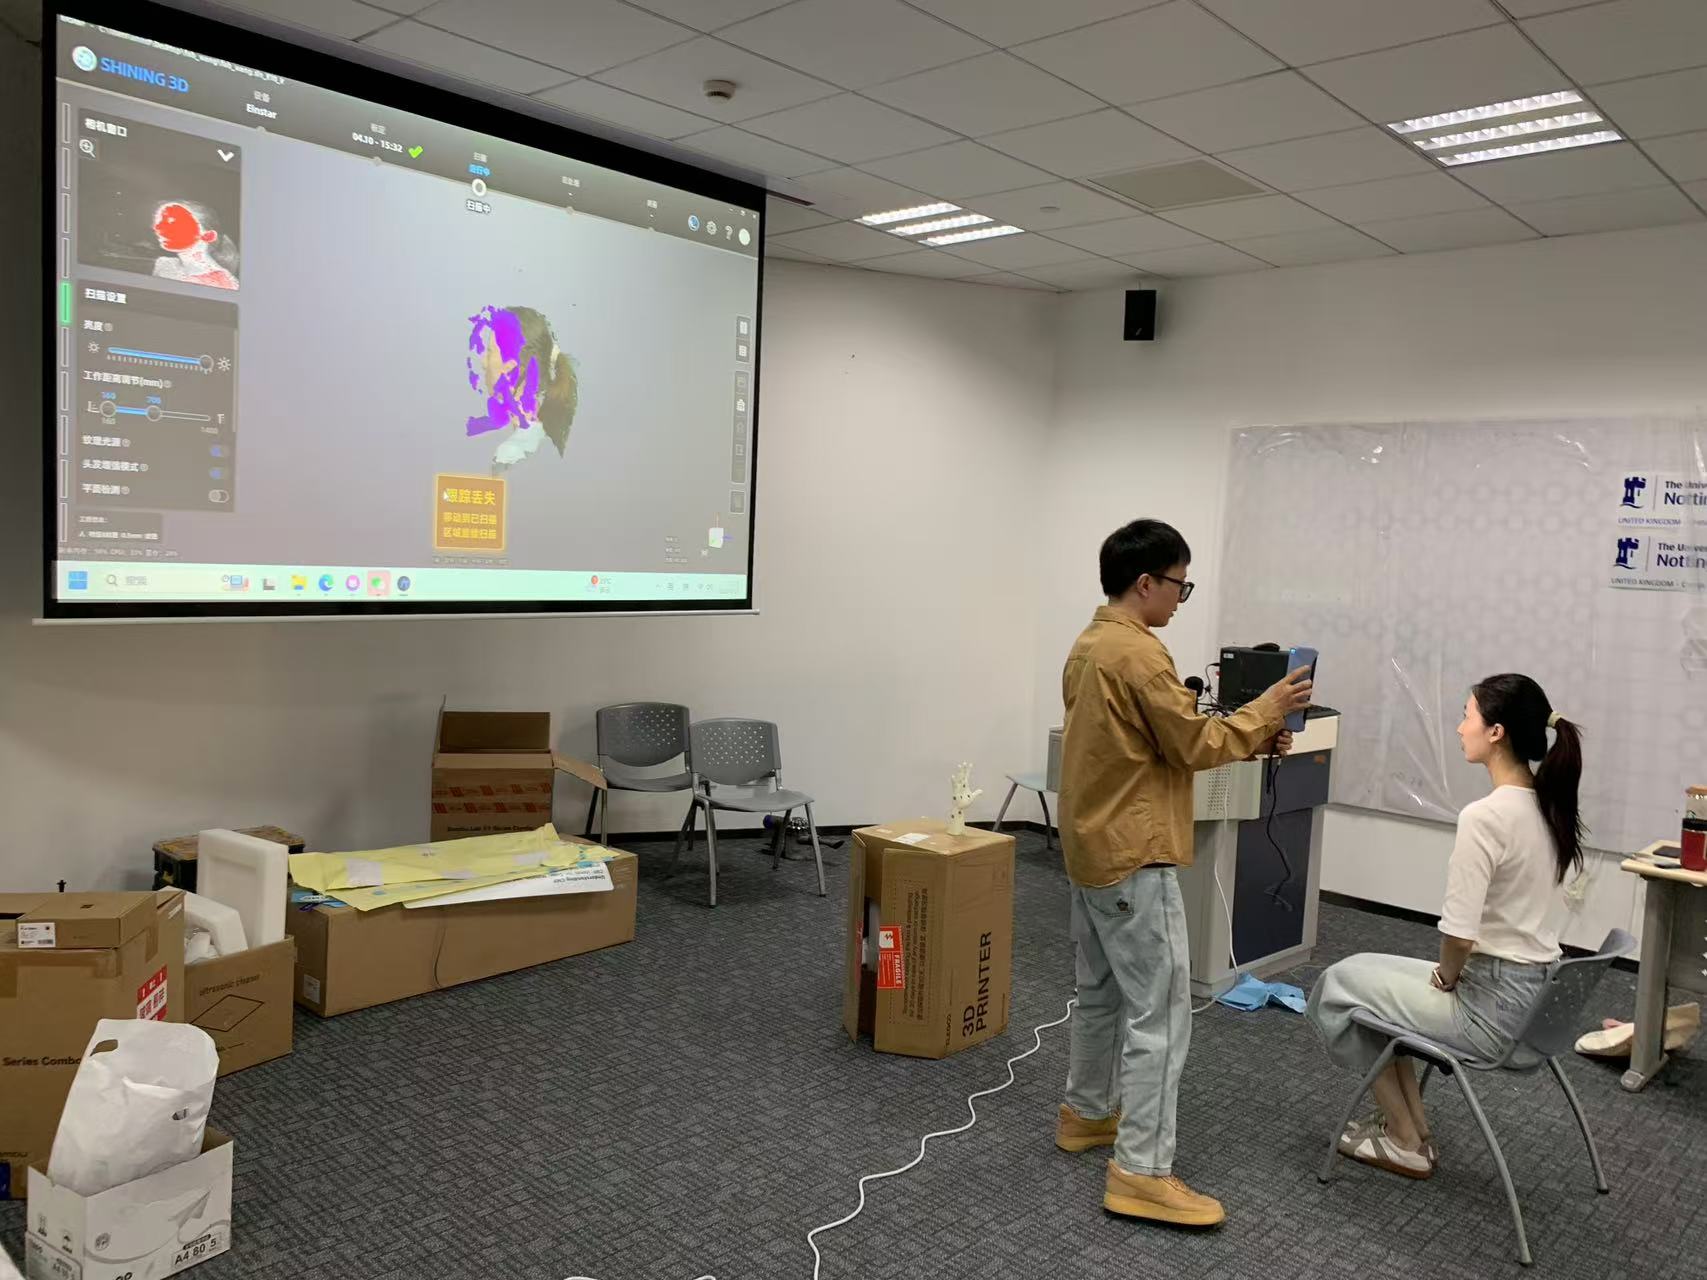
3D Scanning
Download the software here. To use the 3D scanning, we need to correct the scaner firstly. Then, preview the scan effect real time and adjust the scaner to fit the model. After that, transform the scaanning model into a point cloud. Finally, fix broken faces and encapsulate the model. Export the file to stl. form.
SLA Printing
SLA (Stereolithography) is a popular 3D printing technique and one of the leading resin printing technologies. It stands out in the additive manufacturing industry due to its ability to create highly accurate, isotropic, and watertight prototypes. It also excels in producing production-grade parts with smooth surfaces and intricate details.
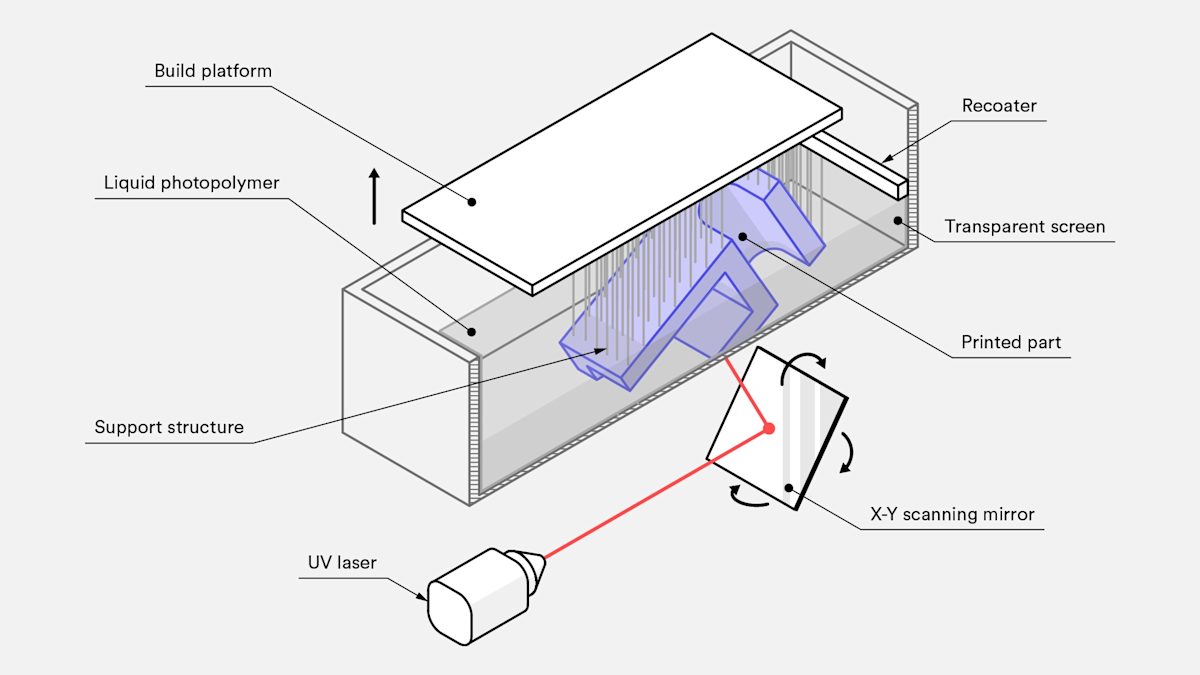
SLA 3D printing begins by submerging the build platform in a tank filled with liquid photopolymer resin, positioning it at a precise layer height above the surface. A high-precision UV laser then selectively cures and solidifies the resin, creating each layer of the model.
During the photopolymerization process, the UV laser activates the monomer carbon chains in the liquid resin, triggering a chemical reaction that forms solid, crosslinked bonds. This results in strong, durable parts with fine details and smooth surfaces. To accurately direct the laser, a system of mirrors—called galvos—guides the beam along a predefined path, ensuring the entire cross-sectional area of the model is cured into a fully solid structure.
Once printing is complete, the part remains in a partially cured state. Additional post-processing under UV light is often required to enhance its mechanical and thermal properties. Unlike thermoplastics used in fused deposition modeling (FDM), SLA materials are thermoset polymers, meaning the curing process is irreversible. SLA parts cannot be melted back into liquid form—when exposed to extreme heat, they will burn rather than soften.
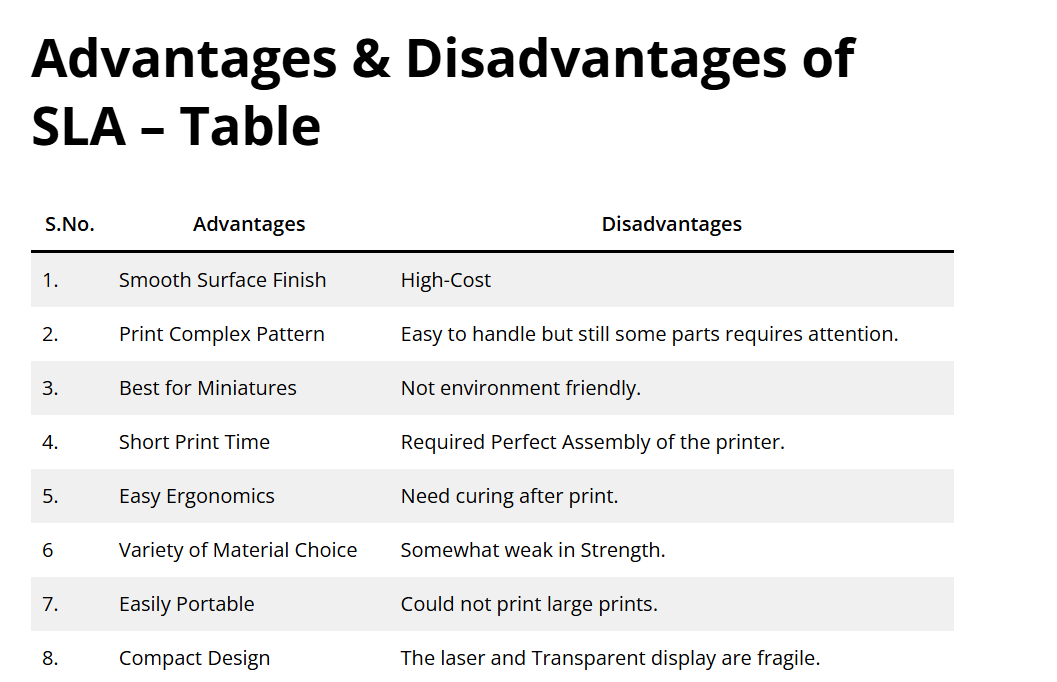
The advantages and disadvantages of SLA printing are as follows:
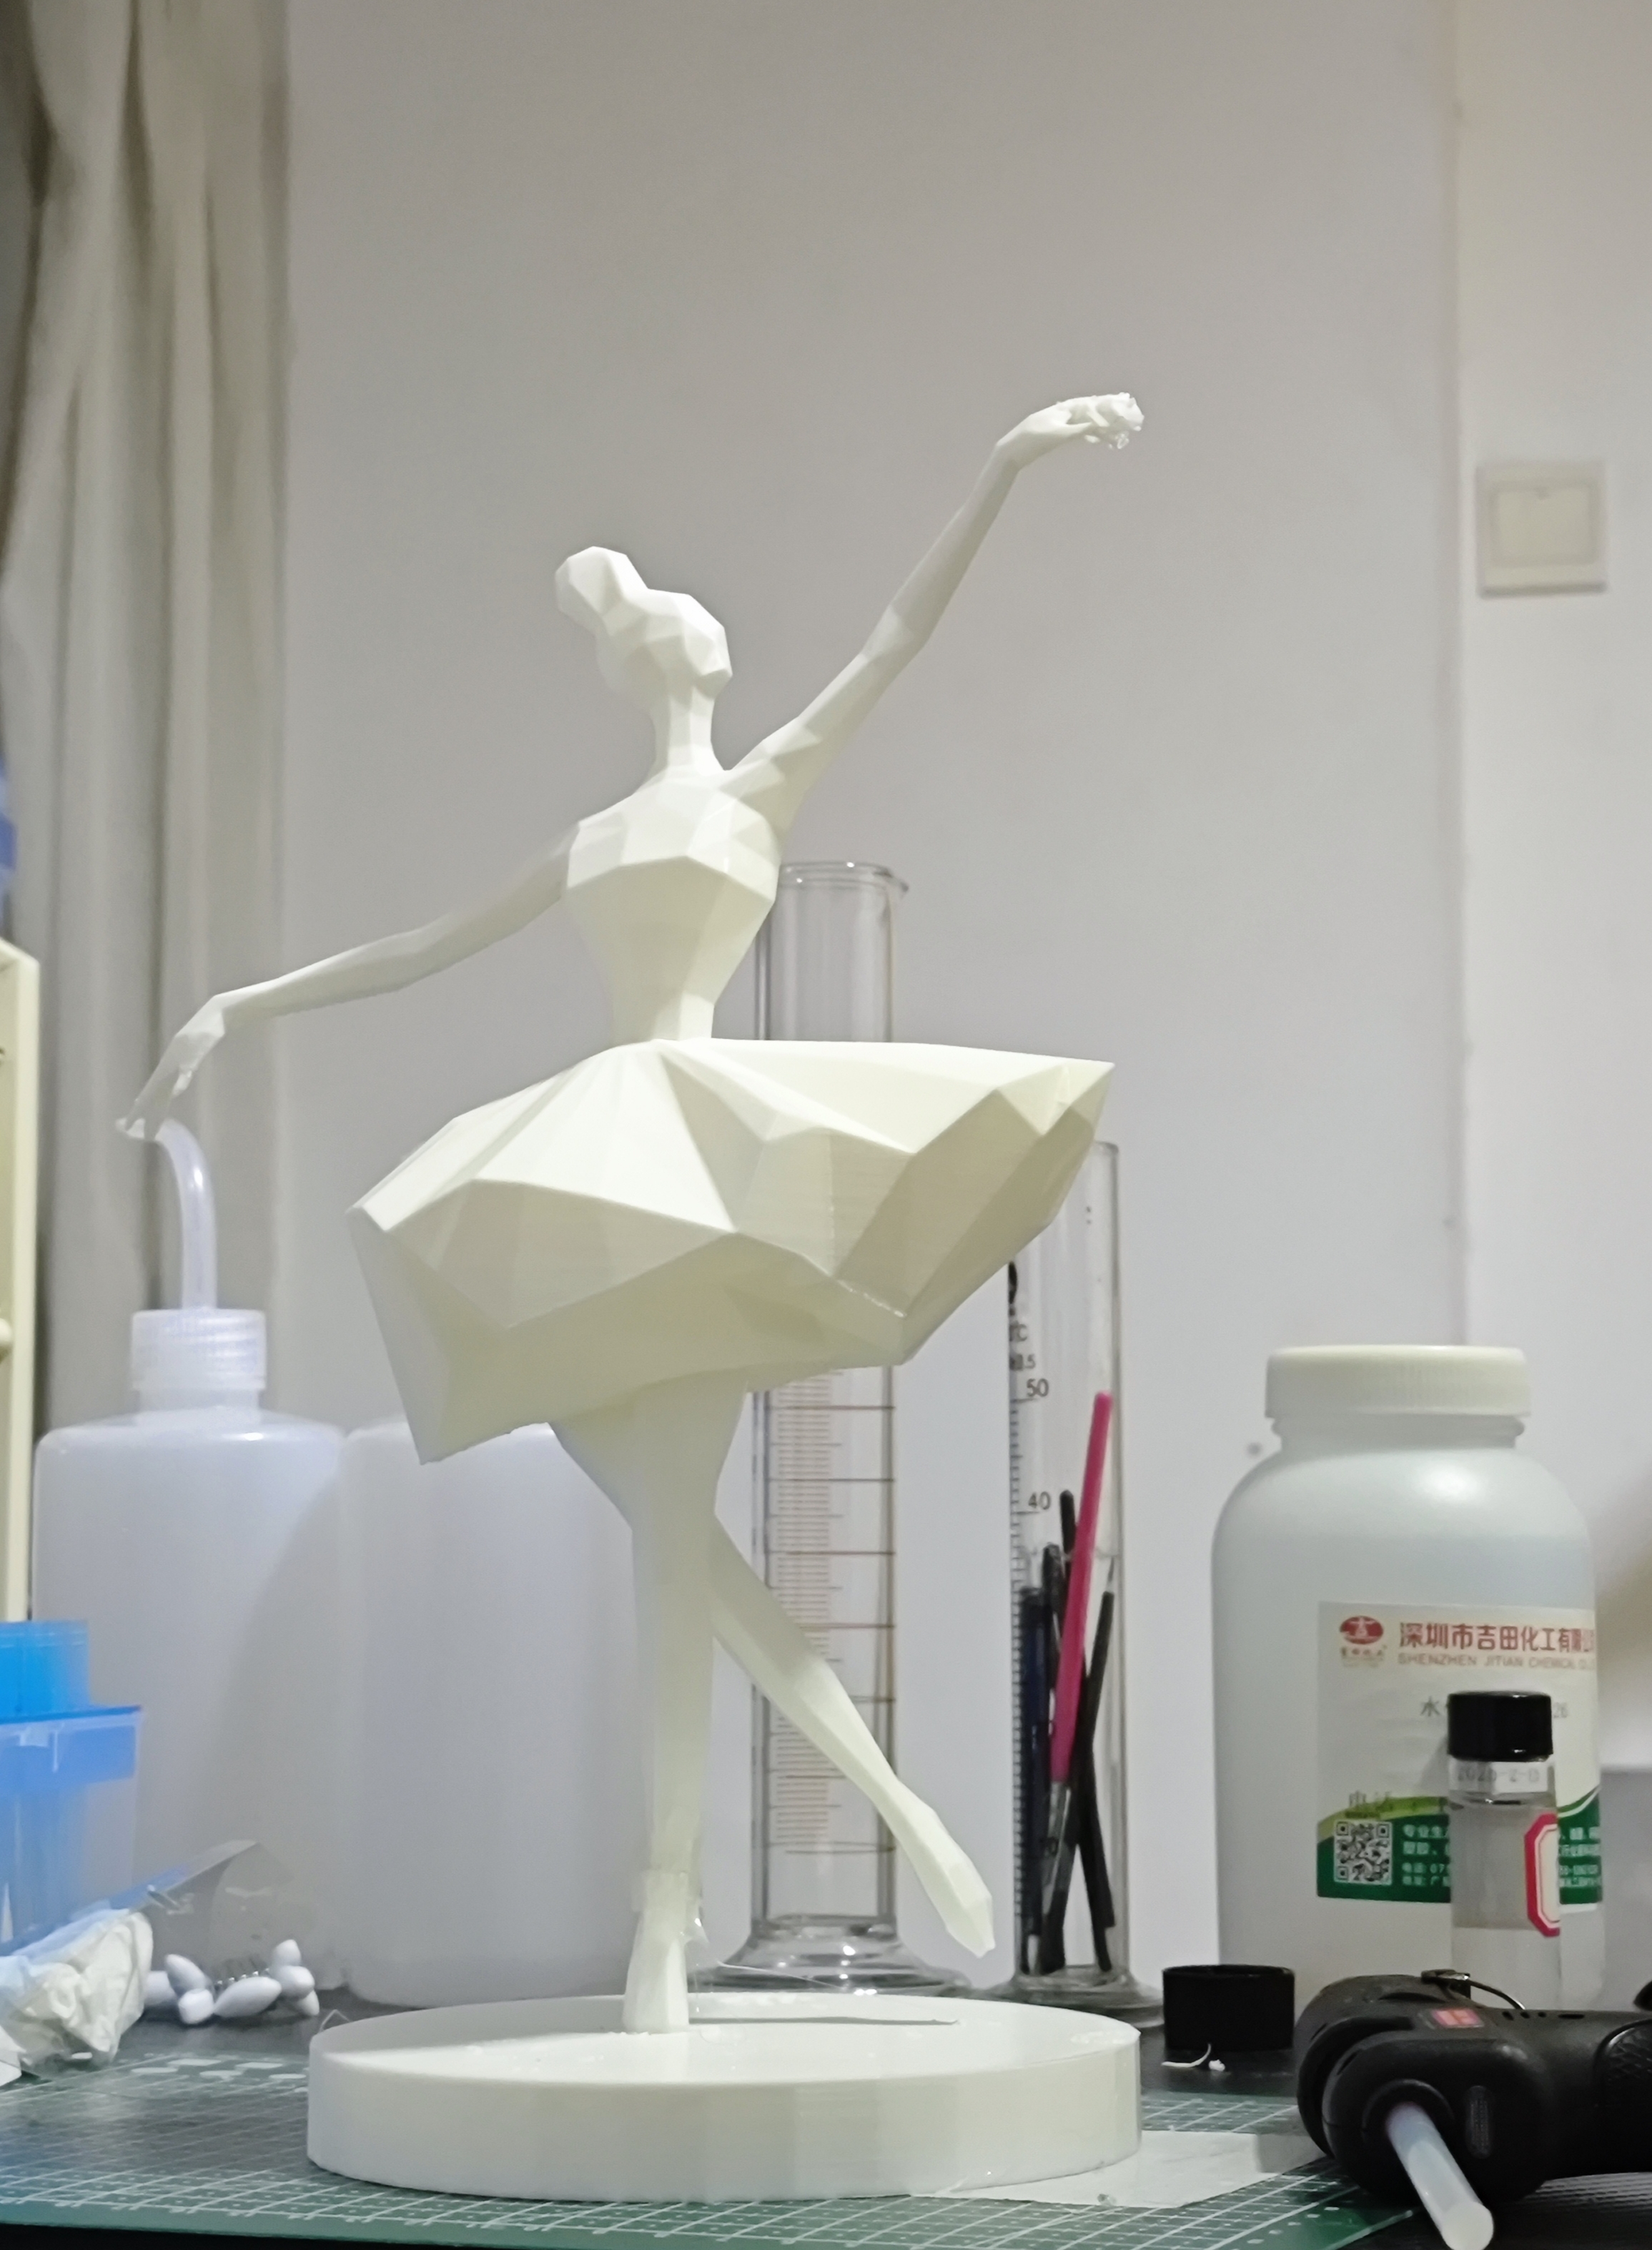
A print product is shown as follows:
HP MJM
The detail MJM printer information can be previewed by clicking here.