Project Management
0. Essential Software & Tools (Download Links)
| Tool | Description | Download Link |
|---|---|---|
| Git | Version control system (Required) | Download Git |
| VS Code | Code editor (Recommended) | Download VS Code |
| Node.js | Runtime for VitePress (Required) | Download Node.js (LTS) |
| GitHub Desktop | GUI client for Git (Easier to use) | Download GitHub Desktop |
| PicGo | Image uploader tool | Download PicGo |
| VitePress | The documentation framework we use | Official Documentation |
| Google Chrome | Recommended Browser for Development | Download Chrome |
| Typora | Standalone Markdown Editor (Optional) | Download Typora |
1. GitHub Settings
Create a new GitHub jasperxi0218/imageuploadservice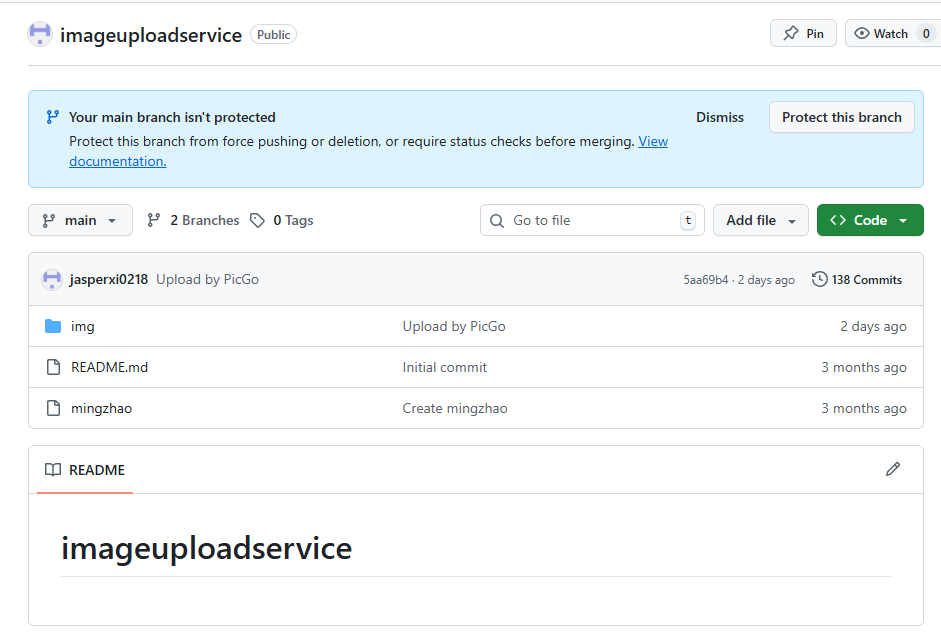 Download the Picgo software
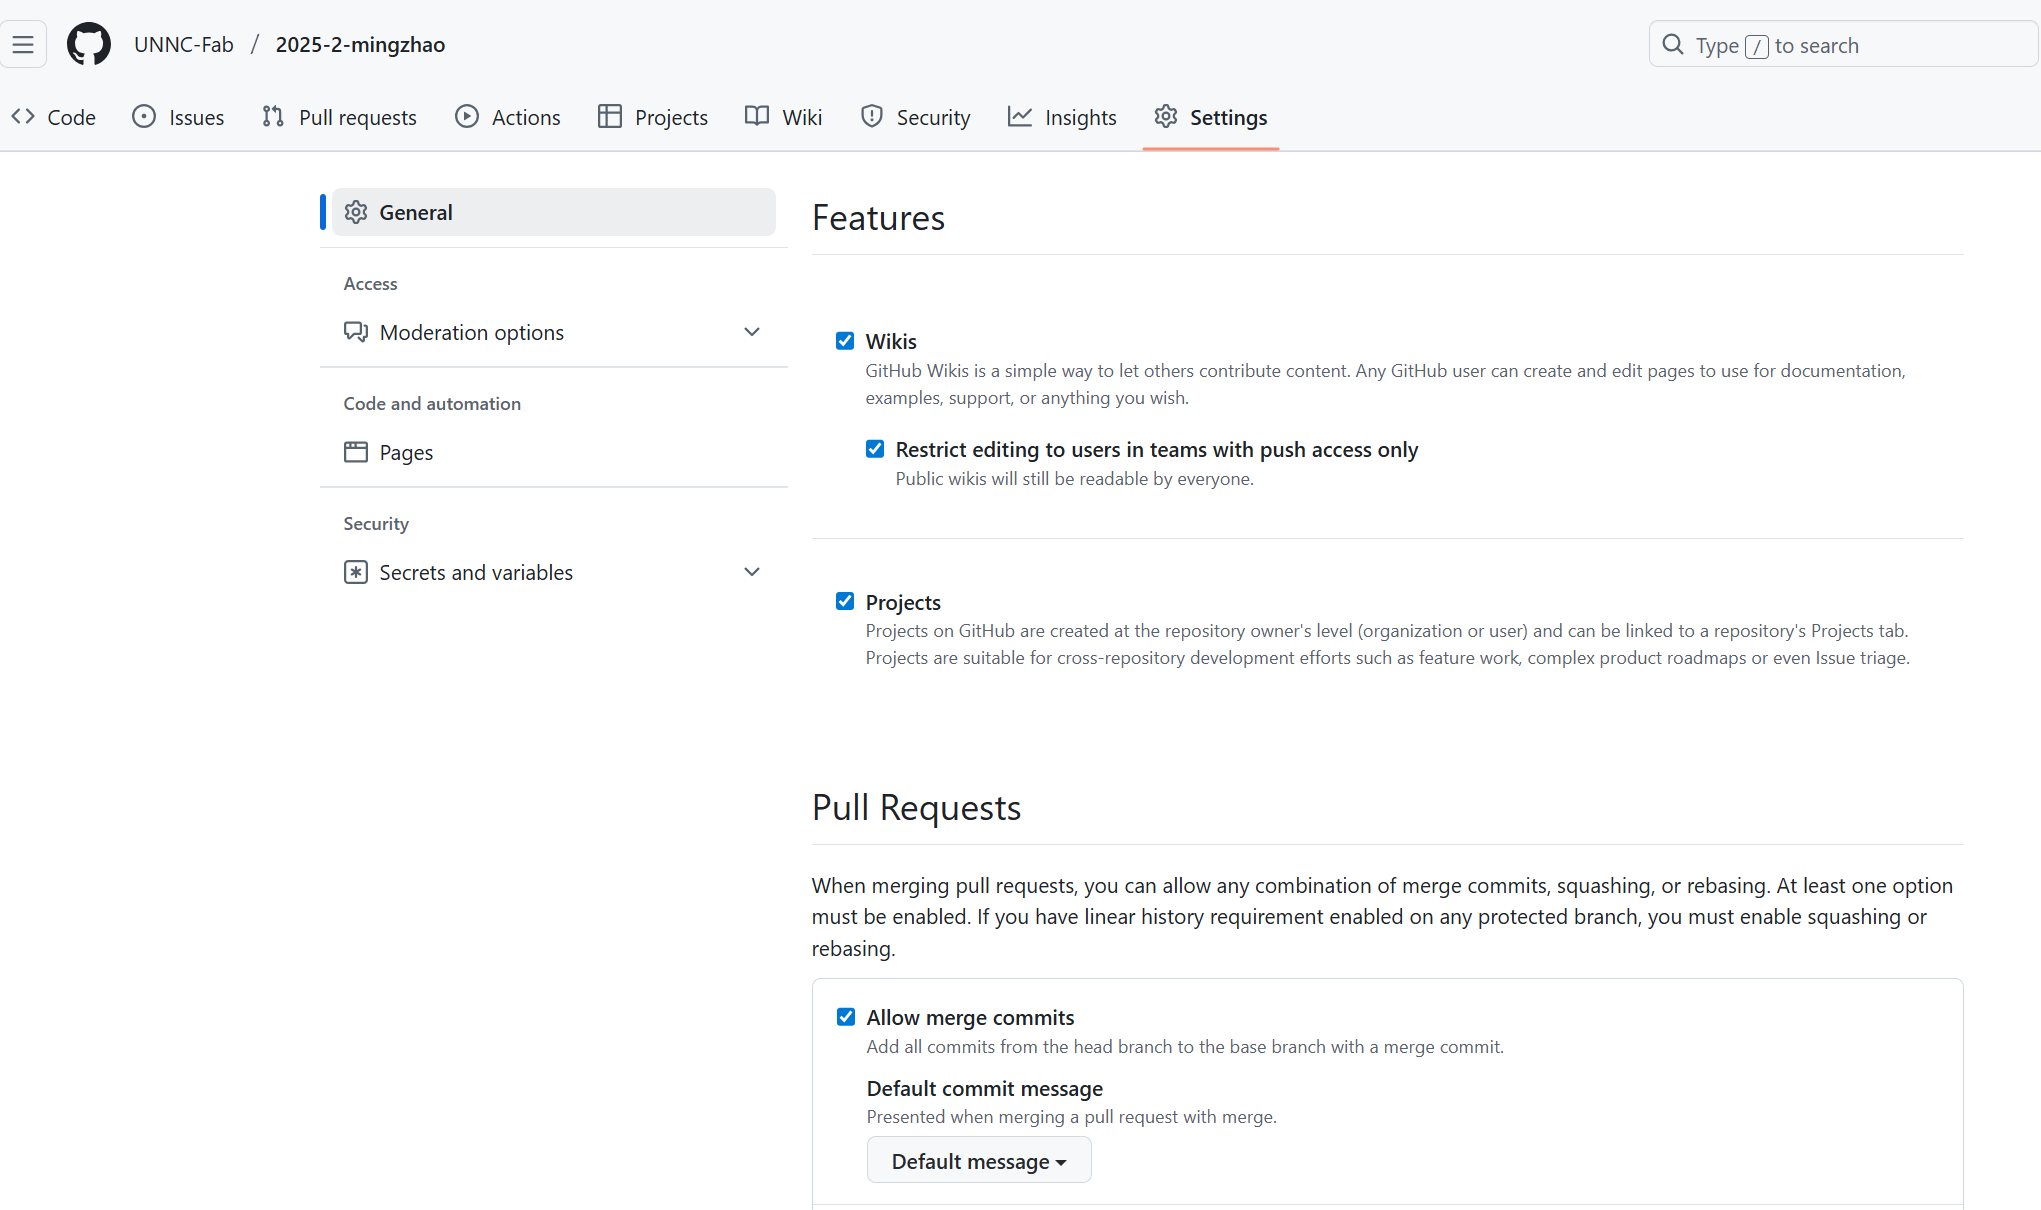
 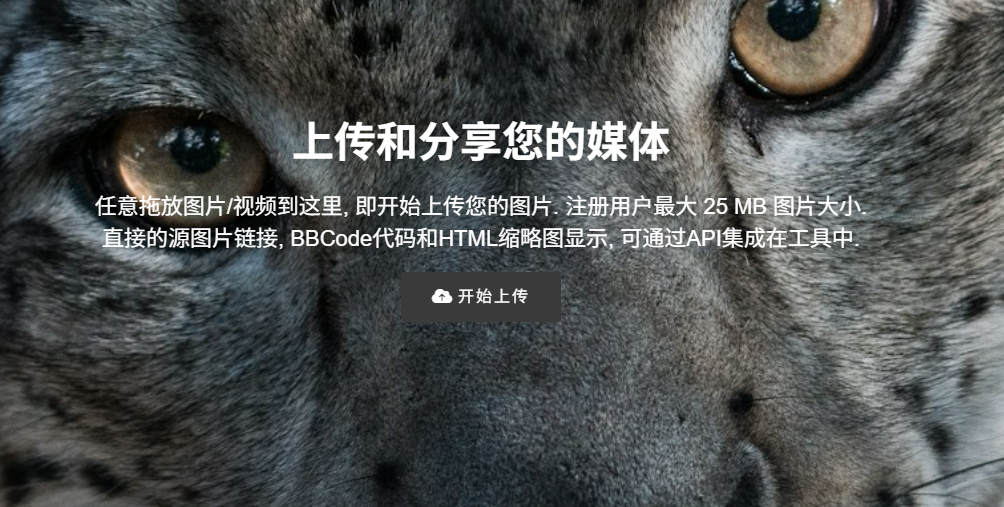 Once members are invited, go to Settings to configure project permissions and collaboration options.
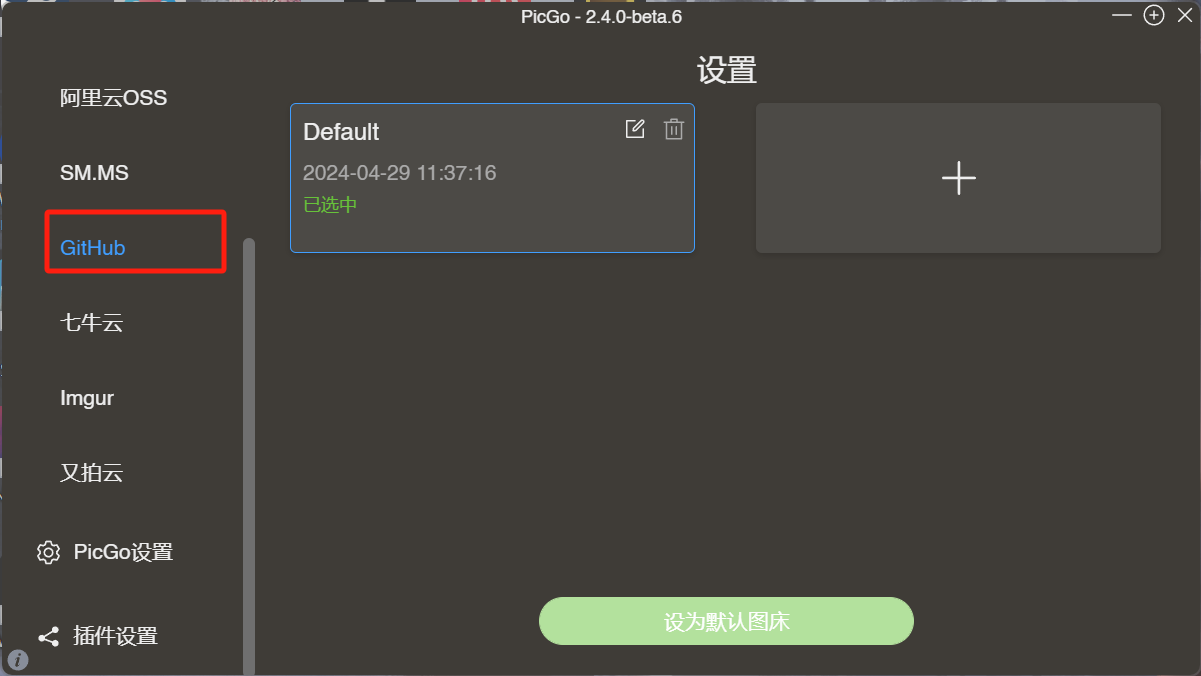
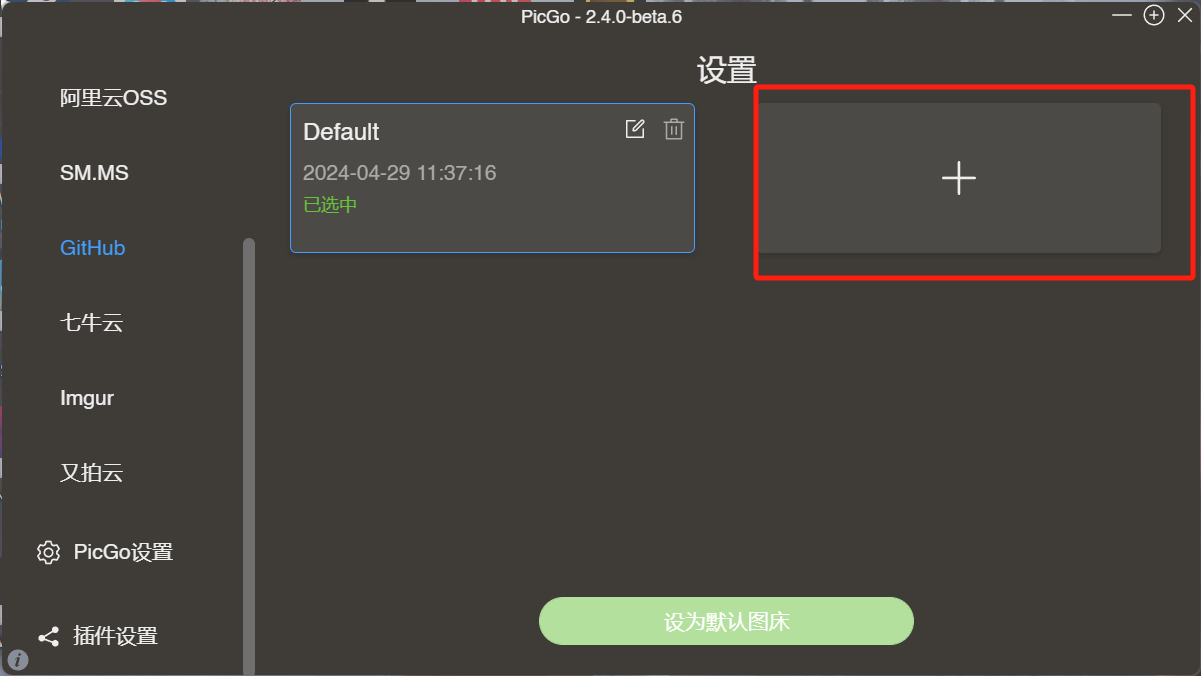
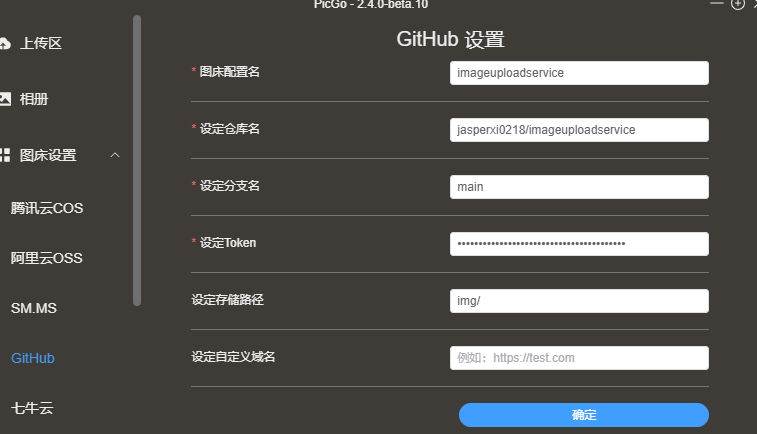 Set the token
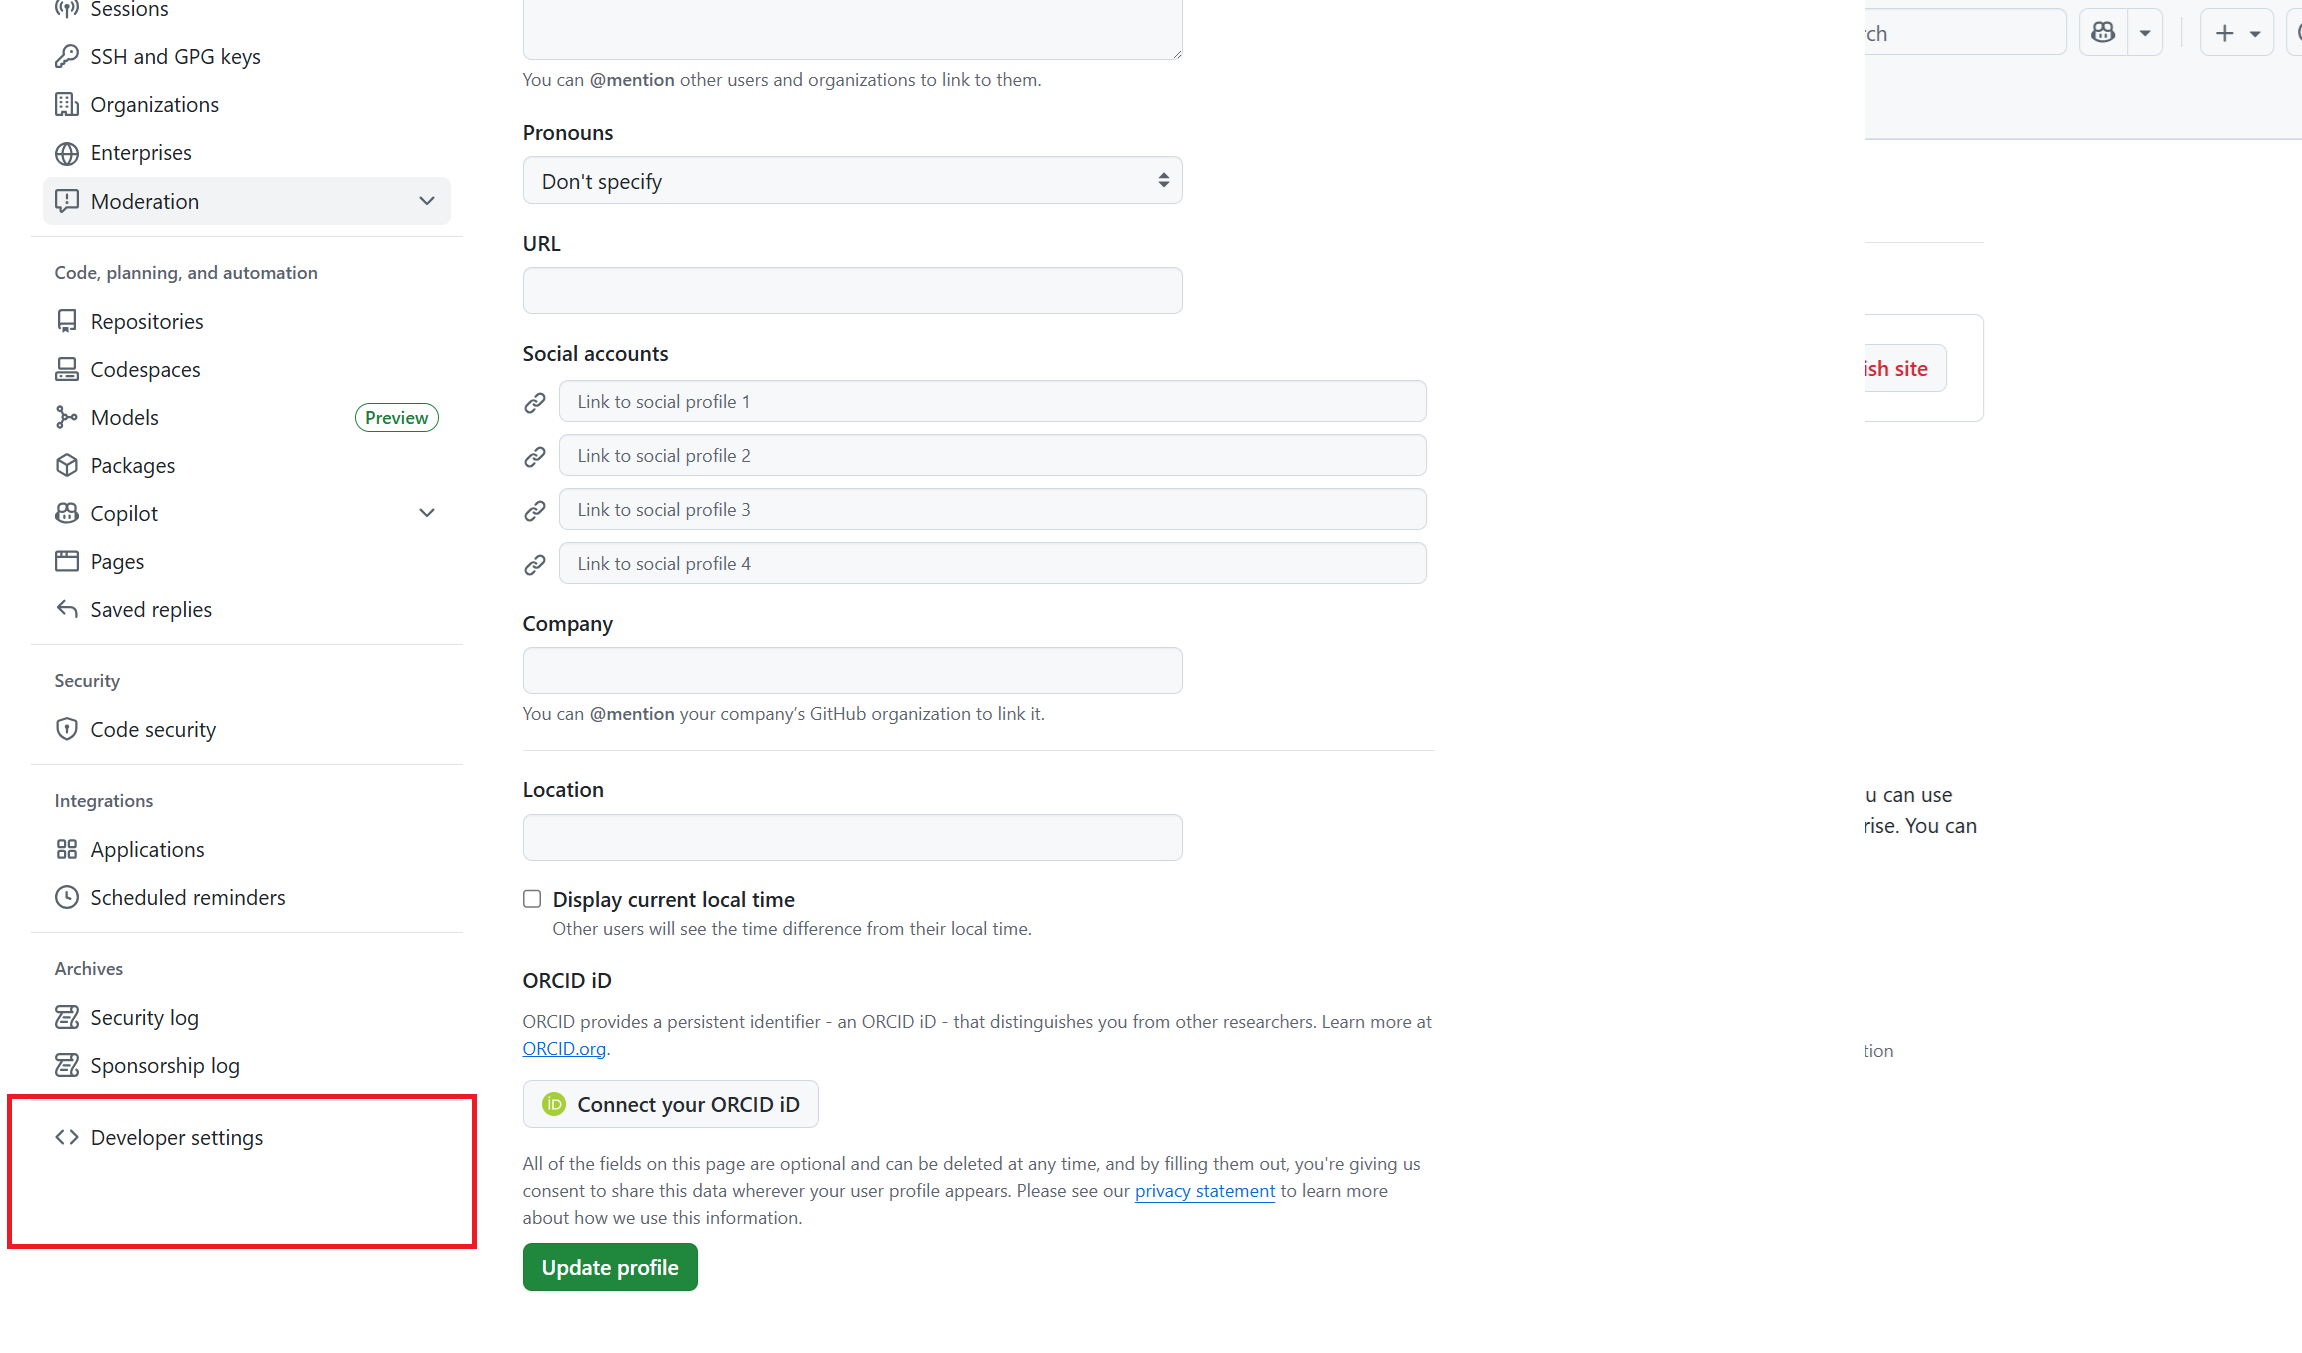
 Complete the setup.
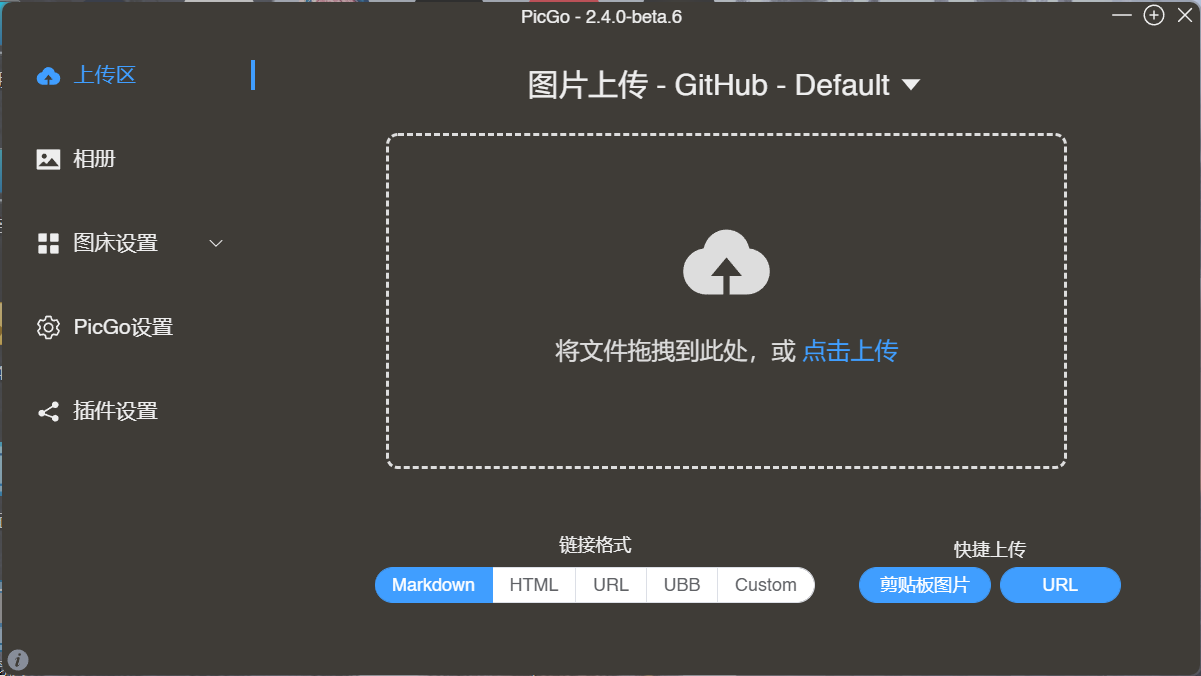 Upload pictures here.
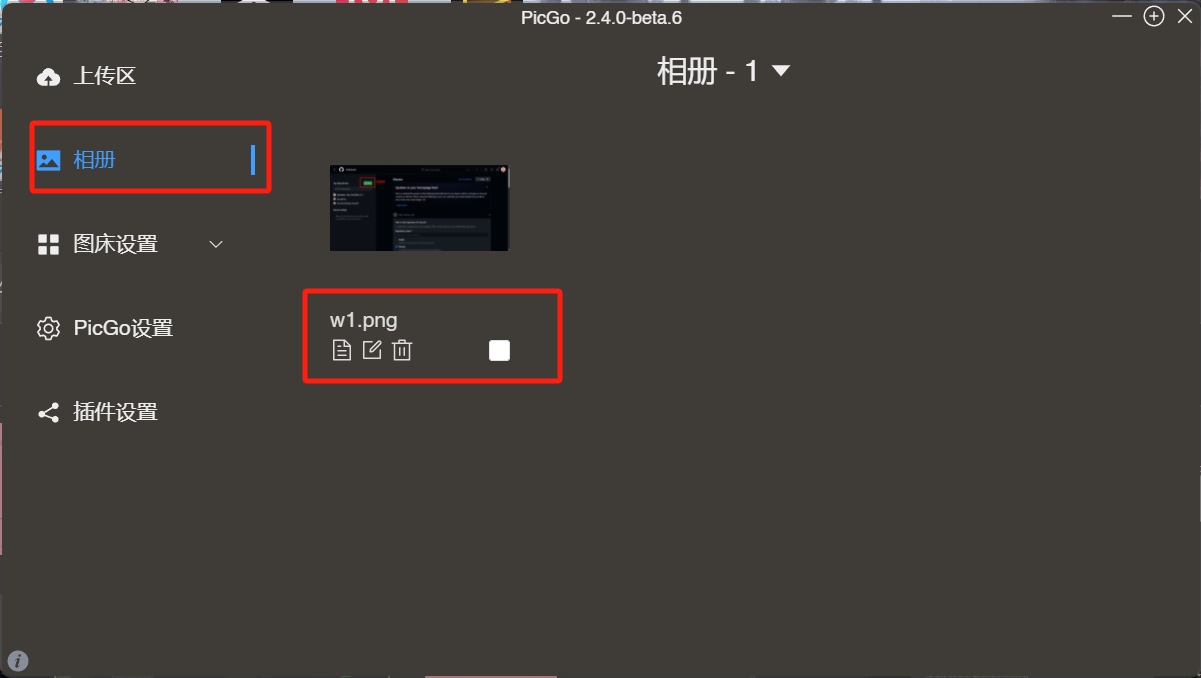 View and manage images here.
2. Create a Repository
To start, we need to create a repository on GitHub at github.com. 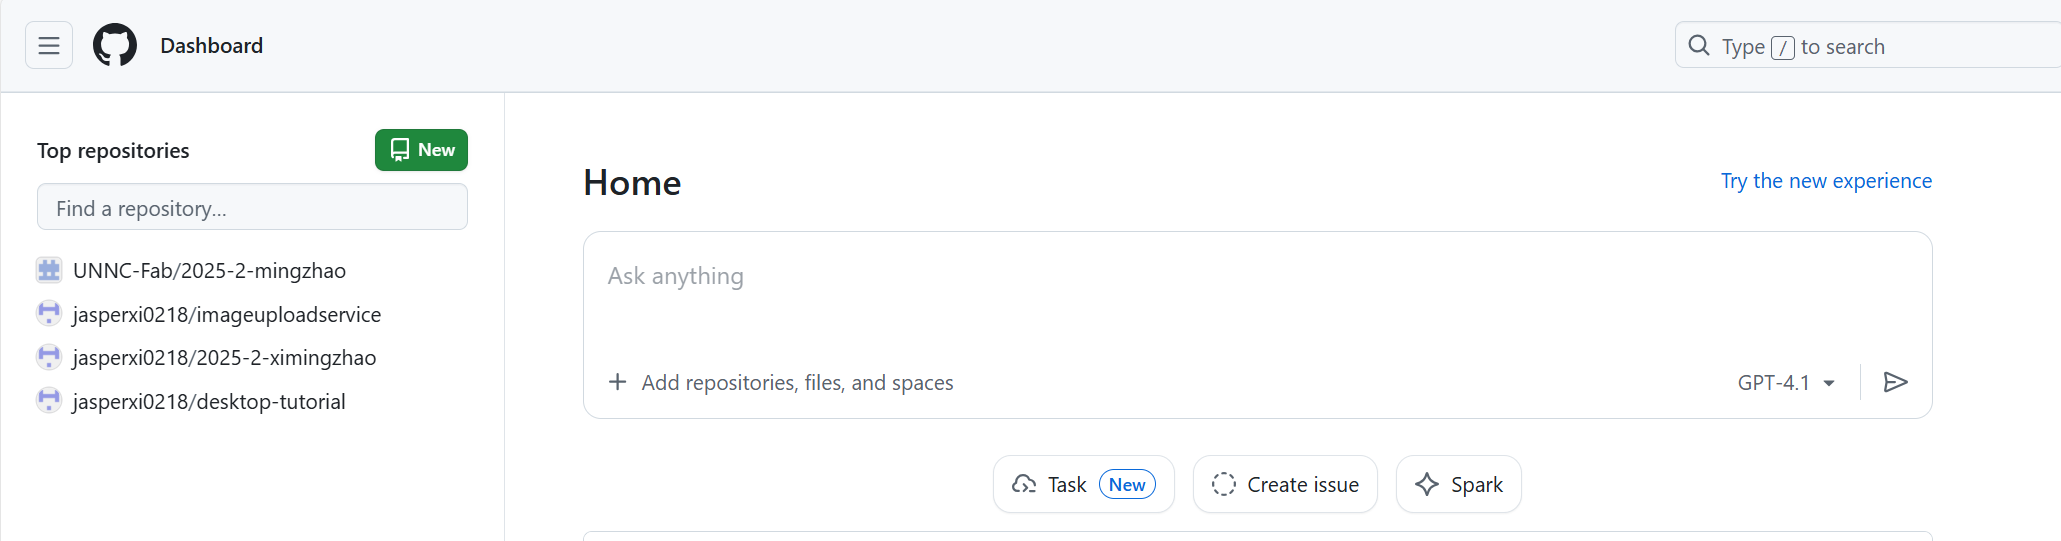
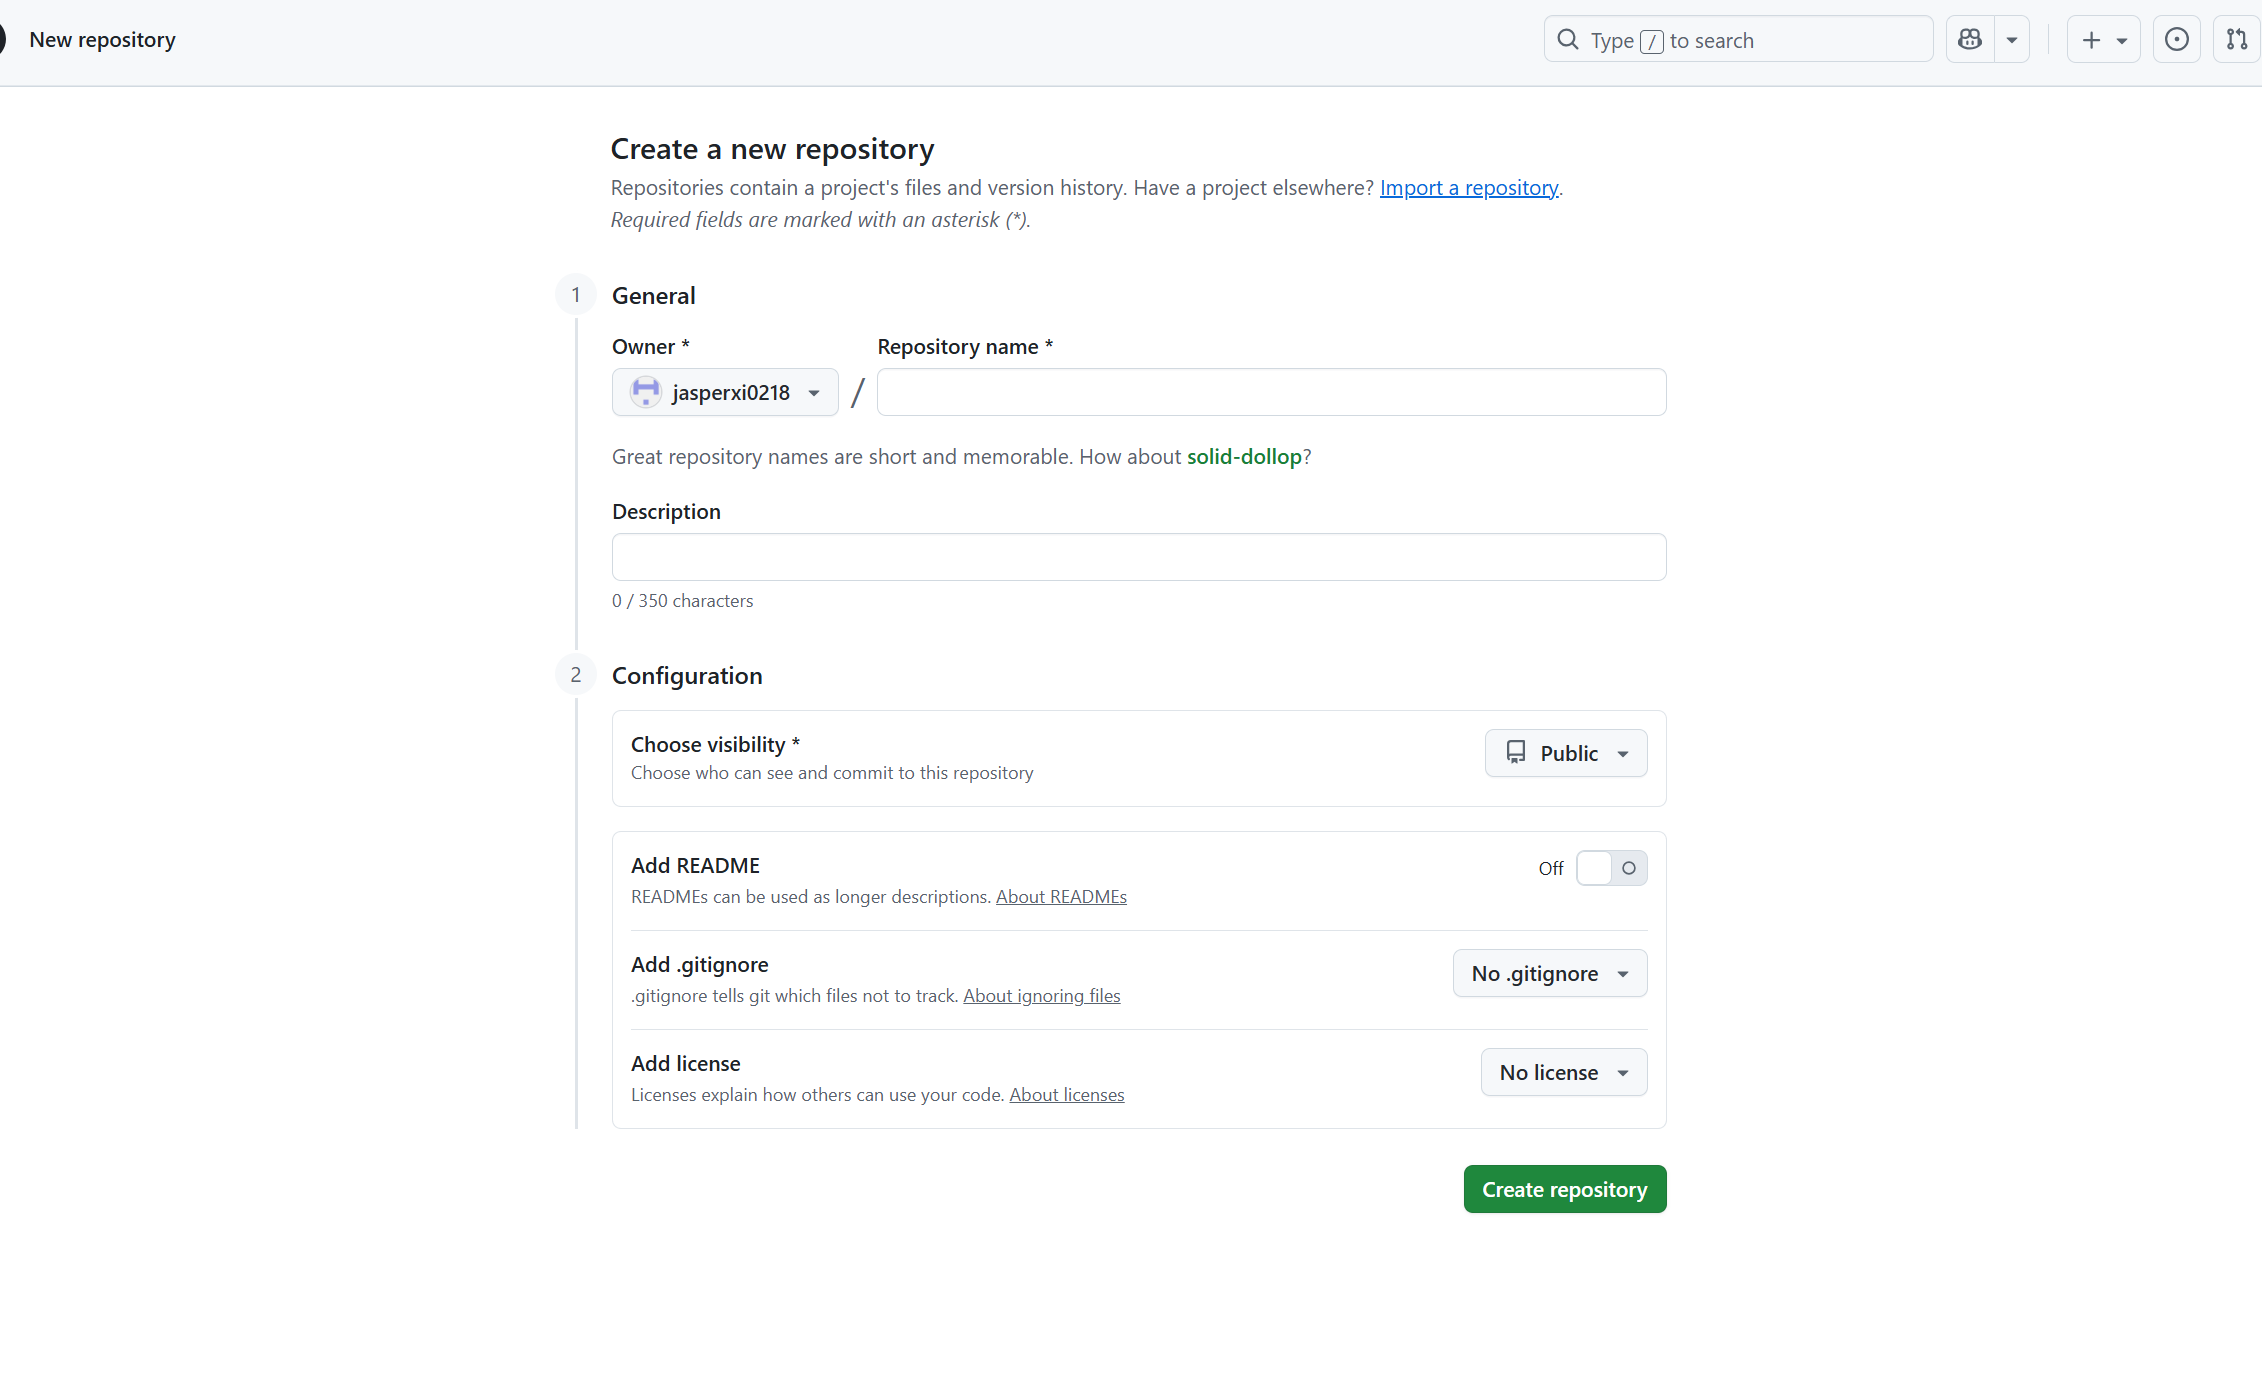 Set the repository name first. As we continue to create our repository, we need to set our visibility to Public, allowing Internet users to access it.
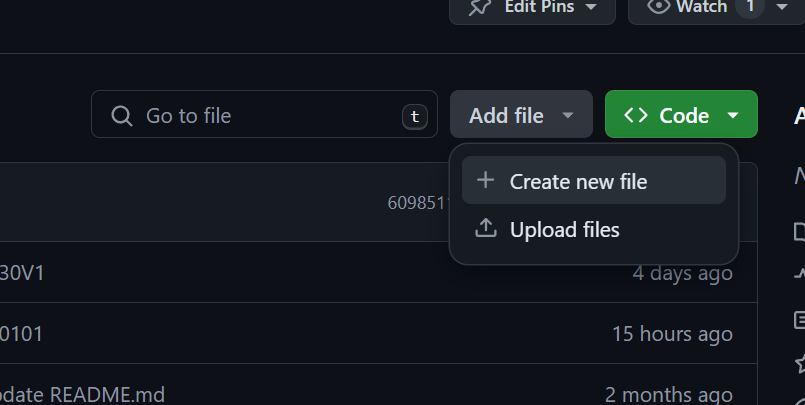
 Be sure to include a README file in the repository, as this is where we can provide a comprehensive project description.
Complete creation.
3. Member Invitation
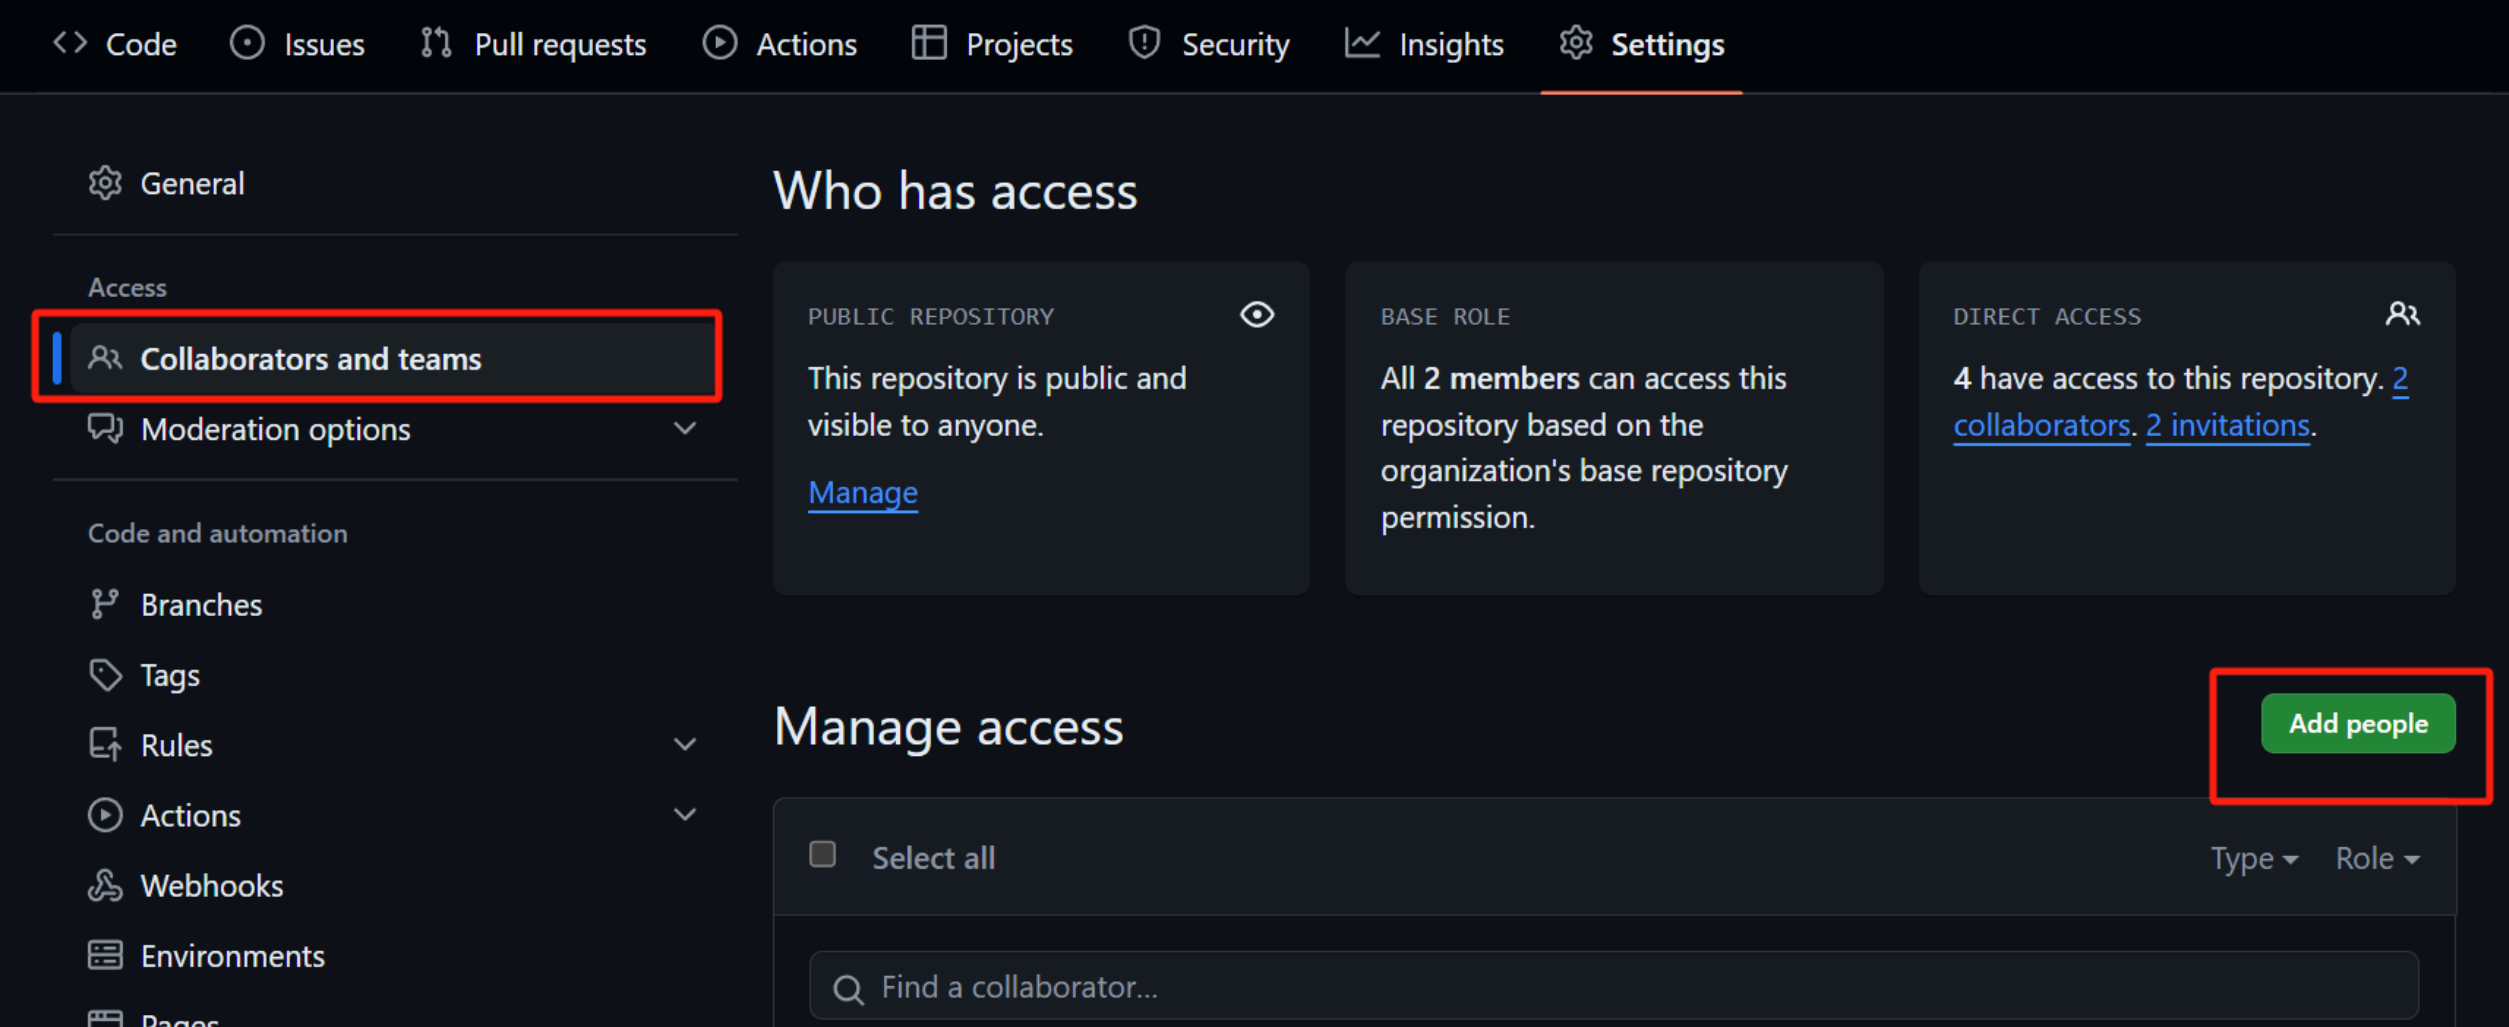 You can invite team members to your repository. After inviting, you can view the list of invited members in the repository settings.
4. Upload Web Page
Use Clone, Pull, and Push commands to manage your code locally and synchronize with GitHub.
Step 1: Clone (First Time Only)
Download the repository from GitHub to your local computer.
Click the green Code button on GitHub and copy the URL.
In GitHub Desktop (or terminal), select Clone Repository.
Step 2: Push (Upload Changes)
After editing your files in VS Code, you need to upload them.
Commit: Write a summary (e.g., "update docs") and click Commit to main.
Push: Click Push origin to upload your changes to the GitHub server.
Click to upload (Push)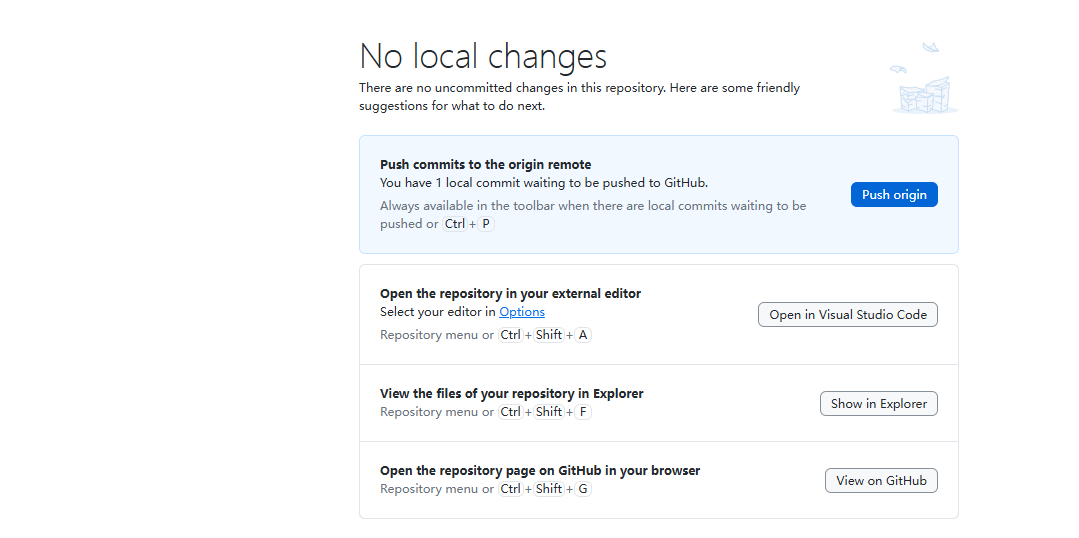
Then you can view it on your GitHub webpage (after GitHub Actions finishes building). 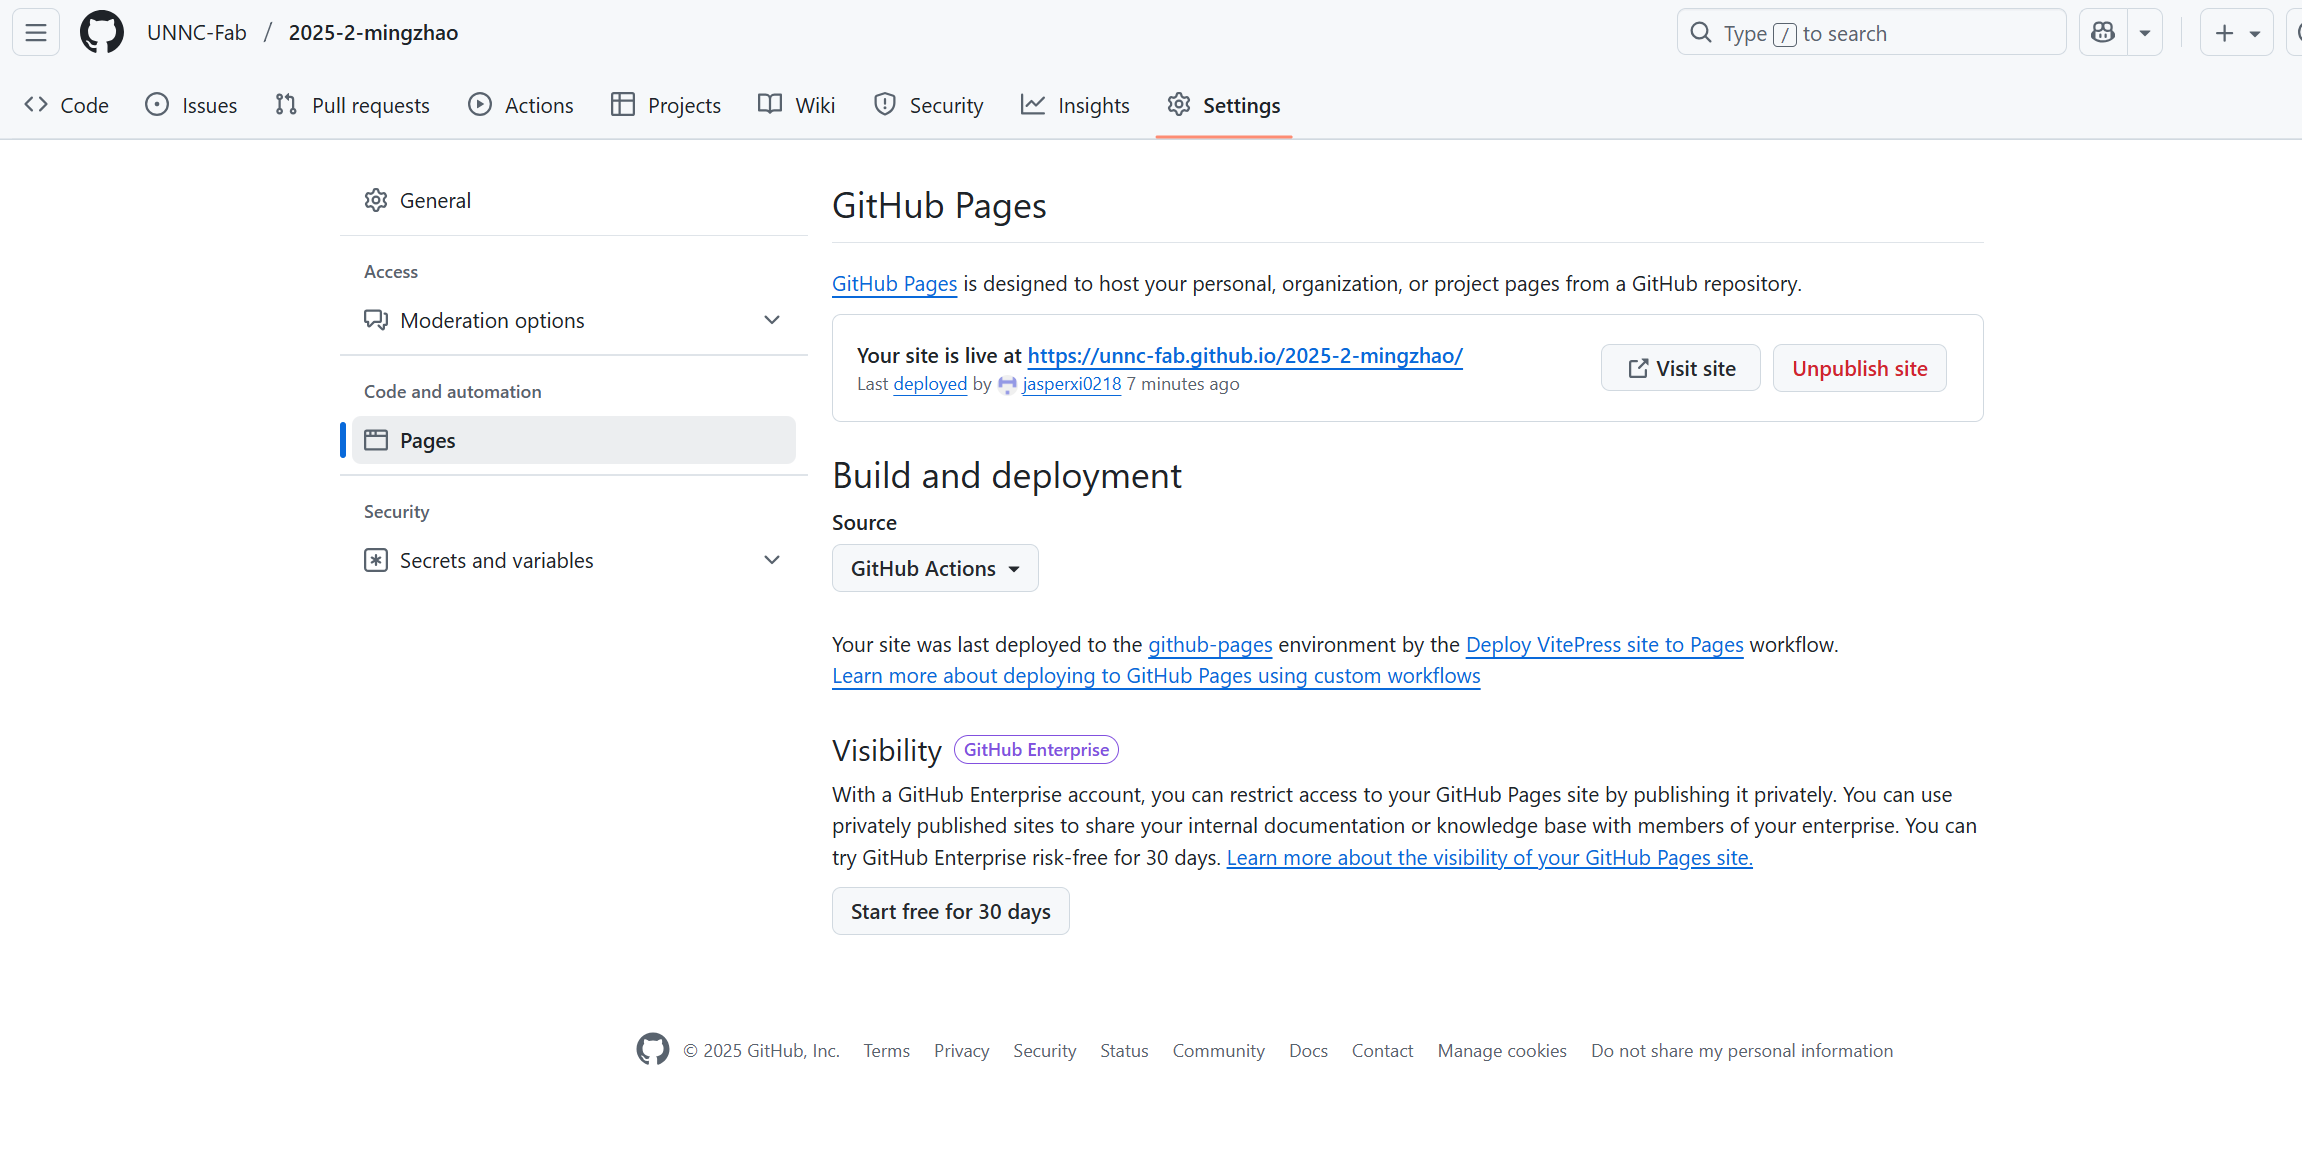
Step 3: Pull (Sync Updates)
If you (or a teammate) modified files on another computer or directly on the GitHub website, your local files will be outdated.
Click Fetch origin -> Pull origin to download the latest changes to your local computer.
Tip: Always "Pull" before you start working to avoid conflicts.
Prerequisites: Environment Setup
Before creating a repository, we need to set up the local development environment.
Git Installation
- Windows: Download Git for Windows. Install with default settings.
- macOS: Run
brew install gitin Terminal. - Linux: Run
sudo apt install git.
Crucial Configuration: Open terminal and run the following commands to configure Git with your name and email:
git config --global user.name "Your Name"
git config --global user.email "your_email@example.com"
VS Code Setup
- Download: Install Visual Studio Code.
- Extensions: Install the following extensions:
- Vue (Official): This extension provides syntax highlighting, snippets, and tooling for Vue.js development.
- Prettier: This extension ensures consistent code formatting across the project.
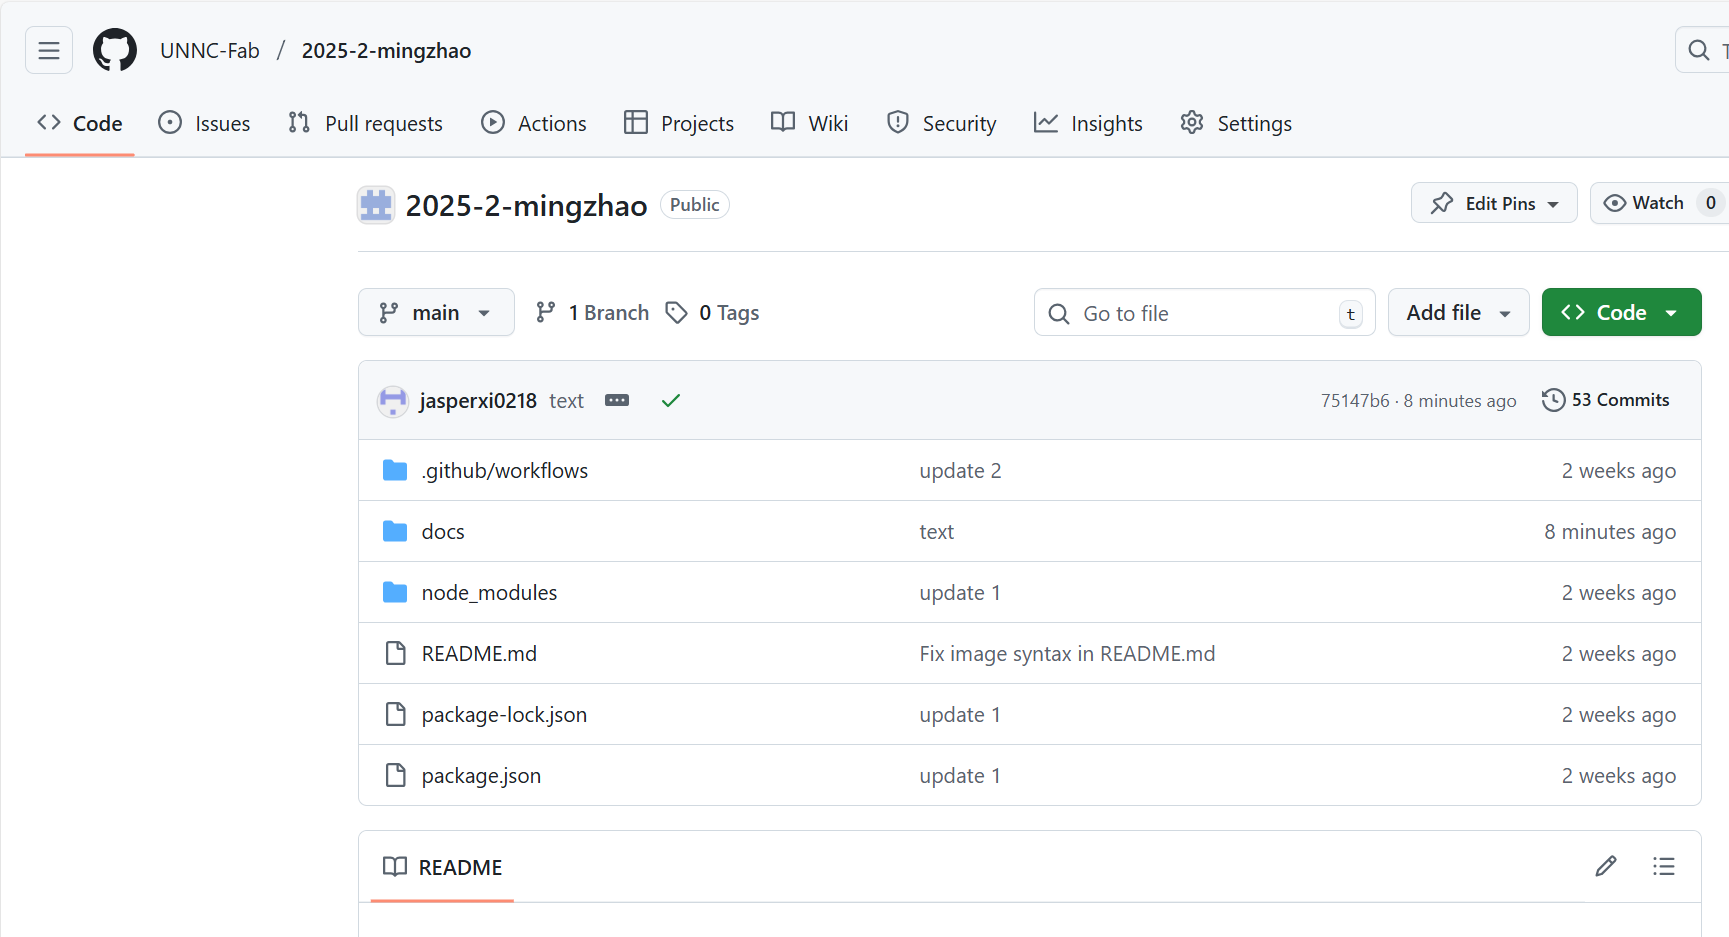
Project Directory Structure (Detailed)
This is the complete file structure of our VitePress project in VS Code.
2025-2-mingzhao/                # Root Project Directory (Project Name)
├── .git/                       # Git Version Control System (Hidden Folder)
├── .github/                    # GitHub Configuration
│   └── workflows/              # Automation Scripts
│       └── deploy.yml          # GitHub Actions CI/CD Script
├── docs/                       # Source Code for Documentation
│   ├── .vitepress/             # Core VitePress Configuration
│   │   ├── cache/              # Cache Files (Auto-generated)
│   │   ├── dist/               # Build Output (The actual website files)
│   │   ├── theme/              # Custom Theme Settings
│   │   │   ├── index.ts        # Theme Entry File
│   │   │   └── style.css       # Custom CSS (Cyberpunk Style)
│   │   └── config.mts          # Main Site Config (Nav, Sidebar, Search)
│   ├── daily-homework/         # Folder: Daily Homework Modules
│   │   ├── ai-bp.md
│   │   ├── arduino.md
│   │   ├── cad-design.md
│   │   ├── computer-control-cutting.md
│   │   ├── electronics-design.md
│   │   ├── electronics-production.md
│   │   ├── final-project-debug.md
│   │   ├── laser-cutting.md
│   │   ├── molding-and-casting.md
│   │   ├── networking-communications.md
│   │   ├── processing.md
│   │   └── project-management.md
│   ├── finalwork/              # Folder: Final Project
│   │   └── psychological-sand-table.md
│   ├── public/                 # Static Assets (Accessible from root)
│   │   ├── dashboard.html      # Custom Landing Page (Cyberpunk Dashboard)
│   │   └── [images...]         # Project Images
│   ├── small-homework-in-class/# Folder: Class Assignments
│   │   ├── google-development-language.md
│   │   ├── gpl-3-0.md
│   │   └── laser-standards.md
│   └── index.md                # Home Page Redirector
├── node_modules/               # Dependencies Libraries (Do NOT upload to GitHub)
├── .gitignore                  # List of files to ignore (e.g., node_modules)
├── package-lock.json           # Dependency Tree Lock File
└── package.json                # Project Manifest & Scripts
5. Advanced Features
5.1 Search Bar Setup
To enable the built-in local search in VitePress, ensure your docs/.vitepress/config.mts includes the following setting inside themeConfig:
export default defineConfig({
  themeConfig: {
    search: { provider: 'local' },
    // ... other settings (nav, sidebar)
  }
})
5.2 Google Search Integration (Custom Component)
We implemented a custom search box in the navigation bar that allows users to search keywords directly on Google. This involves creating a Vue component and injecting it into the VitePress theme layout.
Step 1: Create Search Component
File path: docs/.vitepress/components/GoogleSearch.vue
This component handles the user input and redirects to Google's search URL.
<script setup>
import { ref } from 'vue'

const query = ref('')

function search() {
  const text = query.value.trim()
  if (!text) return

  // Construct Google Search URL
  const googleUrl = '[https://www.google.com/search?q=](https://www.google.com/search?q=)' + encodeURIComponent(text)
  window.open(googleUrl, '_blank')
}
</script>

<template>
  <div class="google-search-box">
    <input
      type="text"
      v-model="query"
      @keyup.enter="search"
      placeholder="Google All..."
      class="search-input"
    />
    <button @click="search" class="search-btn">GO</button>
  </div>
</template>

<style scoped>
/* CSS for the input box and button */
.google-search-box { display: flex; align-items: center; margin-left: 20px; gap: 8px; }
.search-input {
    border: 1px solid var(--vp-c-divider);
    border-radius: 4px;
    padding: 4px 8px;
    width: 150px;
    transition: width 0.3s;
}
.search-input:focus { width: 180px; border-color: var(--vp-c-brand-1); }
.search-btn {
    background-color: var(--vp-c-brand-1);
    color: #000;
    padding: 4px 10px;
    border-radius: 4px;
    font-weight: bold;
}
</style>
Step 2: Register Component in Theme
File path: docs/.vitepress/theme/index.ts
We use the nav-bar-content-after slot to inject our custom component into the navigation bar.
TypeScript

// @ts-nocheck
import DefaultTheme from 'vitepress/theme'
import { h } from 'vue'
import './style.css'
import GoogleSearch from '../components/GoogleSearch.vue' // Import component

export default {
  extends: DefaultTheme,
  Layout() {
    return h(DefaultTheme.Layout, null, {
      // Inject search box after nav links
      'nav-bar-content-after': () => h(GoogleSearch)
    })
  },
  enhanceApp({ app }) {
  }
}
5.3 AI Assistant Integration (Dual-Mode Chatbot)
We integrated a smart AI chatbot directly into the landing page (dashboard.html). It is designed to work in two modes: Online (API) and Offline (Local Knowledge Base), ensuring the site remains functional even without an internet connection or API key.
Implementation Strategy
- File:
docs/public/dashboard.html(Embedded JavaScript) - Security: API Keys are stored in the user's browser LocalStorage, never on the server.
- API Support: Compatible with OpenAI format APIs (e.g., DeepSeek, Gemini).
Core Logic (JavaScript)
The system checks for an API Key. If present, it calls the cloud model; otherwise, it falls back to a predefined local dictionary.
// 1. Storage Management
let apiKey = localStorage.getItem('fab_ai_key') || '';
let apiModel = localStorage.getItem('fab_ai_model') || 'gemini-1.5-flash';

// 2. Message Handling Logic
async function sendAIMessage() {
    // ... get user input ...

    if (apiKey) {
        // --- Mode A: Online (API) ---
        // Sends request to LLM (DeepSeek / Gemini)
        const response = await fetch(apiBaseUrl + '/chat/completions', {
            method: 'POST',
            headers: {
                'Authorization': `Bearer ${apiKey}`,
                'Content-Type': 'application/json'
            },
            body: JSON.stringify({
                model: apiModel,
                messages: [{ role: "user", content: msg }]
            })
        });
        // ... render markdown response ...
    } else {
        // --- Mode B: Offline (Local Knowledge Base) ---
        // Keyword matching for instant replies
        const kb = {
            'arduino': "Arduino is an open-source electronics platform...",
            'safety': "Lab Safety Rules: 1. Wear safety glasses...",
            // ... more predefined answers
        };
        // ... find match and reply ...
    }
}
UI Design
The chat widget uses fixed positioning to stay at the bottom-right corner, with a Glassmorphism effect created by CSS backdrop-filter.
CSS

#ai-widget {
    position: fixed;
    bottom: 20px;
    right: 20px;
    background: rgba(0, 0, 0, 0.95);
    backdrop-filter: blur(10px);
    z-index: 100;
}
5.4 Custom Styling (Cyberpunk Theme)
To fix visibility issues (e.g., black text on black background) and achieve a "Cyberpunk" look, we created a custom CSS file to override the default VitePress theme.
Step 1: Create Theme Entry File
File path: docs/.vitepress/theme/index.ts
This file tells VitePress to load our custom CSS.
// @ts-nocheck
import DefaultTheme from 'vitepress/theme'
import './style.css' // Import custom styles

export default {
  extends: DefaultTheme,
  enhanceApp({ app }) {
  }
}
Step 2: Define Custom Styles
File path: docs/.vitepress/theme/style.css
We use CSS variables to force a dark background (#050505) and white text (#ffffff), ensuring readability while adding neon accents.
CSS

/* Import Cyberpunk Font */
@import url('[https://fonts.googleapis.com/css2?family=JetBrains+Mono:wght@400;700&display=swap](https://fonts.googleapis.com/css2?family=JetBrains+Mono:wght@400;700&display=swap)');

:root {
    /* --- Force Dark Background --- */
    --vp-c-bg: #050505 !important;
    --vp-c-bg-alt: #0b0d14 !important;

    /* --- Force White Text for Visibility --- */
    --vp-c-text-1: #ffffff !important;
    --vp-c-text-2: #e0e0e0 !important;

    /* --- Neon Accent Colors --- */
    --vp-c-brand-1: #00f3ff !important; /* Cyan */
    --vp-c-brand-2: #00c2cc !important;

    /* --- Glowing Borders --- */
    --vp-c-border: rgba(0, 243, 255, 0.3) !important;
}

/* Fix Paragraph & List Visibility */
.vp-doc p, .vp-doc li {
    color: #e0e0e0 !important;
}

/* Neon Title Effect */
h1, h2, h3 {
    background: -webkit-linear-gradient(45deg, #00f3ff, #bc13fe);
    -webkit-background-clip: text;
    -webkit-text-fill-color: transparent;
    font-weight: bold;
}
6. Project Code Reference
These are the critical configuration files for your project. You can refer to them if you need to restore settings.
6.1 Home Page
This file handles the redirect to your custom dashboard.
---
layout: home
hero:
  name: My project
  text: UNNC-Fab/2025-2-xi mingzhao
sidebar: false
aside: false
outline: false
---

<script setup>
import { onMounted } from 'vue'
onMounted(() => {
  // Redirect to the custom HTML dashboard in public folder
  window.location.replace('dashboard.html')
})
</script>

<style>
/* Prevent white flash during redirect */
html, body {
    background-color: #050505;
    color: #333;
}
</style>
6.2 Site Configuration (docs/.vitepress/config.mts)
This file controls the navigation bar, sidebar, and site title.
TypeScript

import { defineConfig } from 'vitepress'

export default defineConfig({
  title: 'UNNC-FAB 2025-2',
  description: 'MingZhao Portfolio',
  base: '/2025-2-mingzhao/',
  appearance: 'dark',
  cleanUrls: true,

  themeConfig: {
    siteTitle: 'UNNC-FAB 2025-2',

    nav: [
      { text: 'Home', link: '/' },
      { text: 'Daily homework', link: '/daily-homework/project-management' },
      { text: 'Finalwork', link: '/finalwork/psychological-sand-table' },
      { text: 'Small homework in class', link: '/small-homework-in-class/' }
    ],

    search: { provider: 'local' },

    sidebar: {
      '/daily-homework/': [
        {
          text: 'Daily homework',
          items: [
            { text: 'Project Management', link: '/daily-homework/project-management' },
            { text: 'Arduino', link: '/daily-homework/arduino' },
            { text: 'CAD design', link: '/daily-homework/cad-design' },
            { text: '3D Printer', link: '/daily-homework/3d-printer' },
            { text: 'Laser Cutting', link: '/daily-homework/laser-cutting' },
            { text: 'Molding and Casting', link: '/daily-homework/molding-and-casting' },
            { text: 'Processing', link: '/daily-homework/processing' },
            { text: 'Electronics Design', link: '/daily-homework/electronics-design' },
            { text: 'Electronics Production', link: '/daily-homework/electronics-production' },
            { text: 'Networking and Communications', link: '/daily-homework/networking-communications' },
            { text: 'Computer Control Cutting', link: '/daily-homework/computer-control-cutting' },
            { text: 'Final Project Debug', link: '/daily-homework/final-project-debug' },
            { text: 'AI & BP', link: '/daily-homework/ai-bp' }
          ]
        }
      ],

      '/finalwork/': [
        {
          text: 'Finalwork',
          items: [
            { text: 'Psychological sand table', link: '/finalwork/psychological-sand-table' }
          ]
        }
      ],
      '/small-homework-in-class/': [
        {
          text: 'Small homework in class',
          items: [
            { text: 'GPL 3.0', link: '/small-homework-in-class/gpl-3-0' },
            { text: "Google's development language", link: '/small-homework-in-class/google-development-language' },
            { text: 'National and regional standards', link: '/small-homework-in-class/laser-standards' }
          ]
        }
      ]
    },

    socialLinks: [
      { icon: 'github', link: '[https://github.com/UNNC-Fab/2025-2-mingzhao](https://github.com/UNNC-Fab/2025-2-mingzhao)' }
    ]
  }
})
6.3 Auto Deployment (.github/workflows/deploy.yml)
This GitHub Actions script automatically builds and deploys your site when you push to the main branch.
```yaml
name: Deploy VitePress site to Pages

on:
  push:
    branches: [main]
  workflow_dispatch:

permissions:
  contents: read
  pages: write
  id-token: write

concurrency:
  group: pages
  cancel-in-progress: false

jobs:
  build:
    runs-on: ubuntu-latest
    steps:
      - name: Checkout
        uses: actions/checkout@v4
        with:
          fetch-depth: 0

      - name: Setup Node
        uses: actions/setup-node@v4
        with:
          node-version: 22.14.0
          cache: npm

      - name: Setup Pages
        uses: actions/configure-pages@v4

      - name: Install dependencies
        run: npm ci

      - name: Build with VitePress
        run: npm run docs:build

      - name: Upload artifact
        uses: actions/upload-pages-artifact@v3
        with:
          path: docs/.vitepress/dist

  deploy:
    environment:
      name: github-pages
      url: ${{ steps.deployment.outputs.page_url }}
    needs: build
    runs-on: ubuntu-latest
    name: Deploy
    steps:
      - name: Deploy to GitHub Pages
        id: deployment
        uses: actions/deploy-pages@v4