PCB Manufacture
Step 1 Preperation
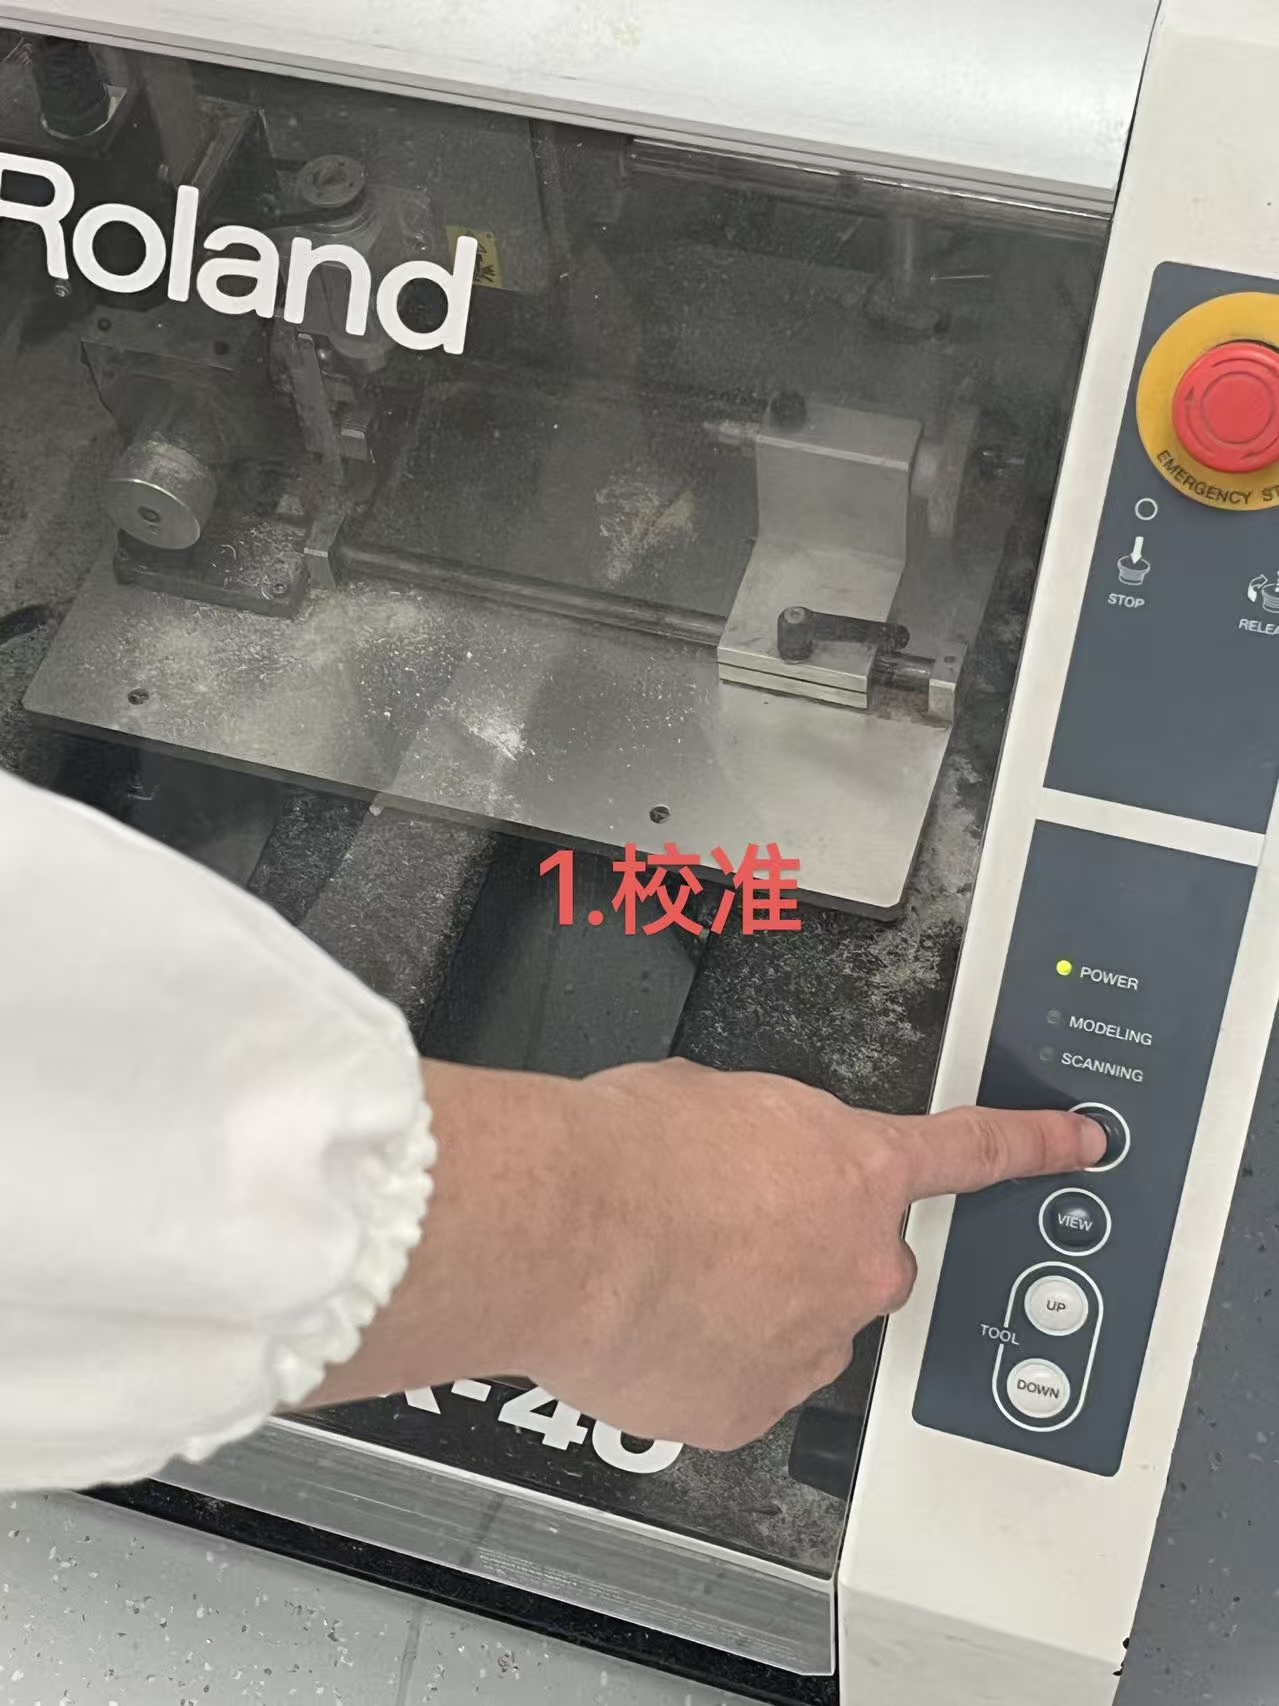
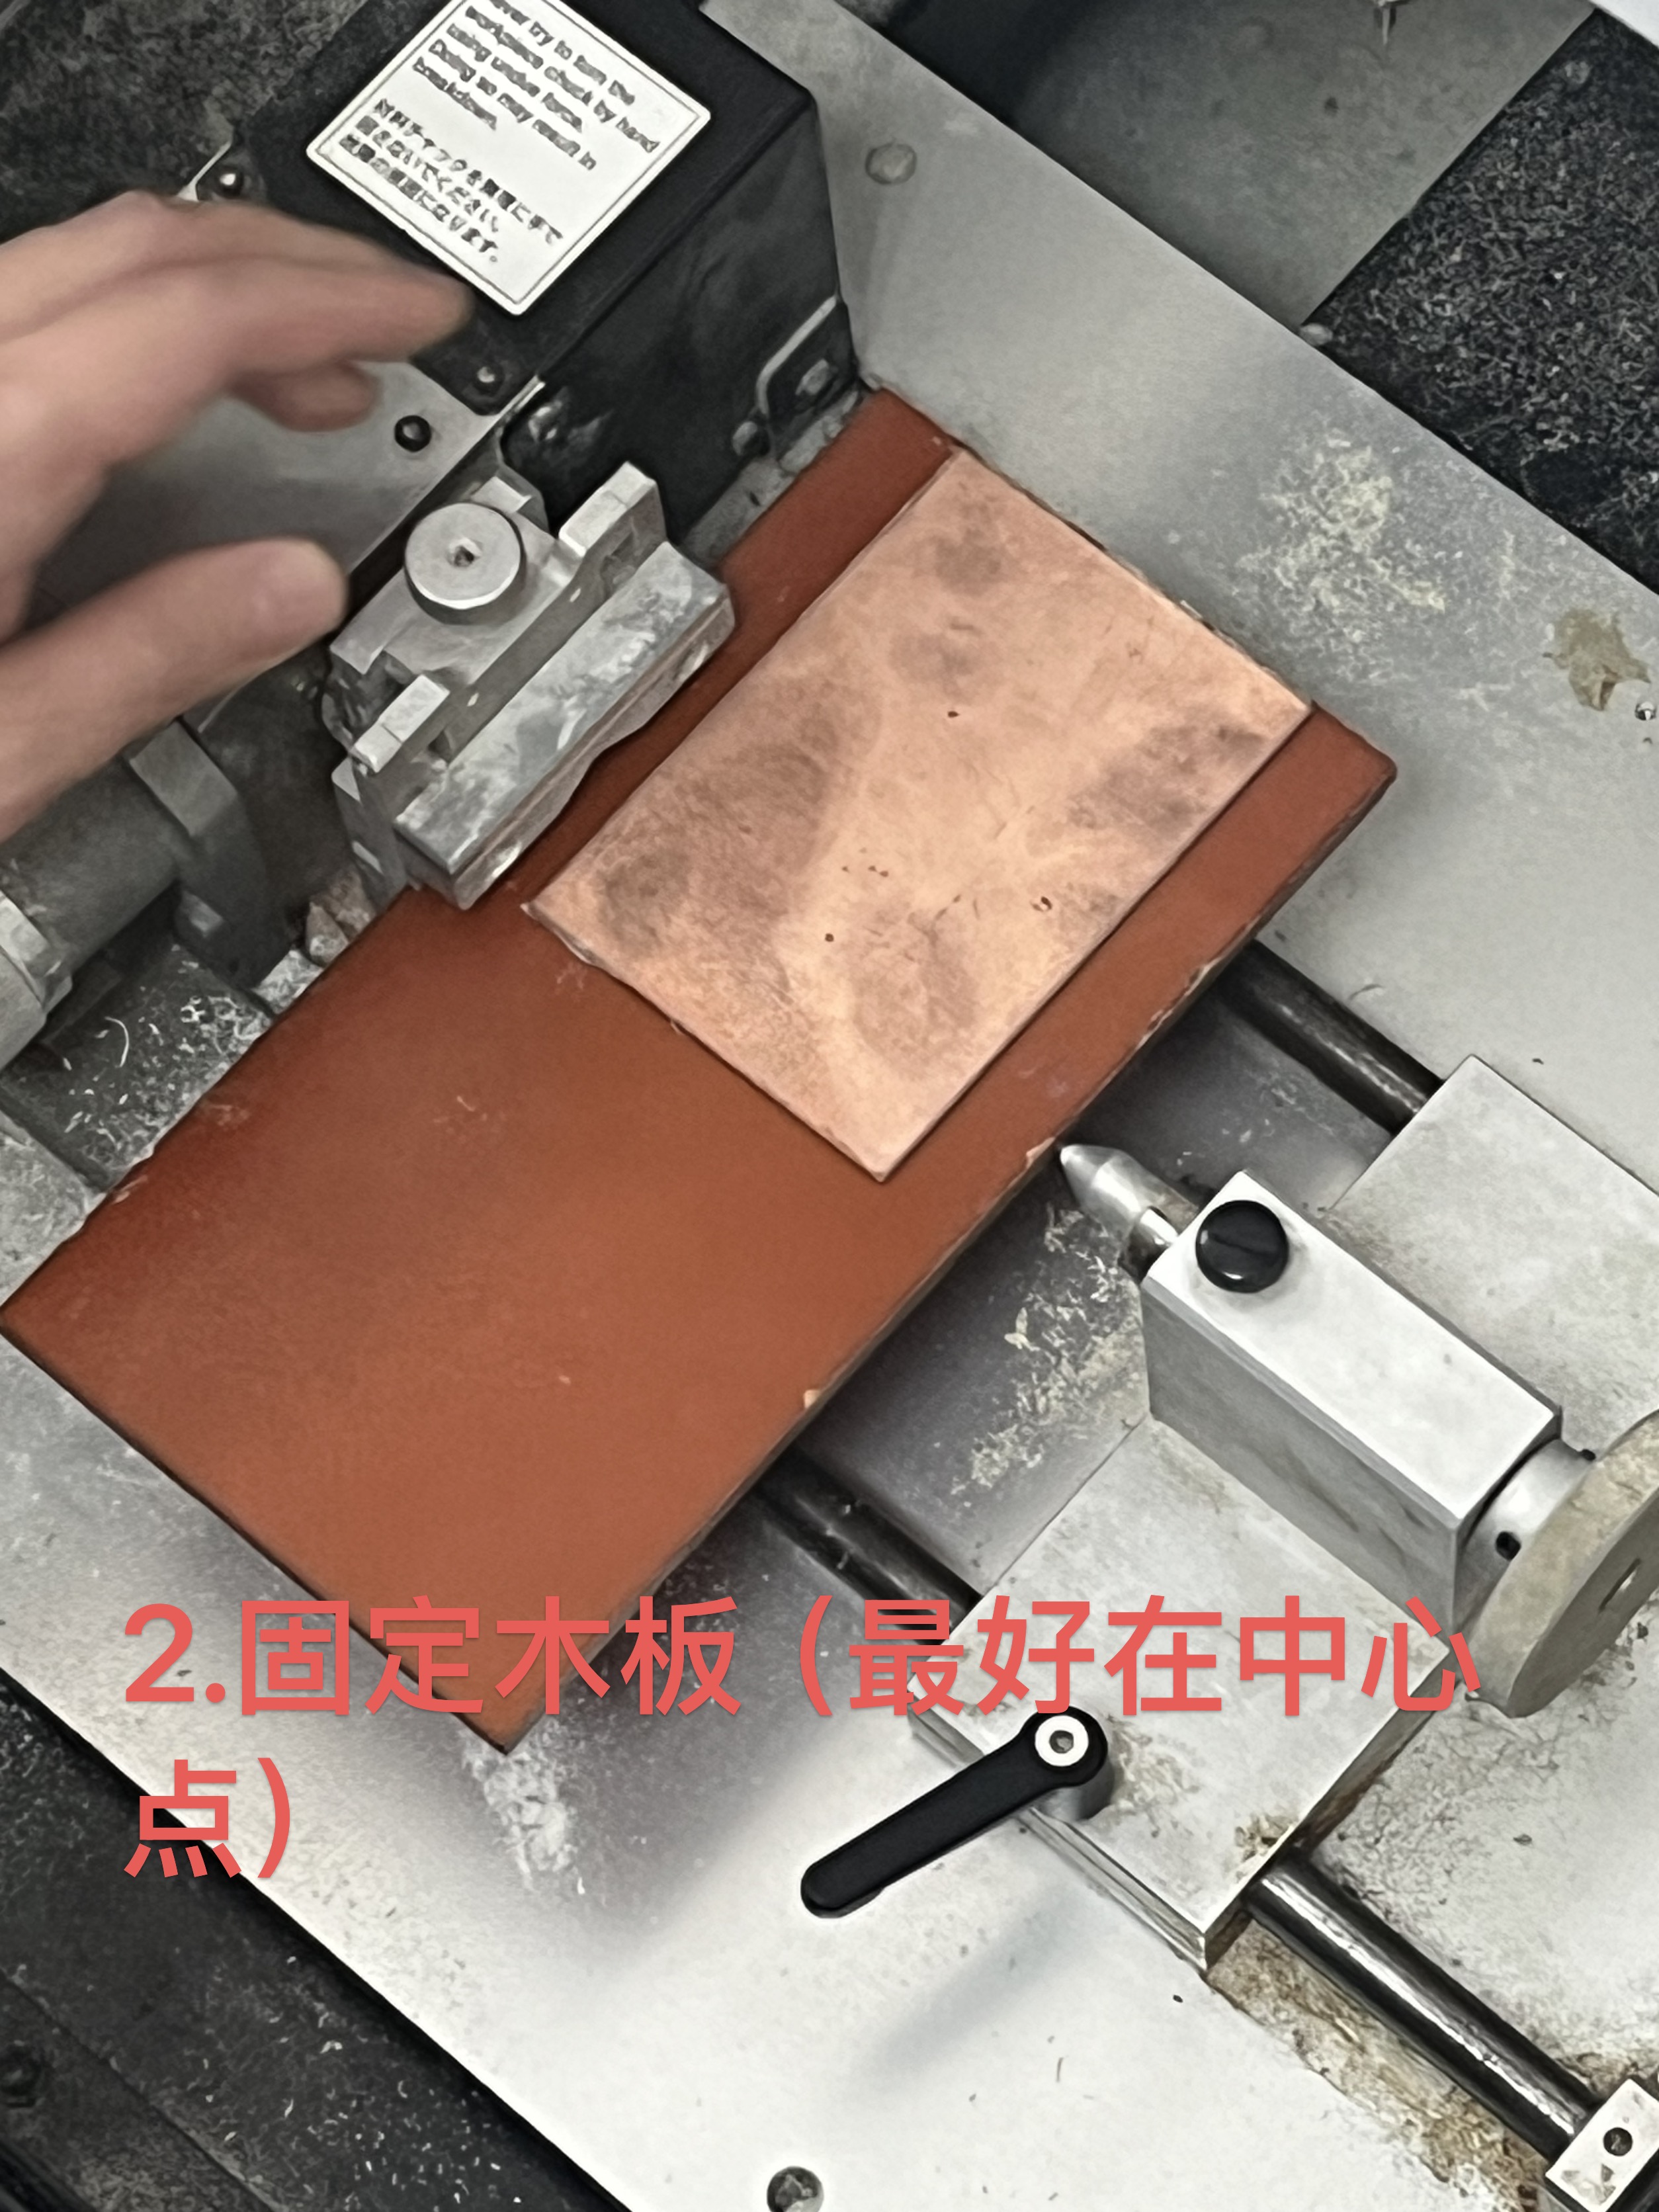
First before doing anything as always check for emergency stop button. Located near top right of the photo below. Then press the button hovered for the machine to start. This will also begin its adjustment whenever the machine is turned on. Once the machine finish adjusting place the copper board onto the wooden board (Tape them together so it doesn't move when cutting). Then place it in the machine, have the leftside metal clamp onto the side of the wooden board then bring in the metal rod to pin against the other side. Note to use a spirit level to make sure the copper board is balanced. In this case we did not have one nearby which resulted in uneven carving in the end. 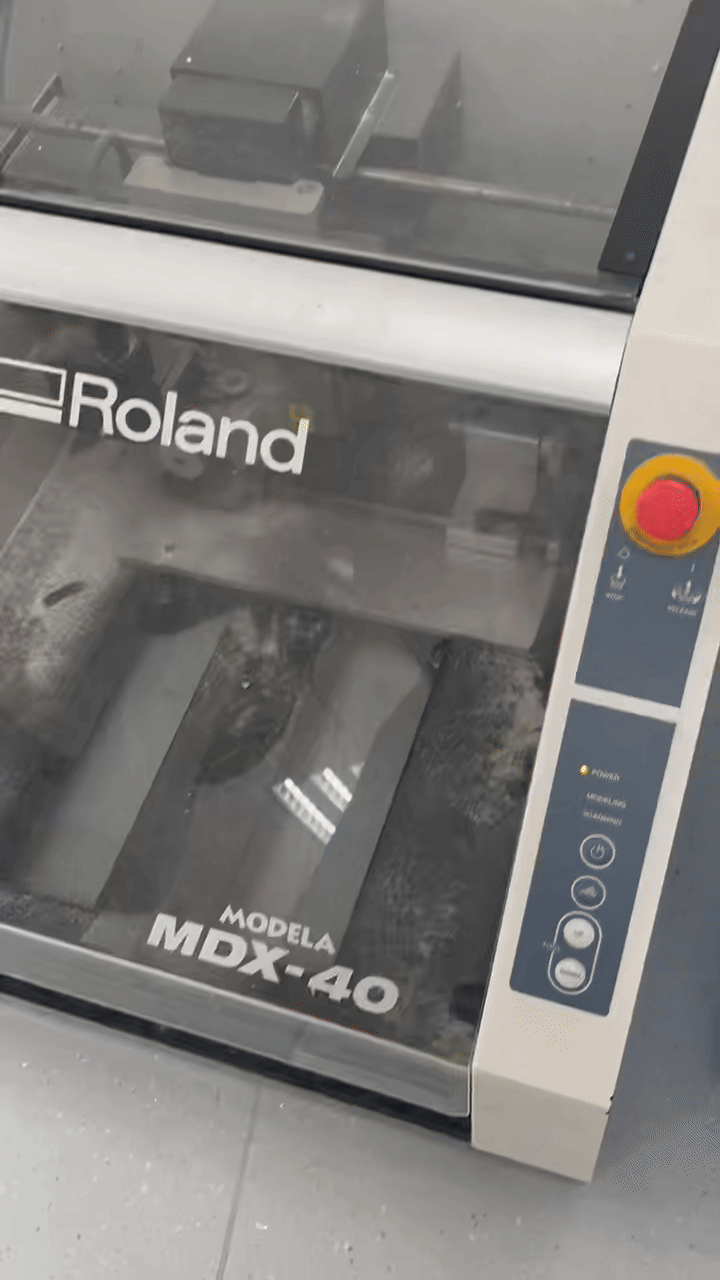
 |  |
Step 2 Computer Settings
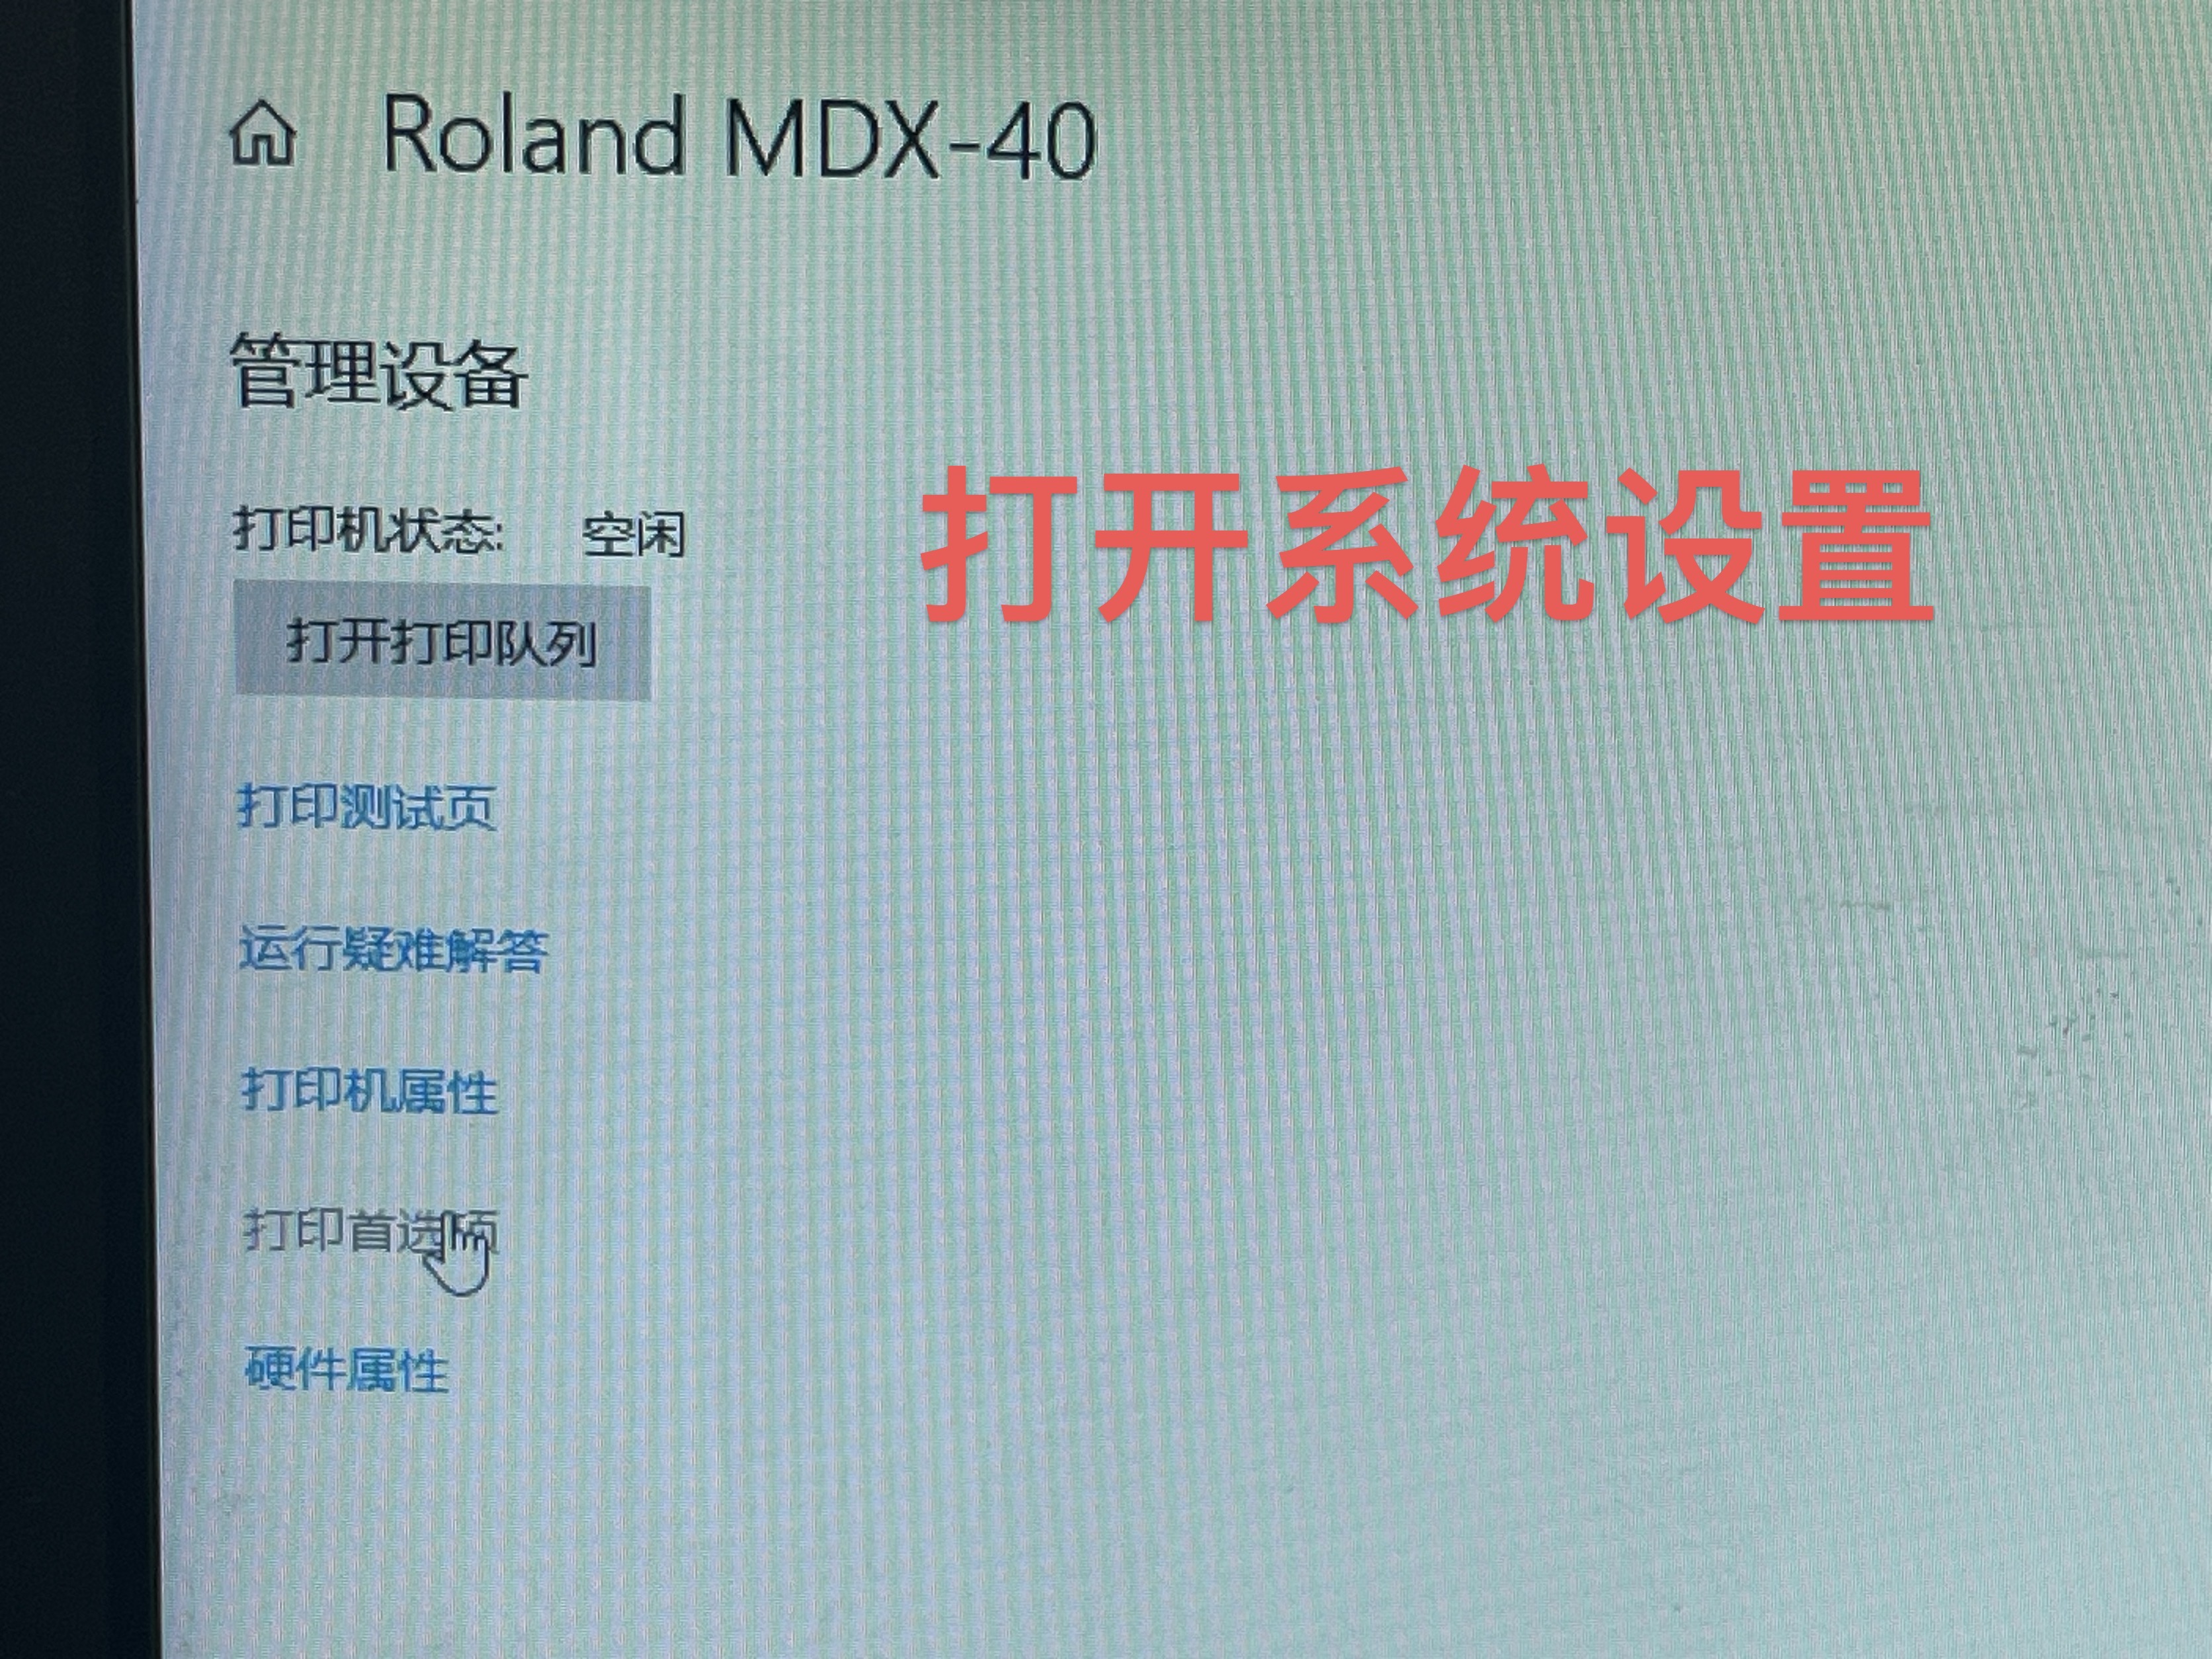
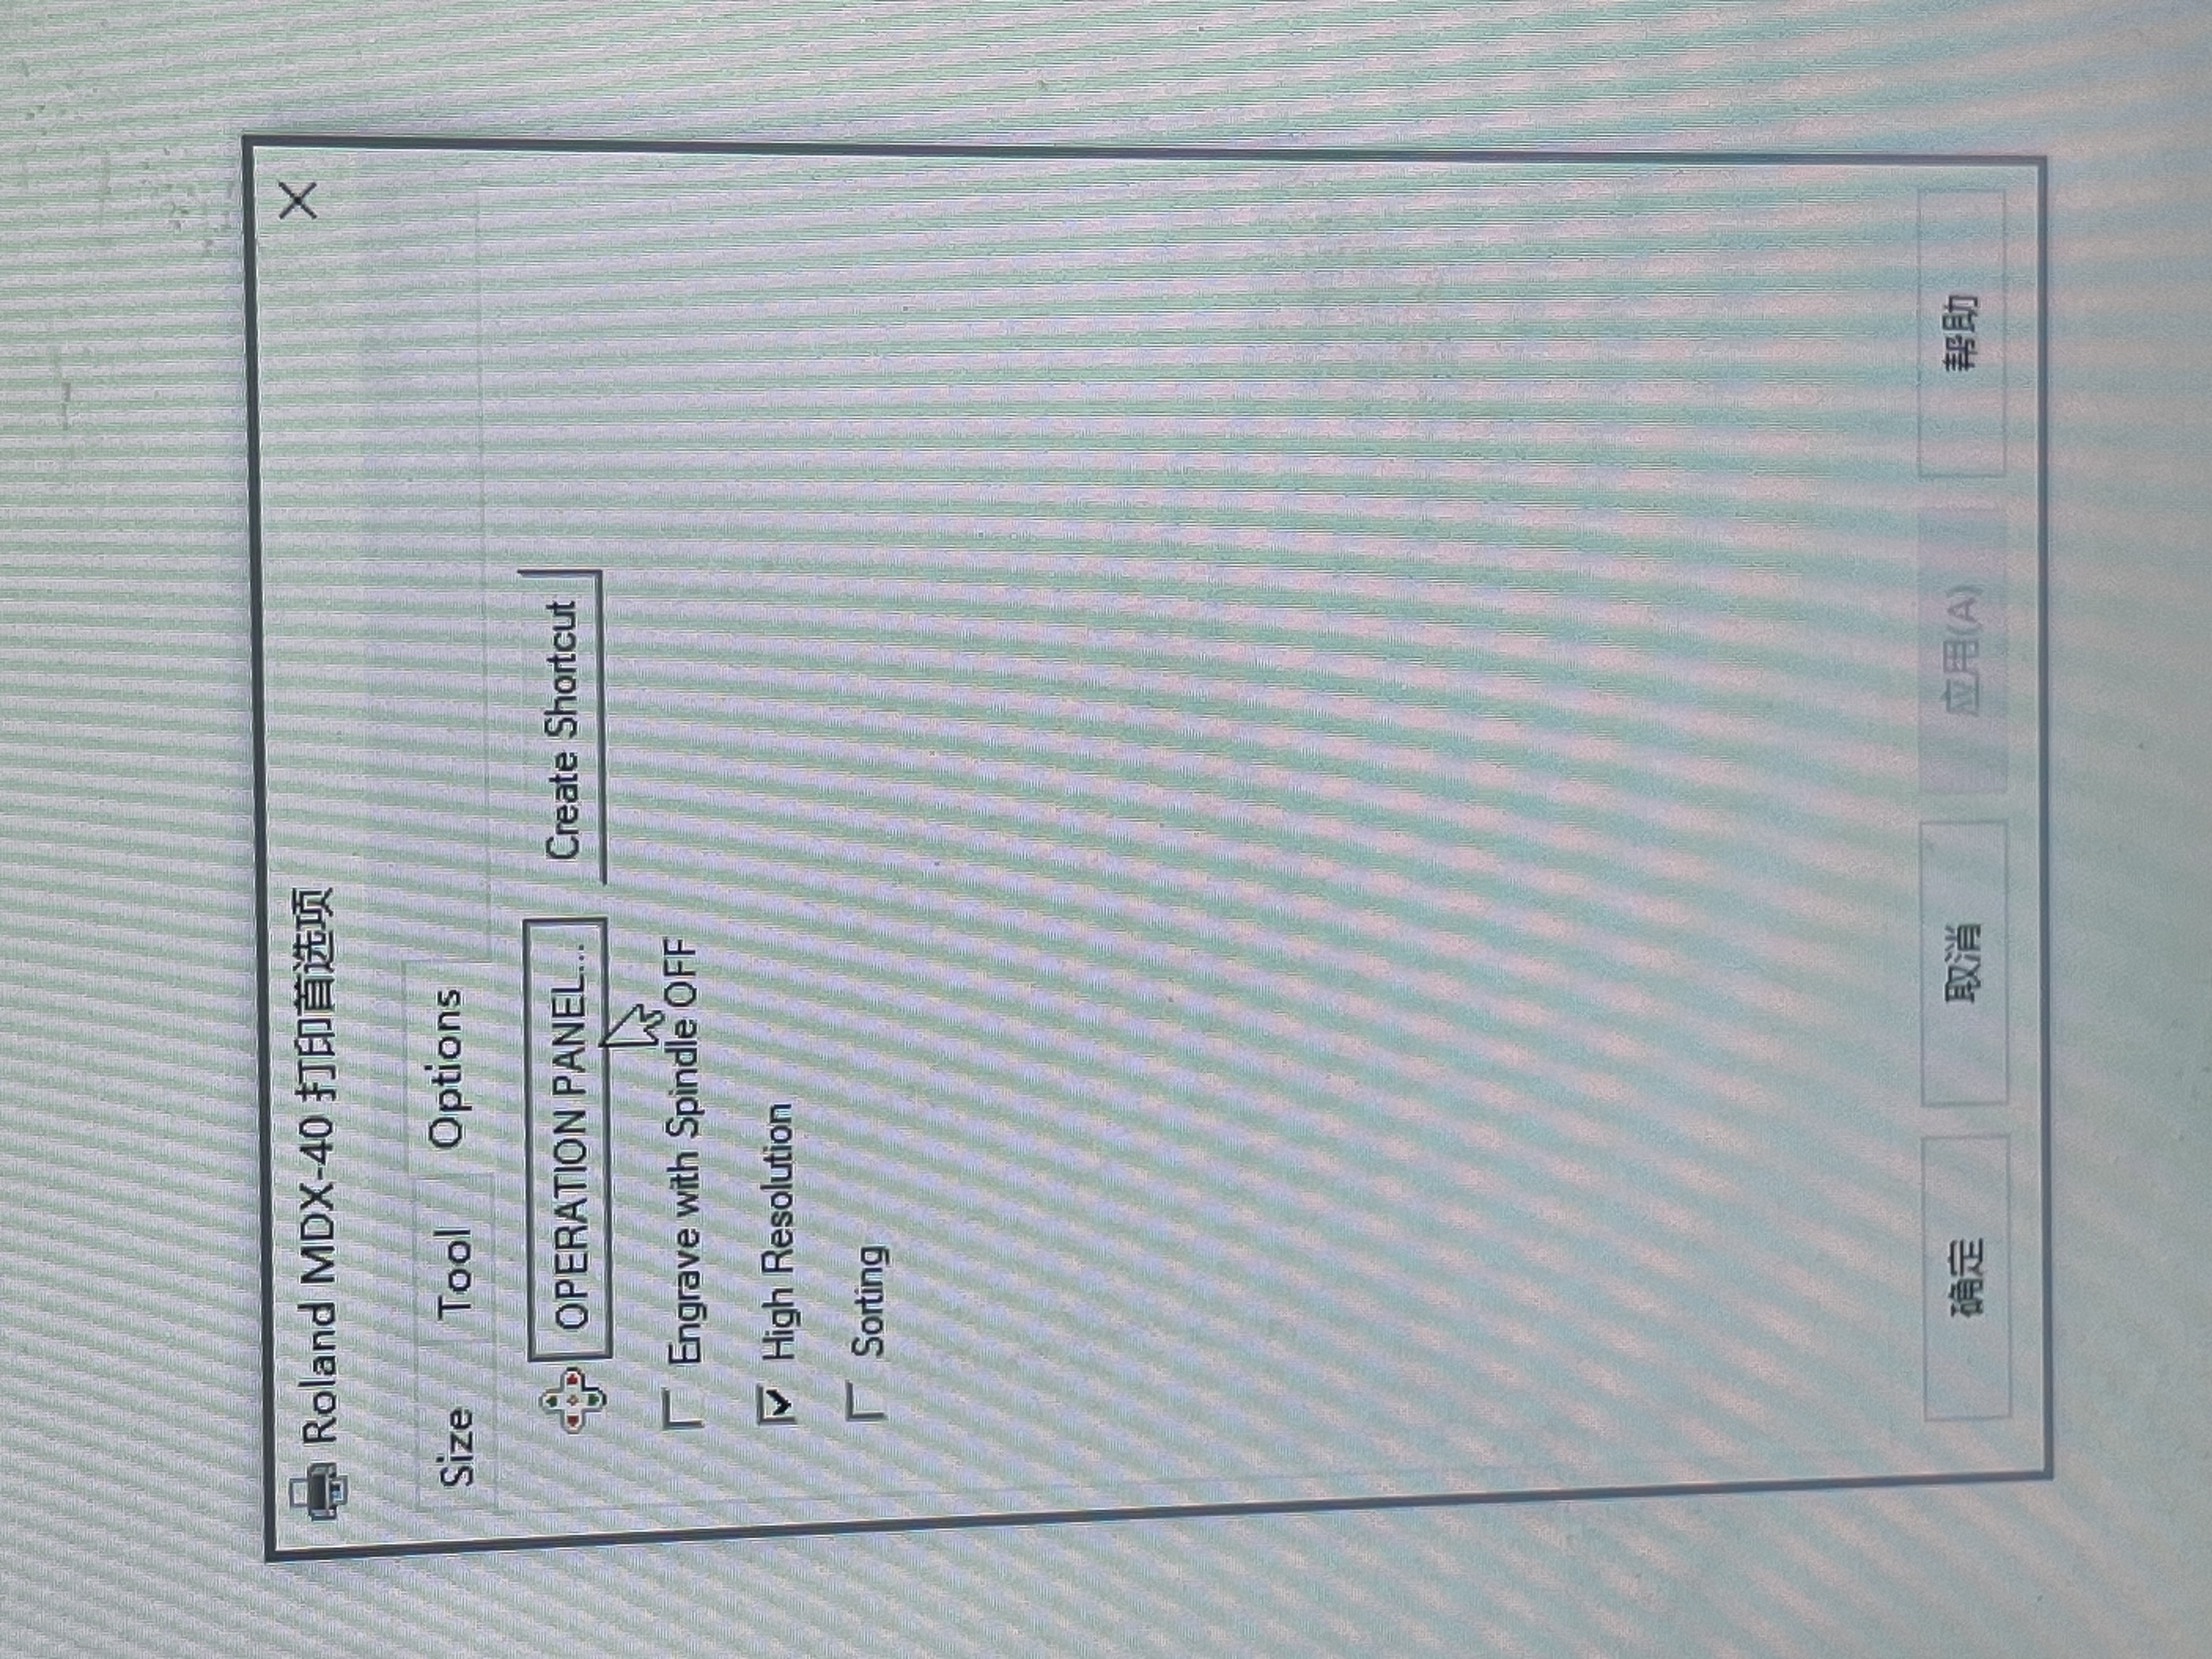
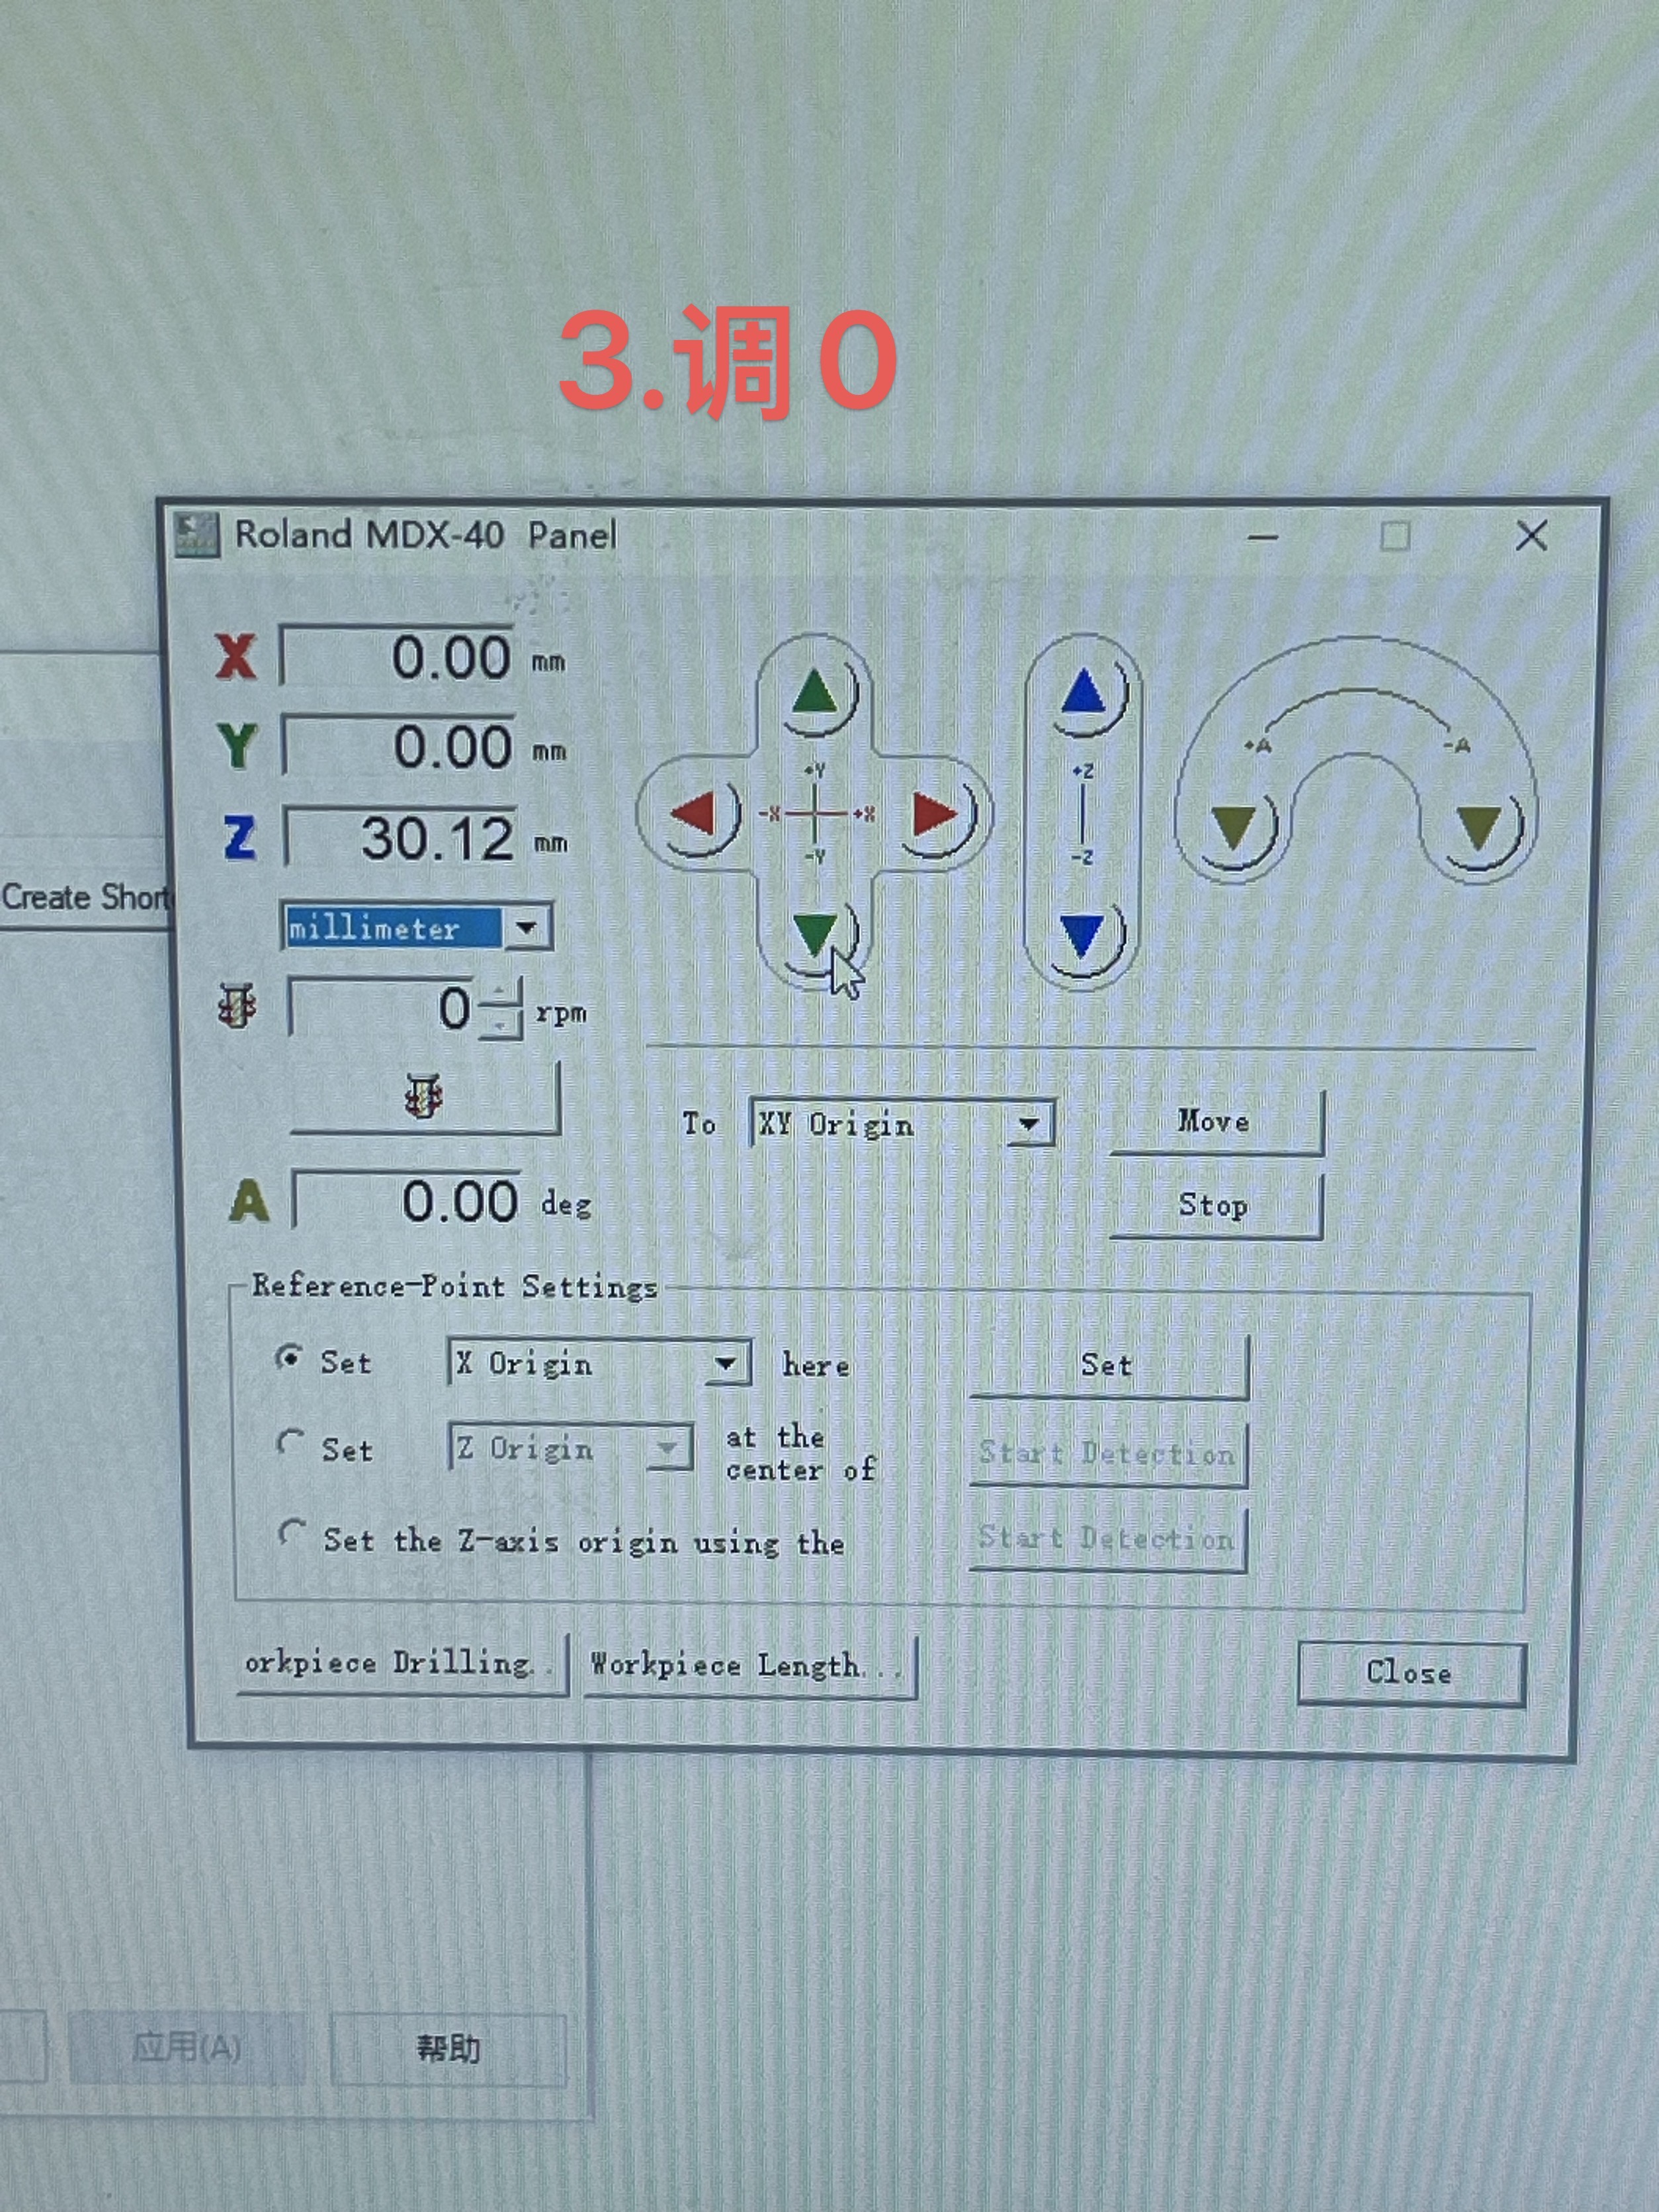
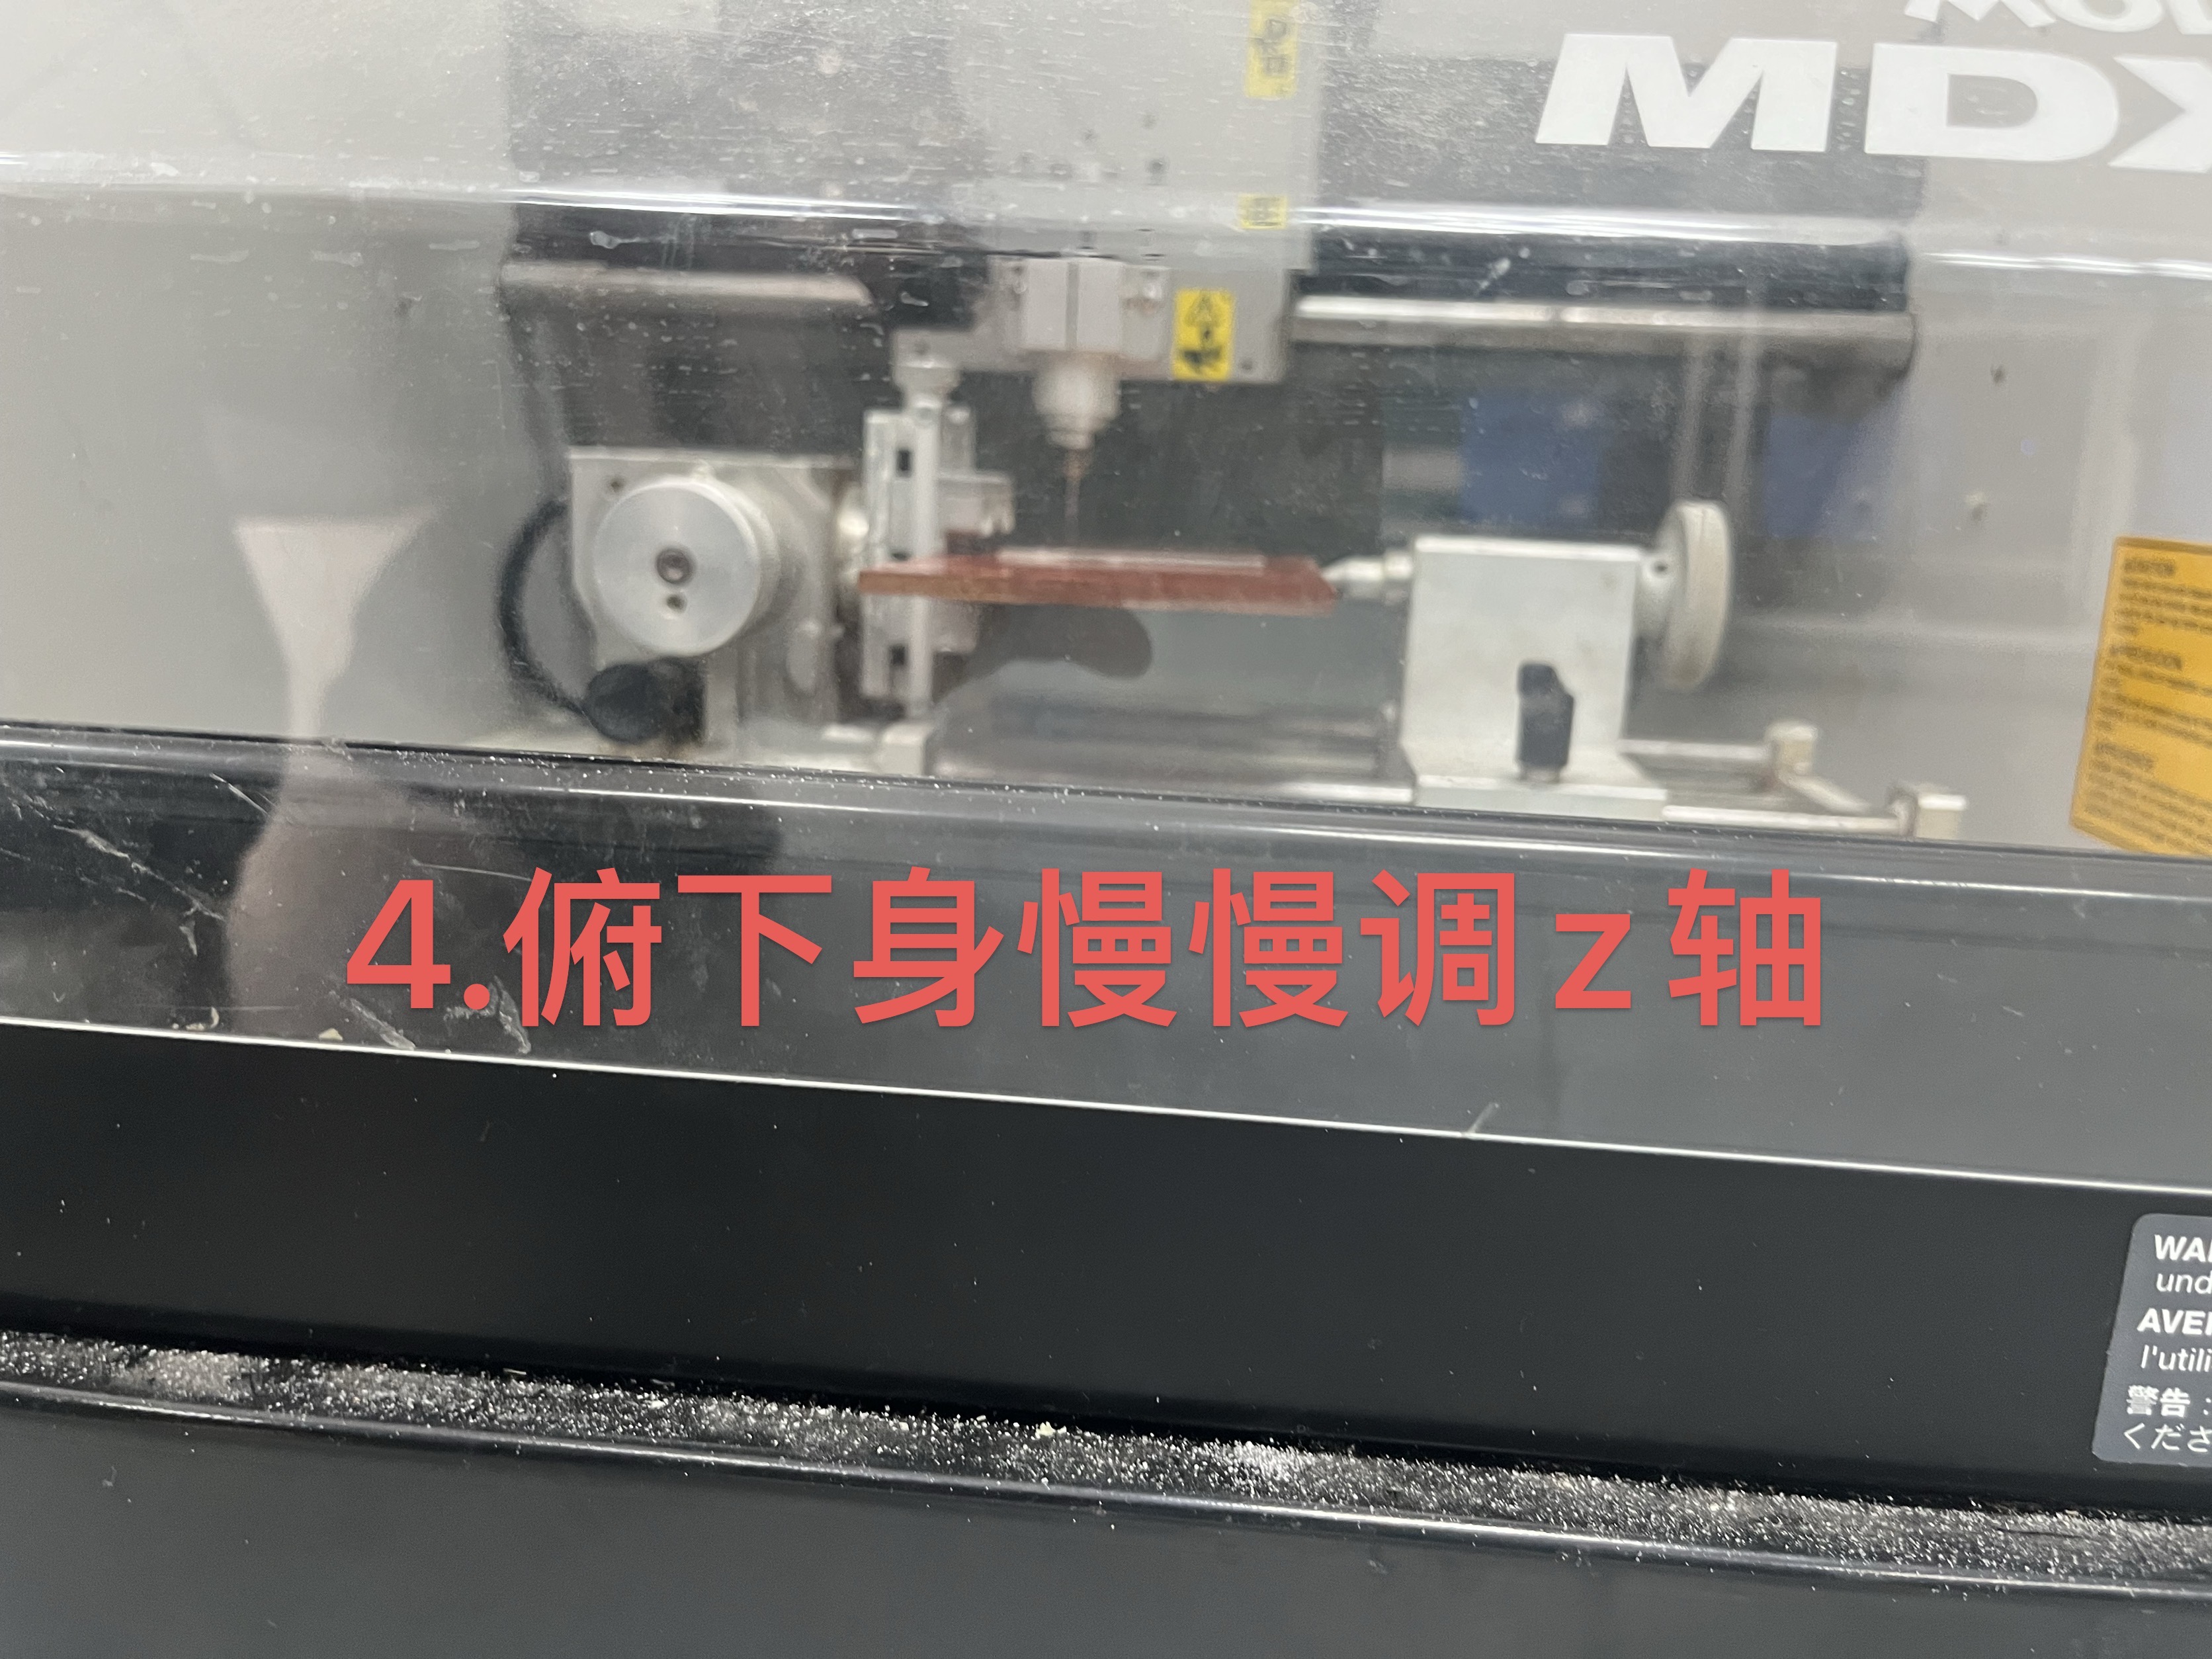
Now that the board is set inside the machine, the needle needs to be adjusted for the location of where you want to start. Starting with the X and Y coordinate click into printer setting then operational panel as shown below. Here you can control the coordinate of the needle. The arrow keys controls where the X and Y coordinate are placed and when done click set X and Y origin. Z coordinate is done manually on the machine. Check through eye when the needle touches the board and set Z origin.
 |  |
 |  |
Step 3 Processing File
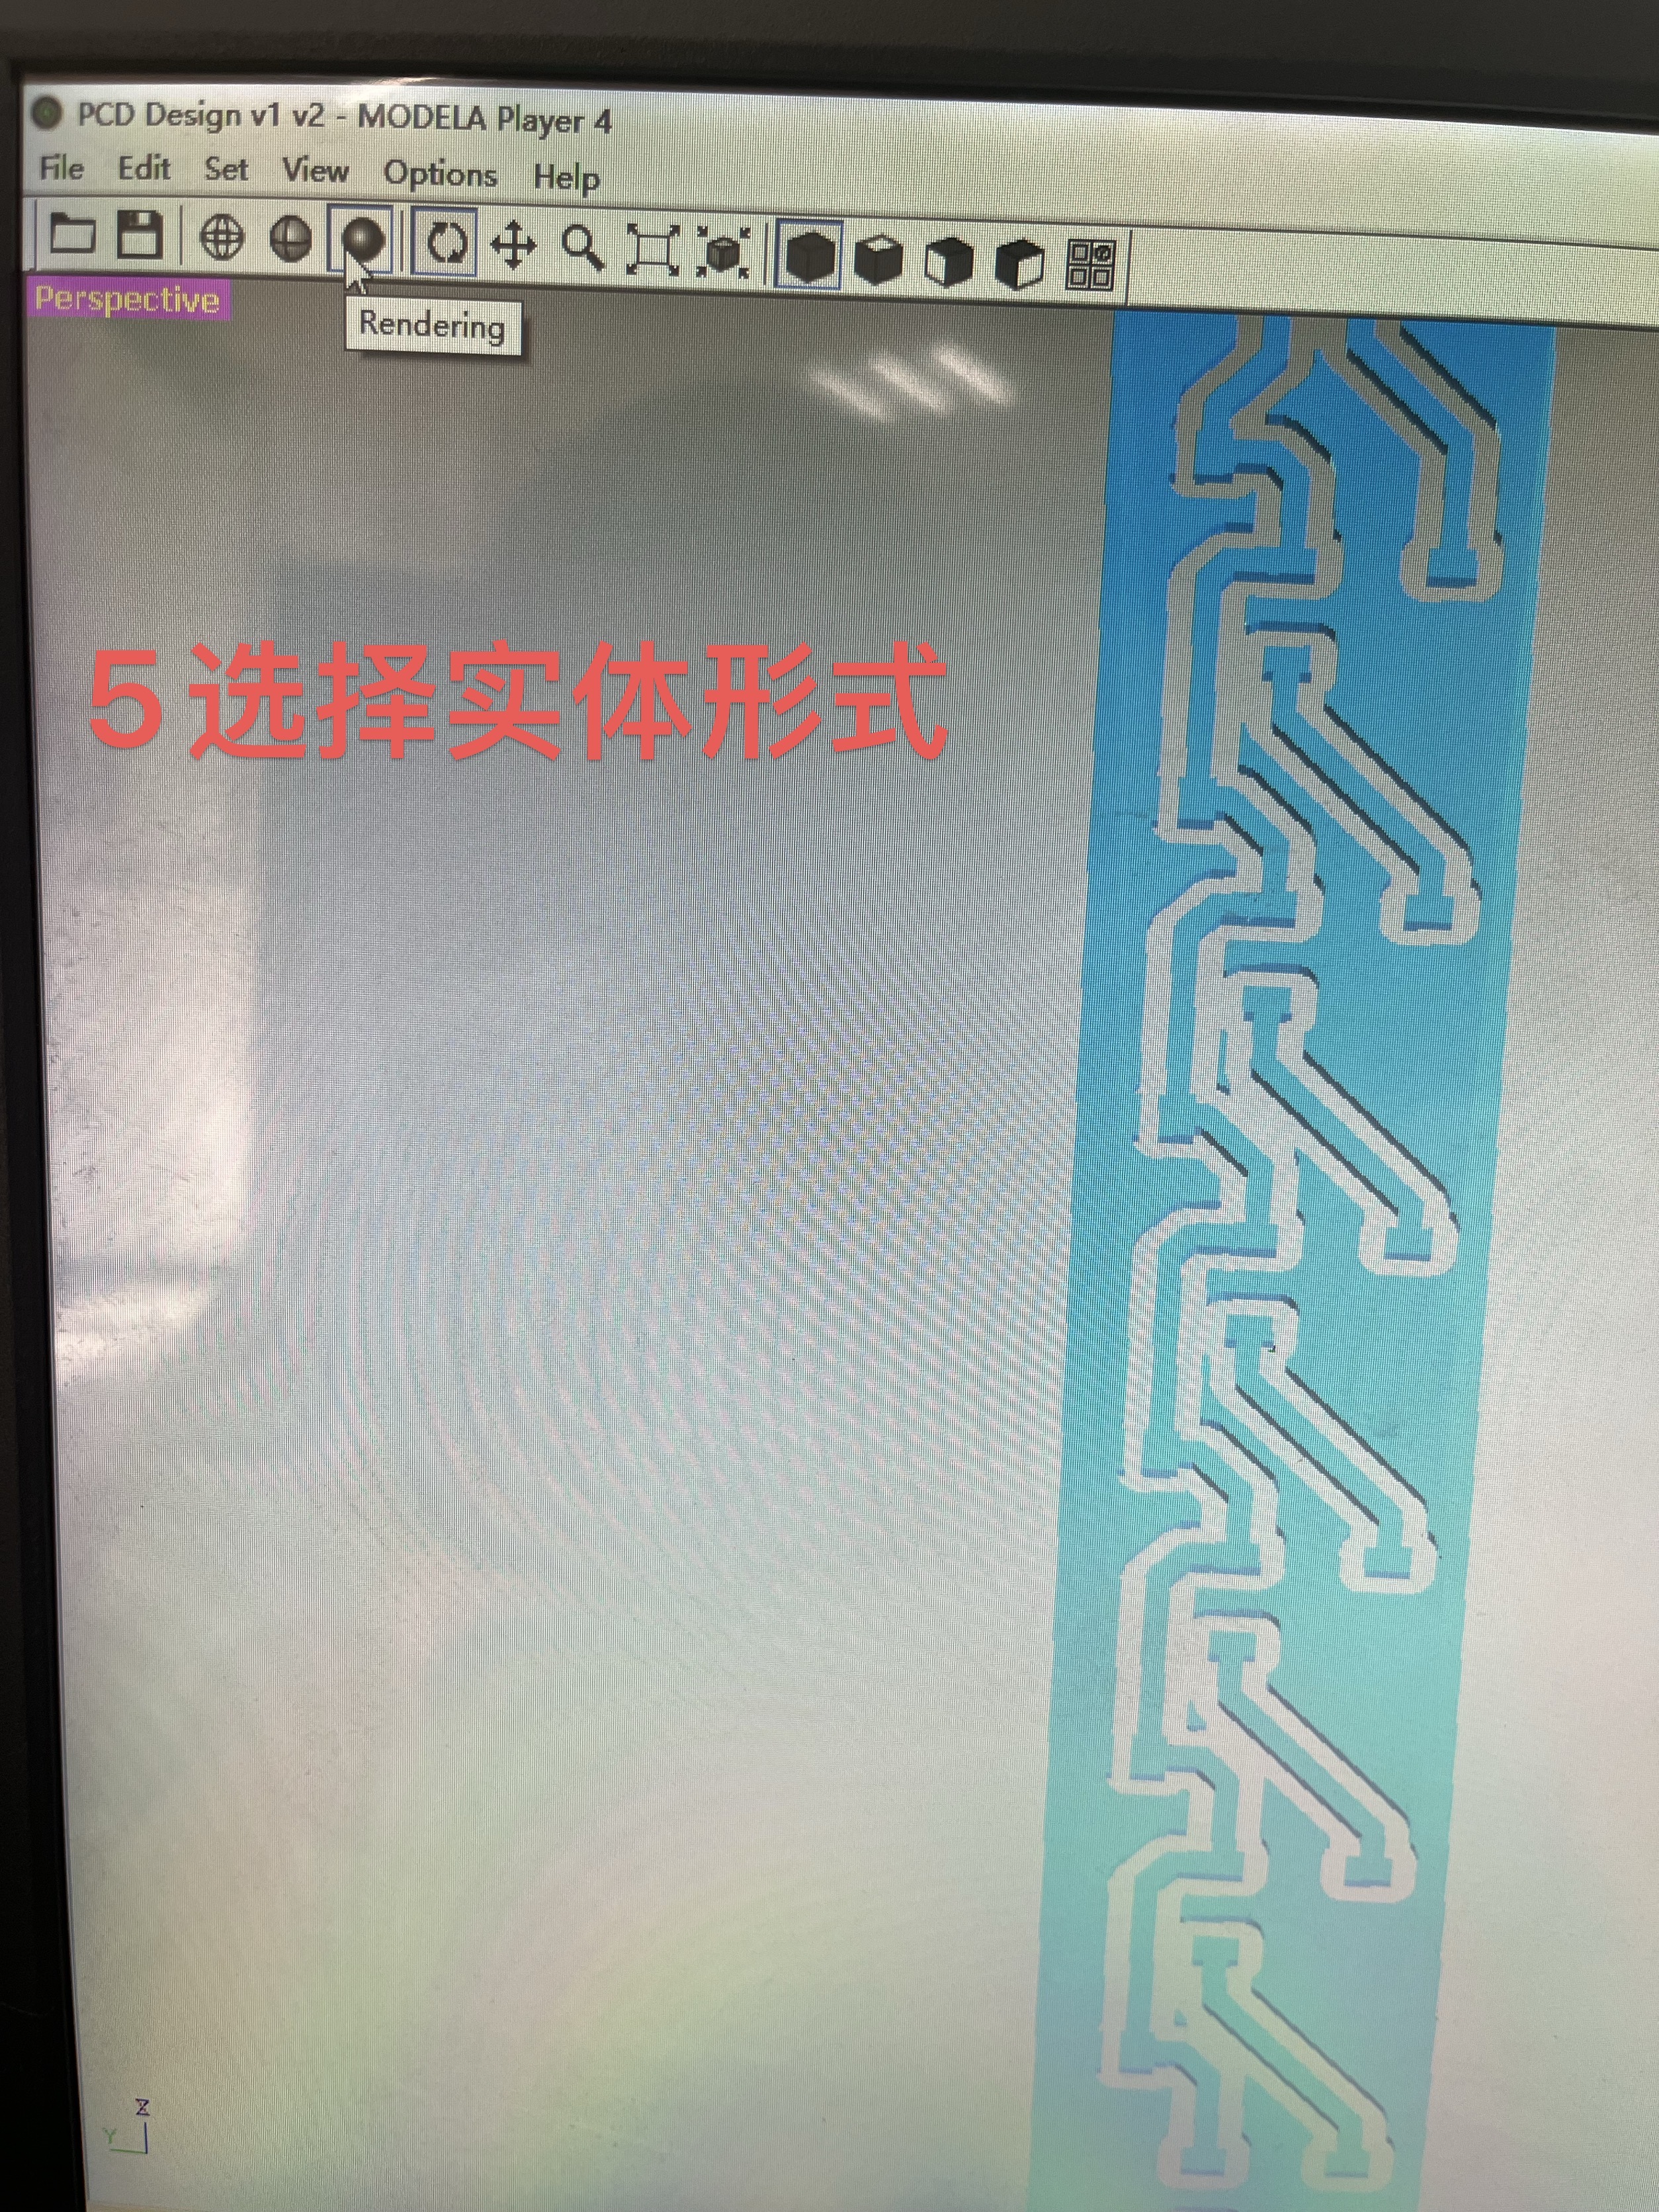
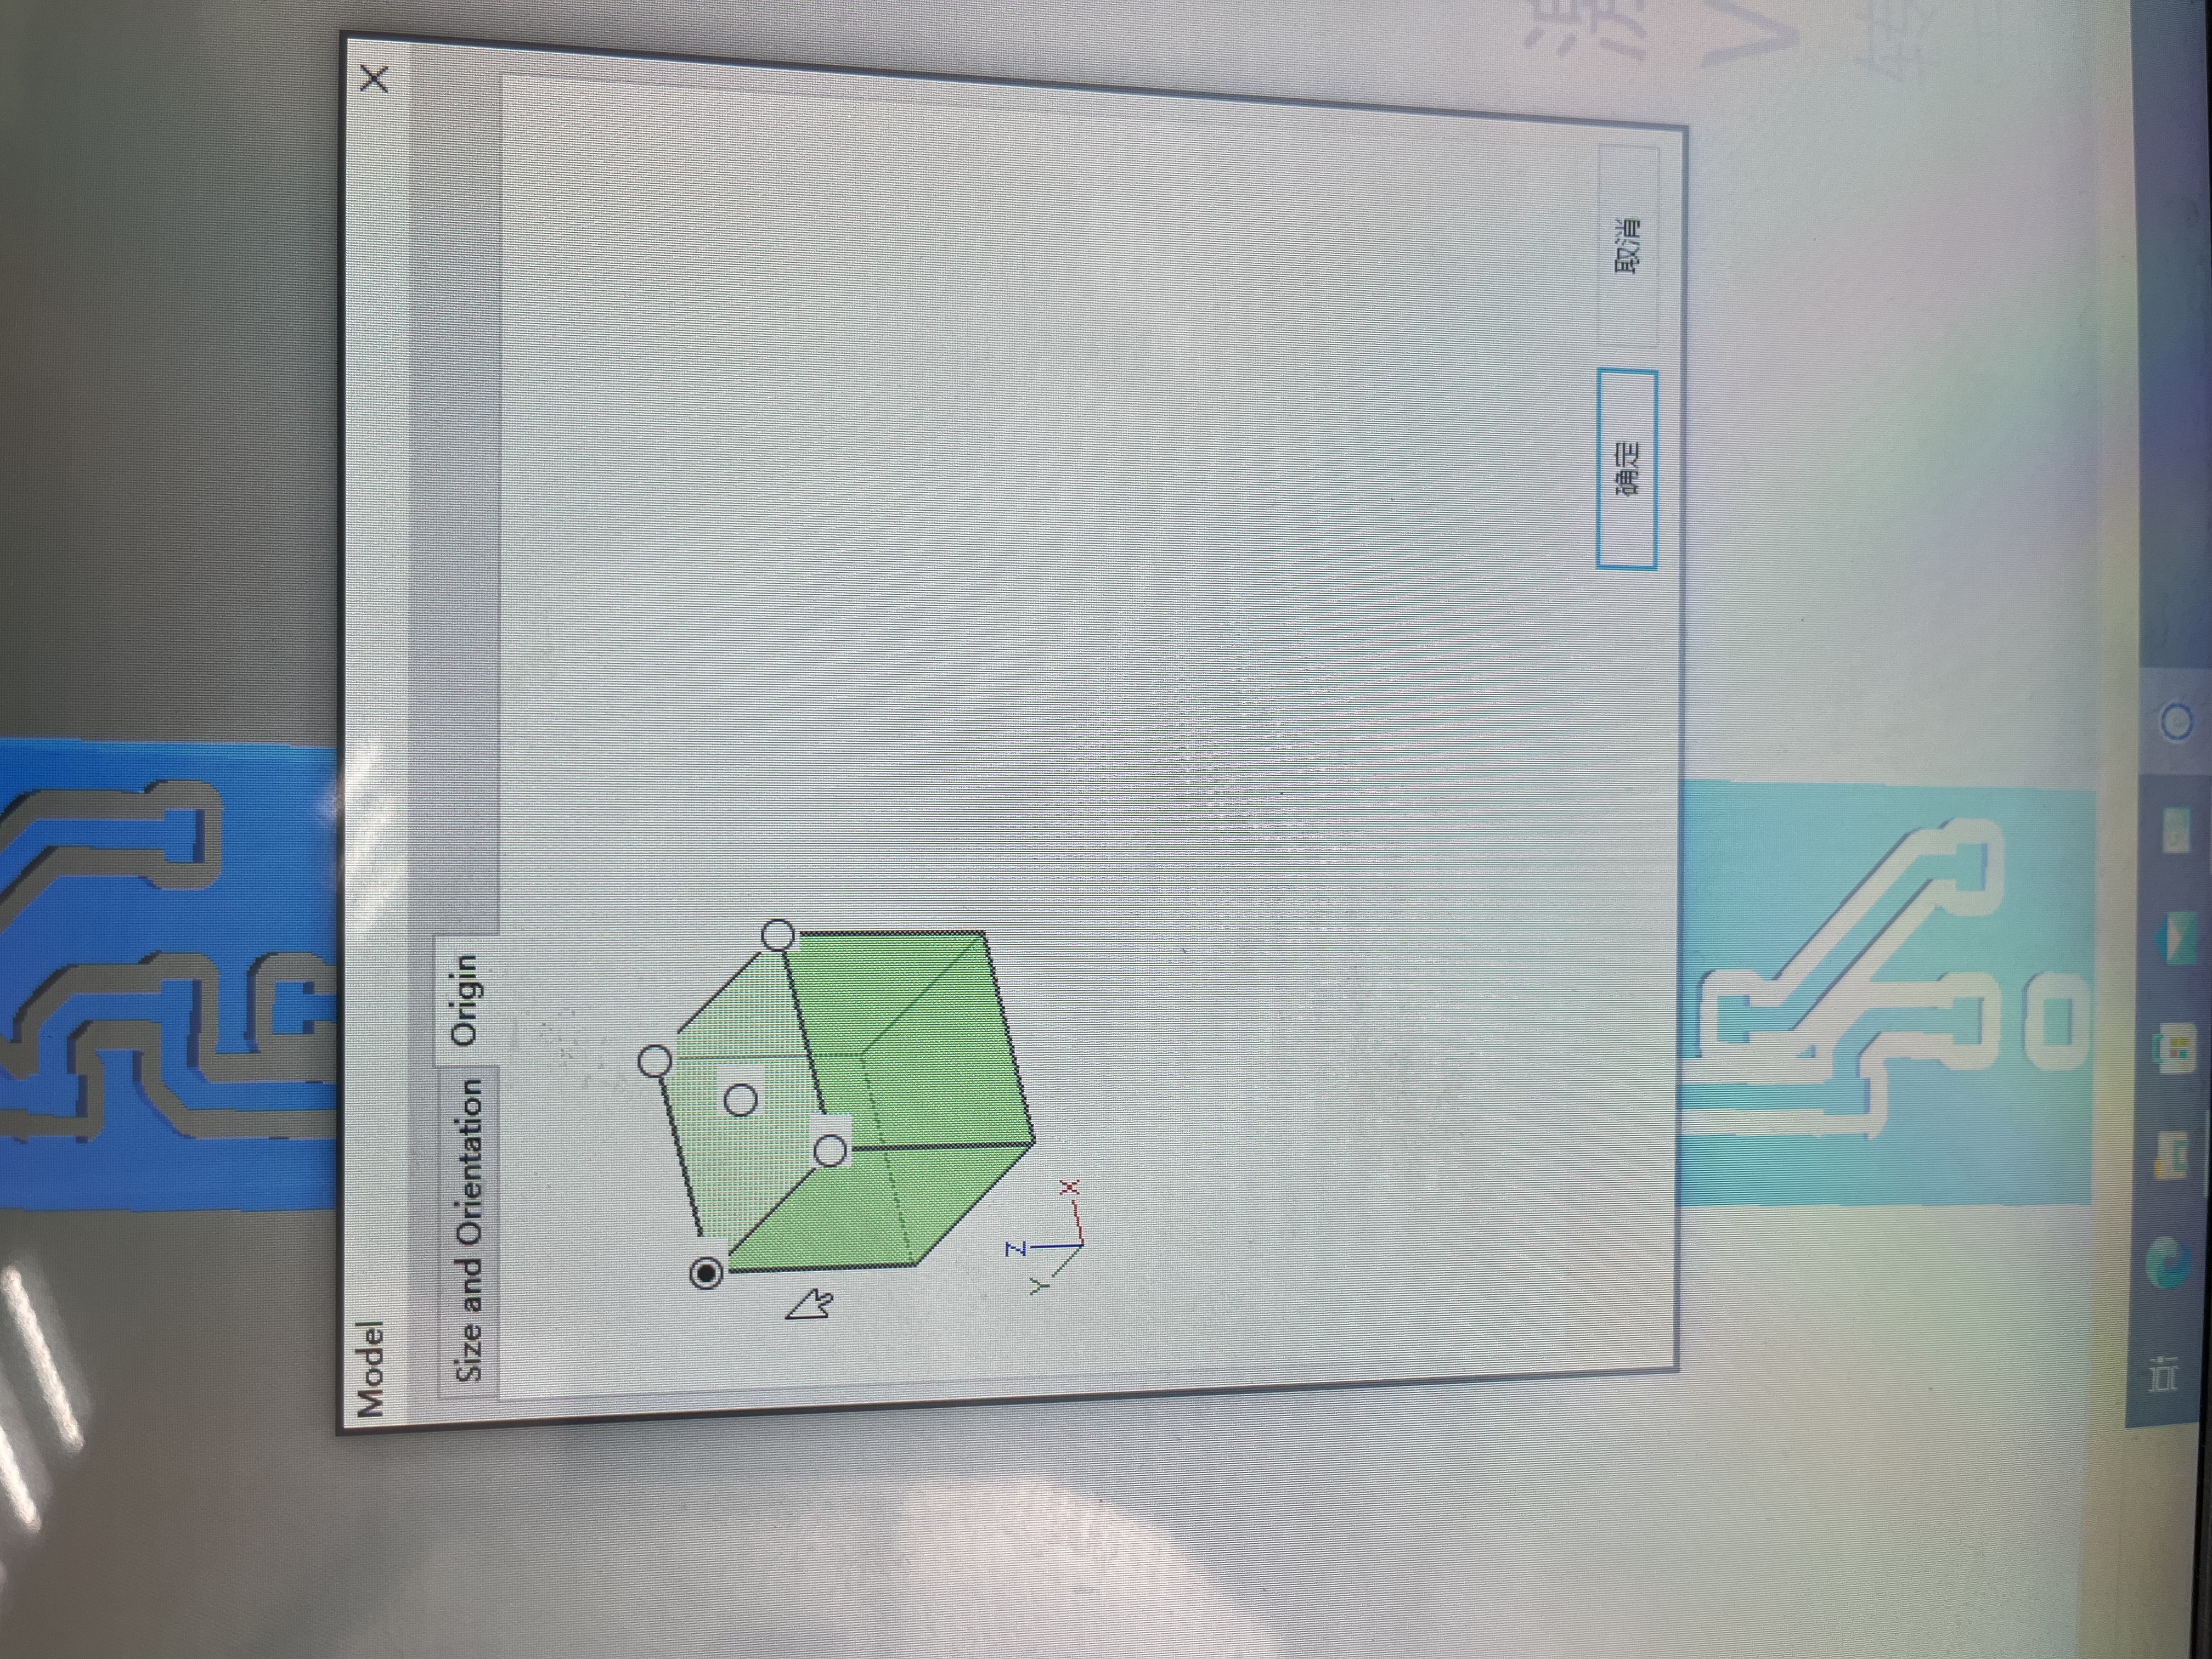
Select file from folder that you want to process and then choose to render as shown the picture on the left. Then choose origin and set the needle starting point to the top left.
 |  |
 | 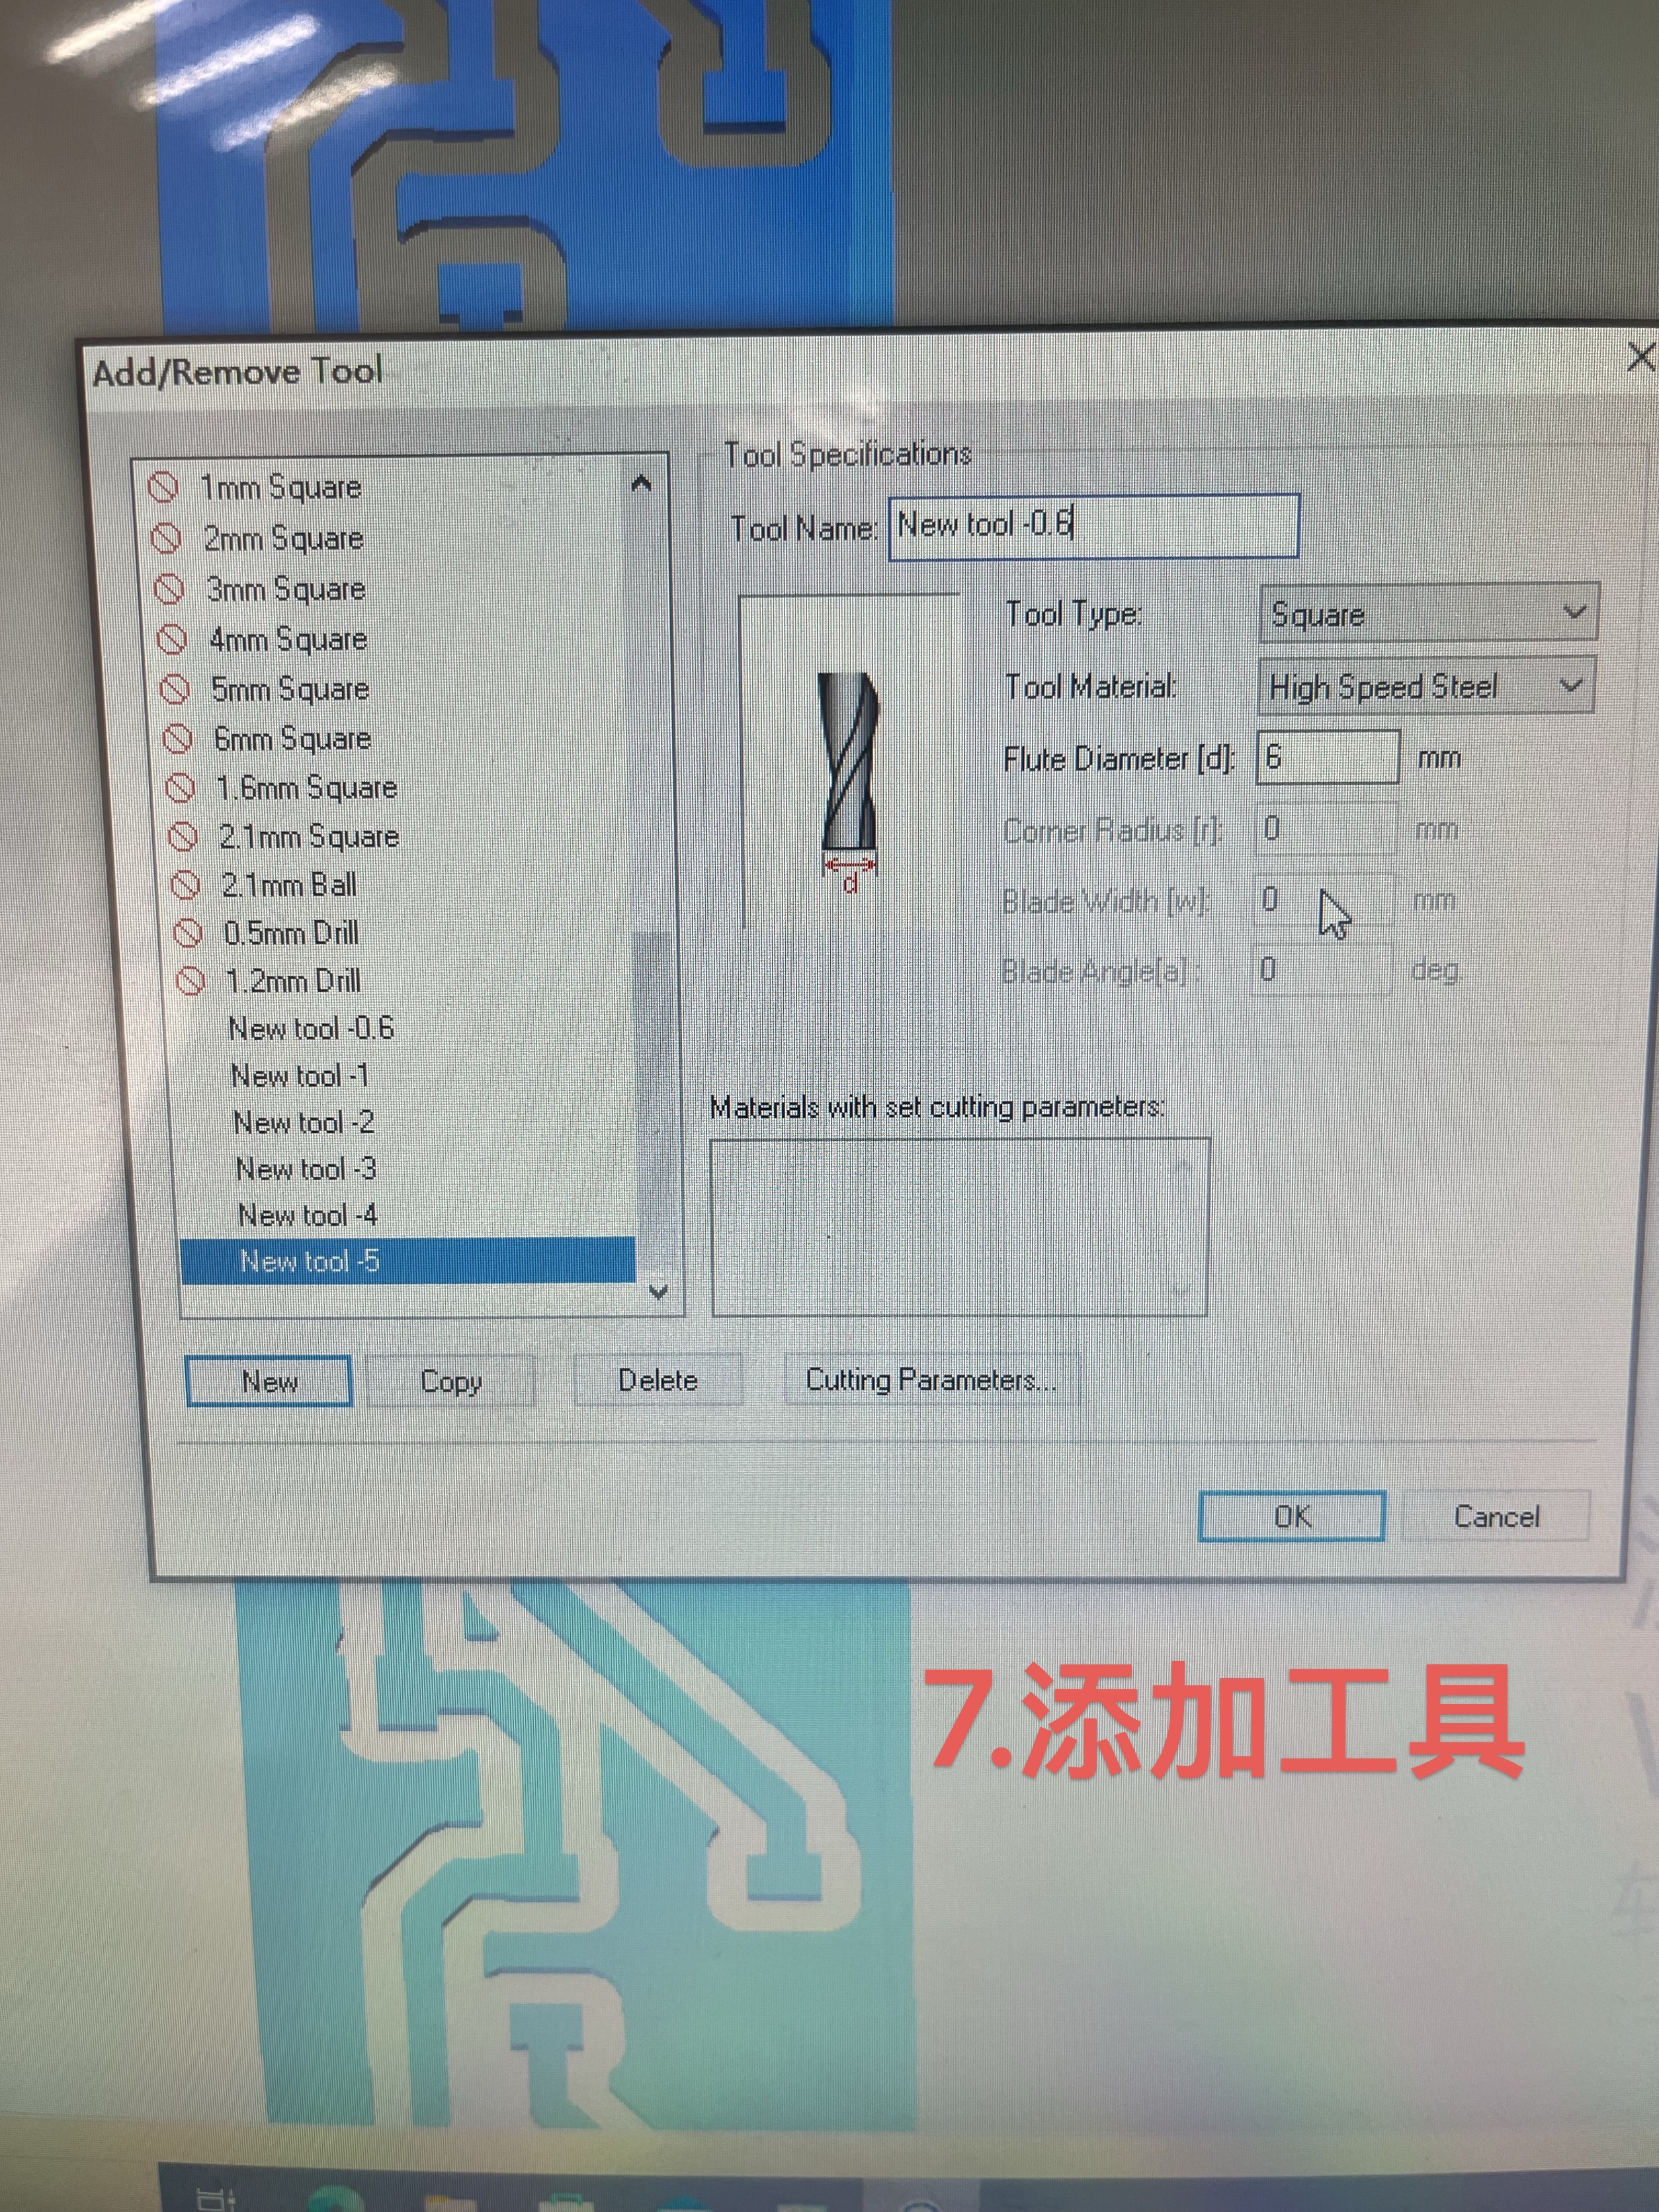 |
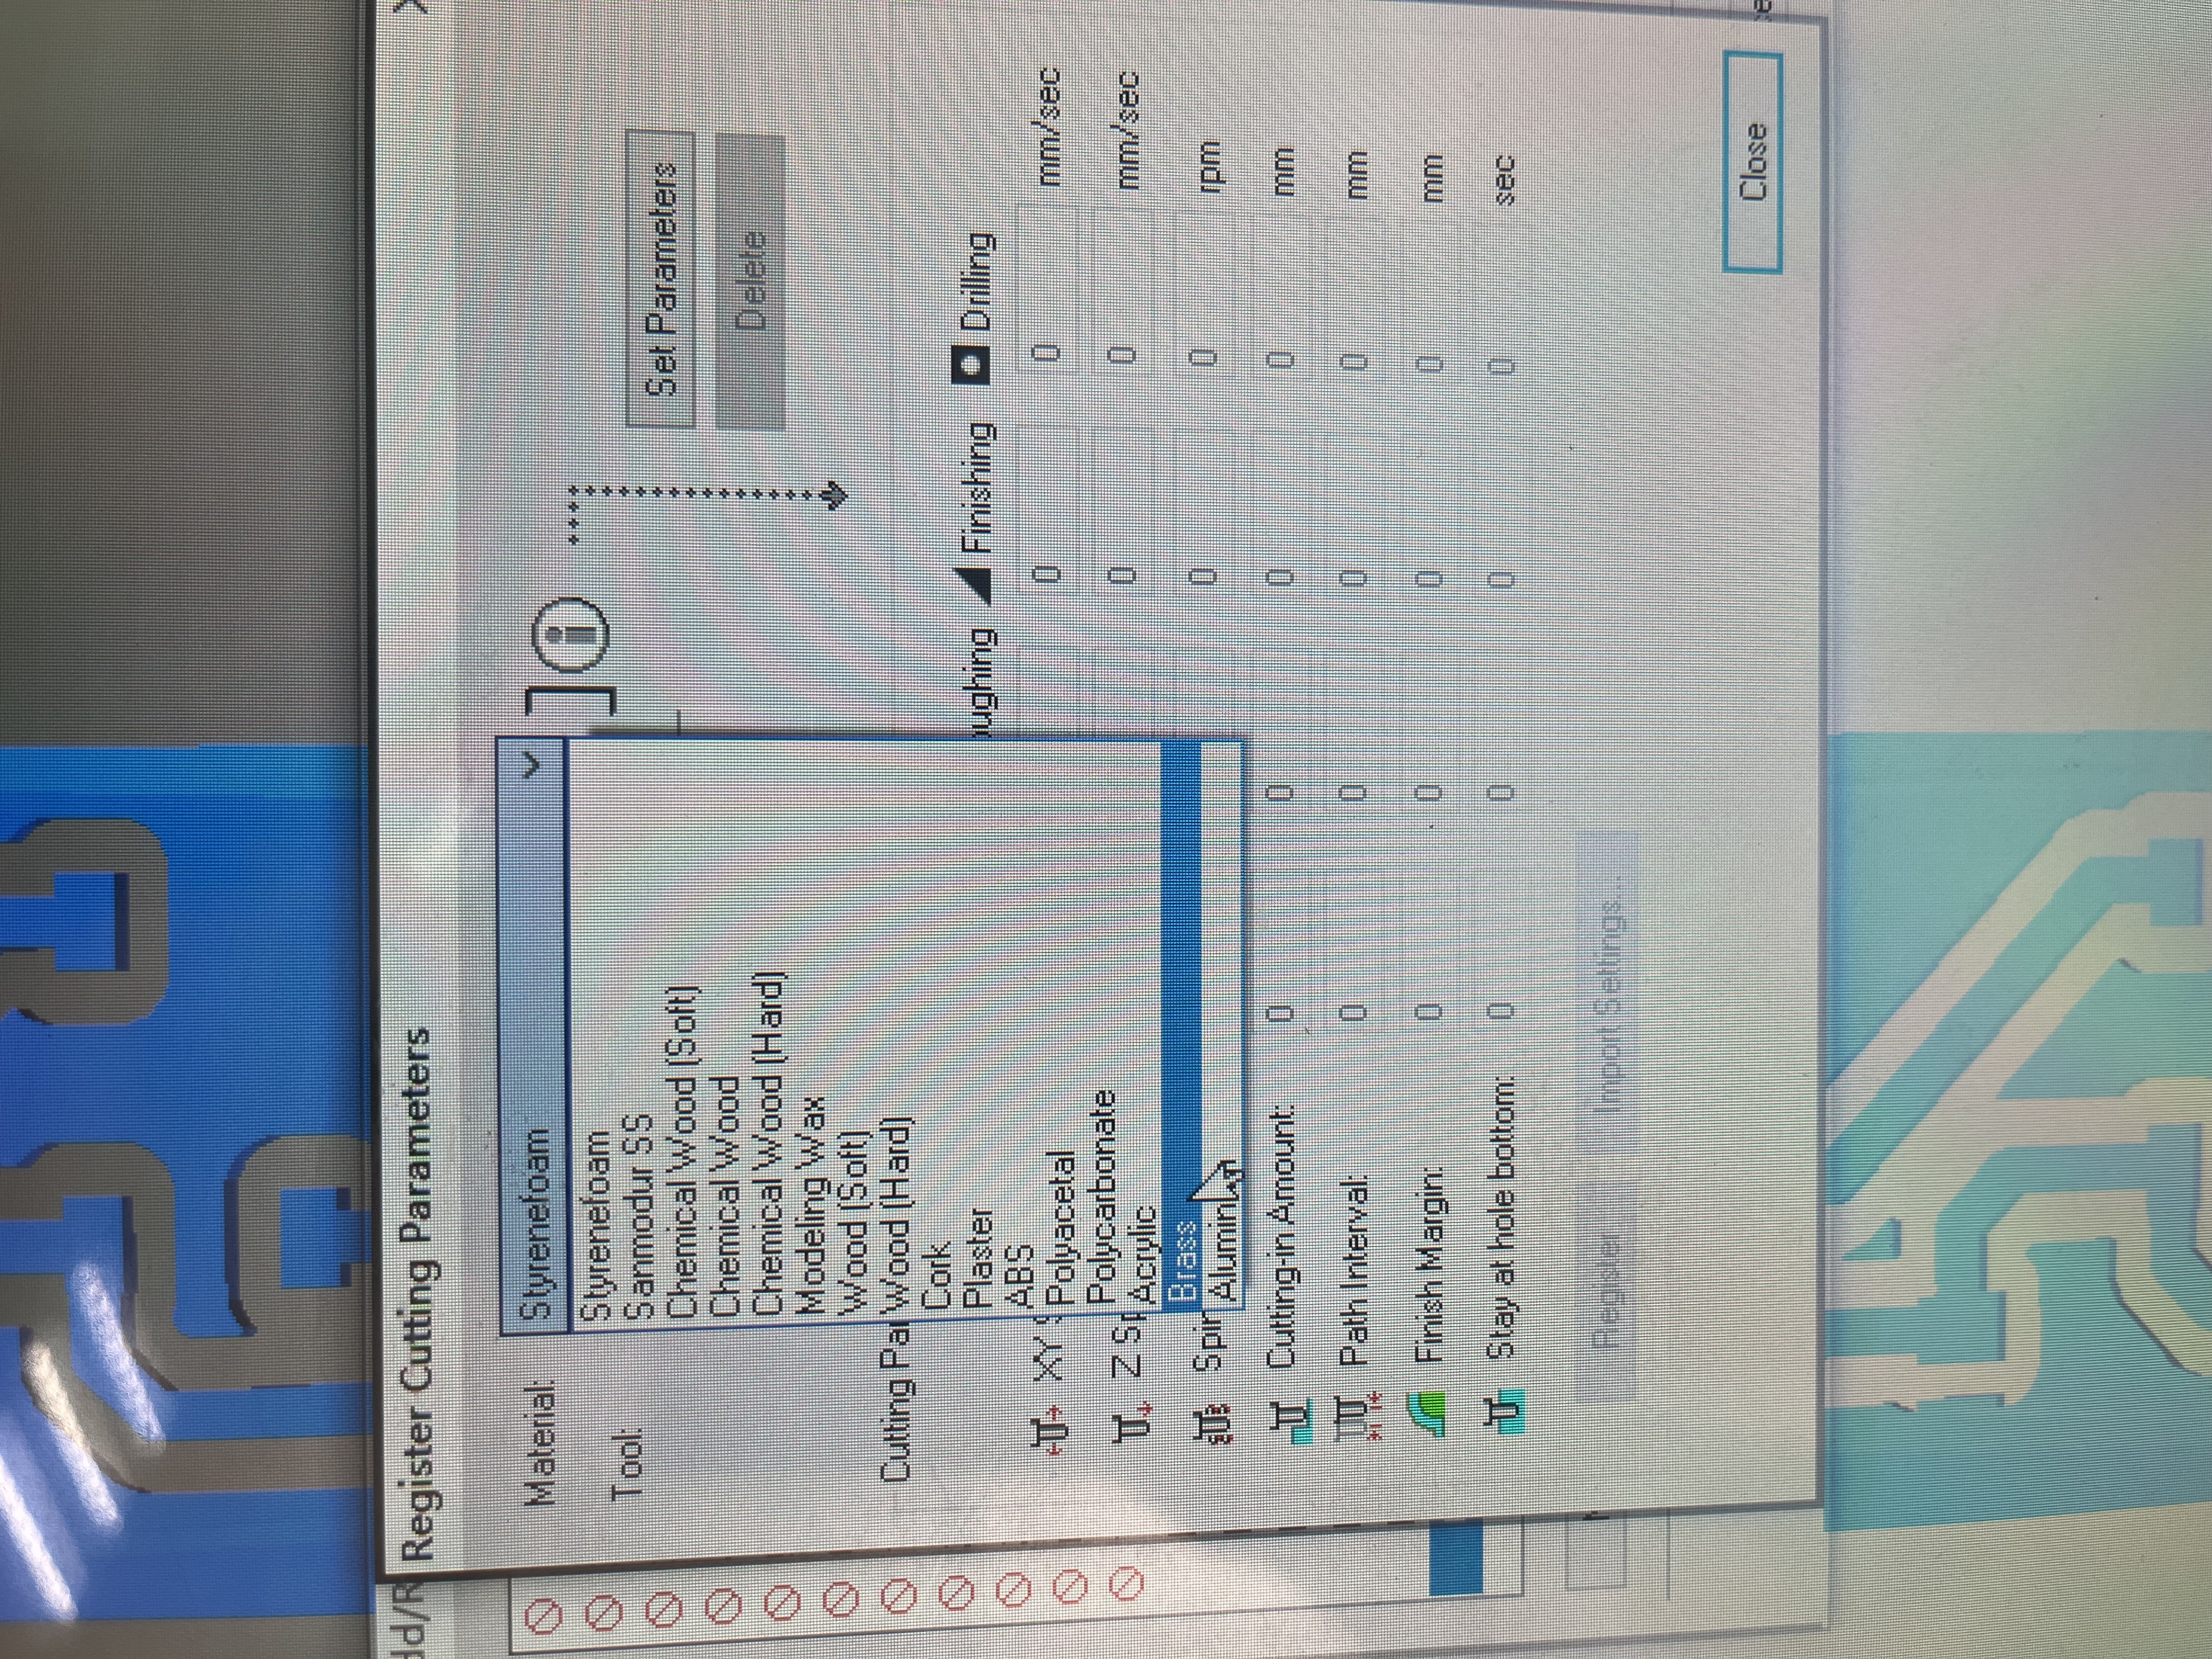
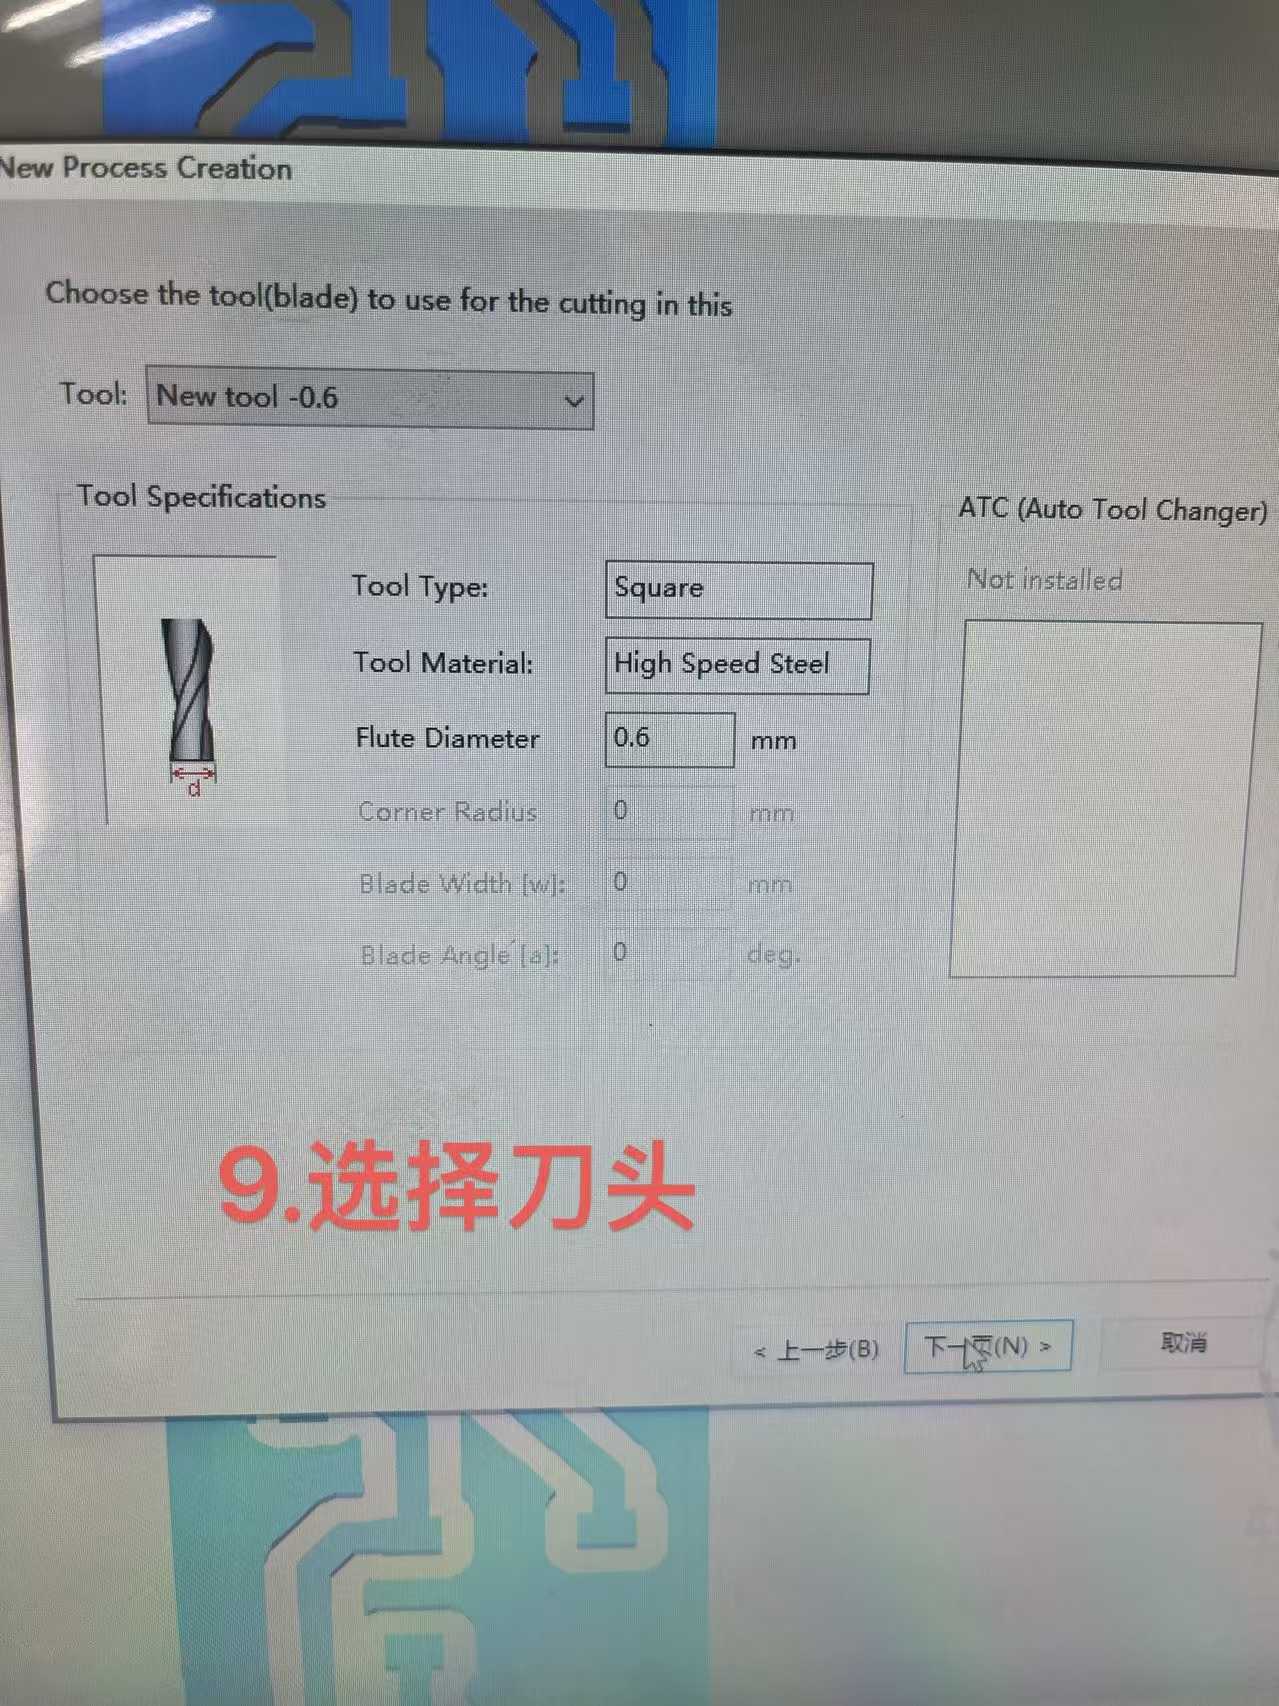
Afterwards add new tool or use existing one if parameters are same. In this case we created new tool and changed flute diameter to 0.6. Click into parameters and choose materials. The ones using this time around is brass.
 | 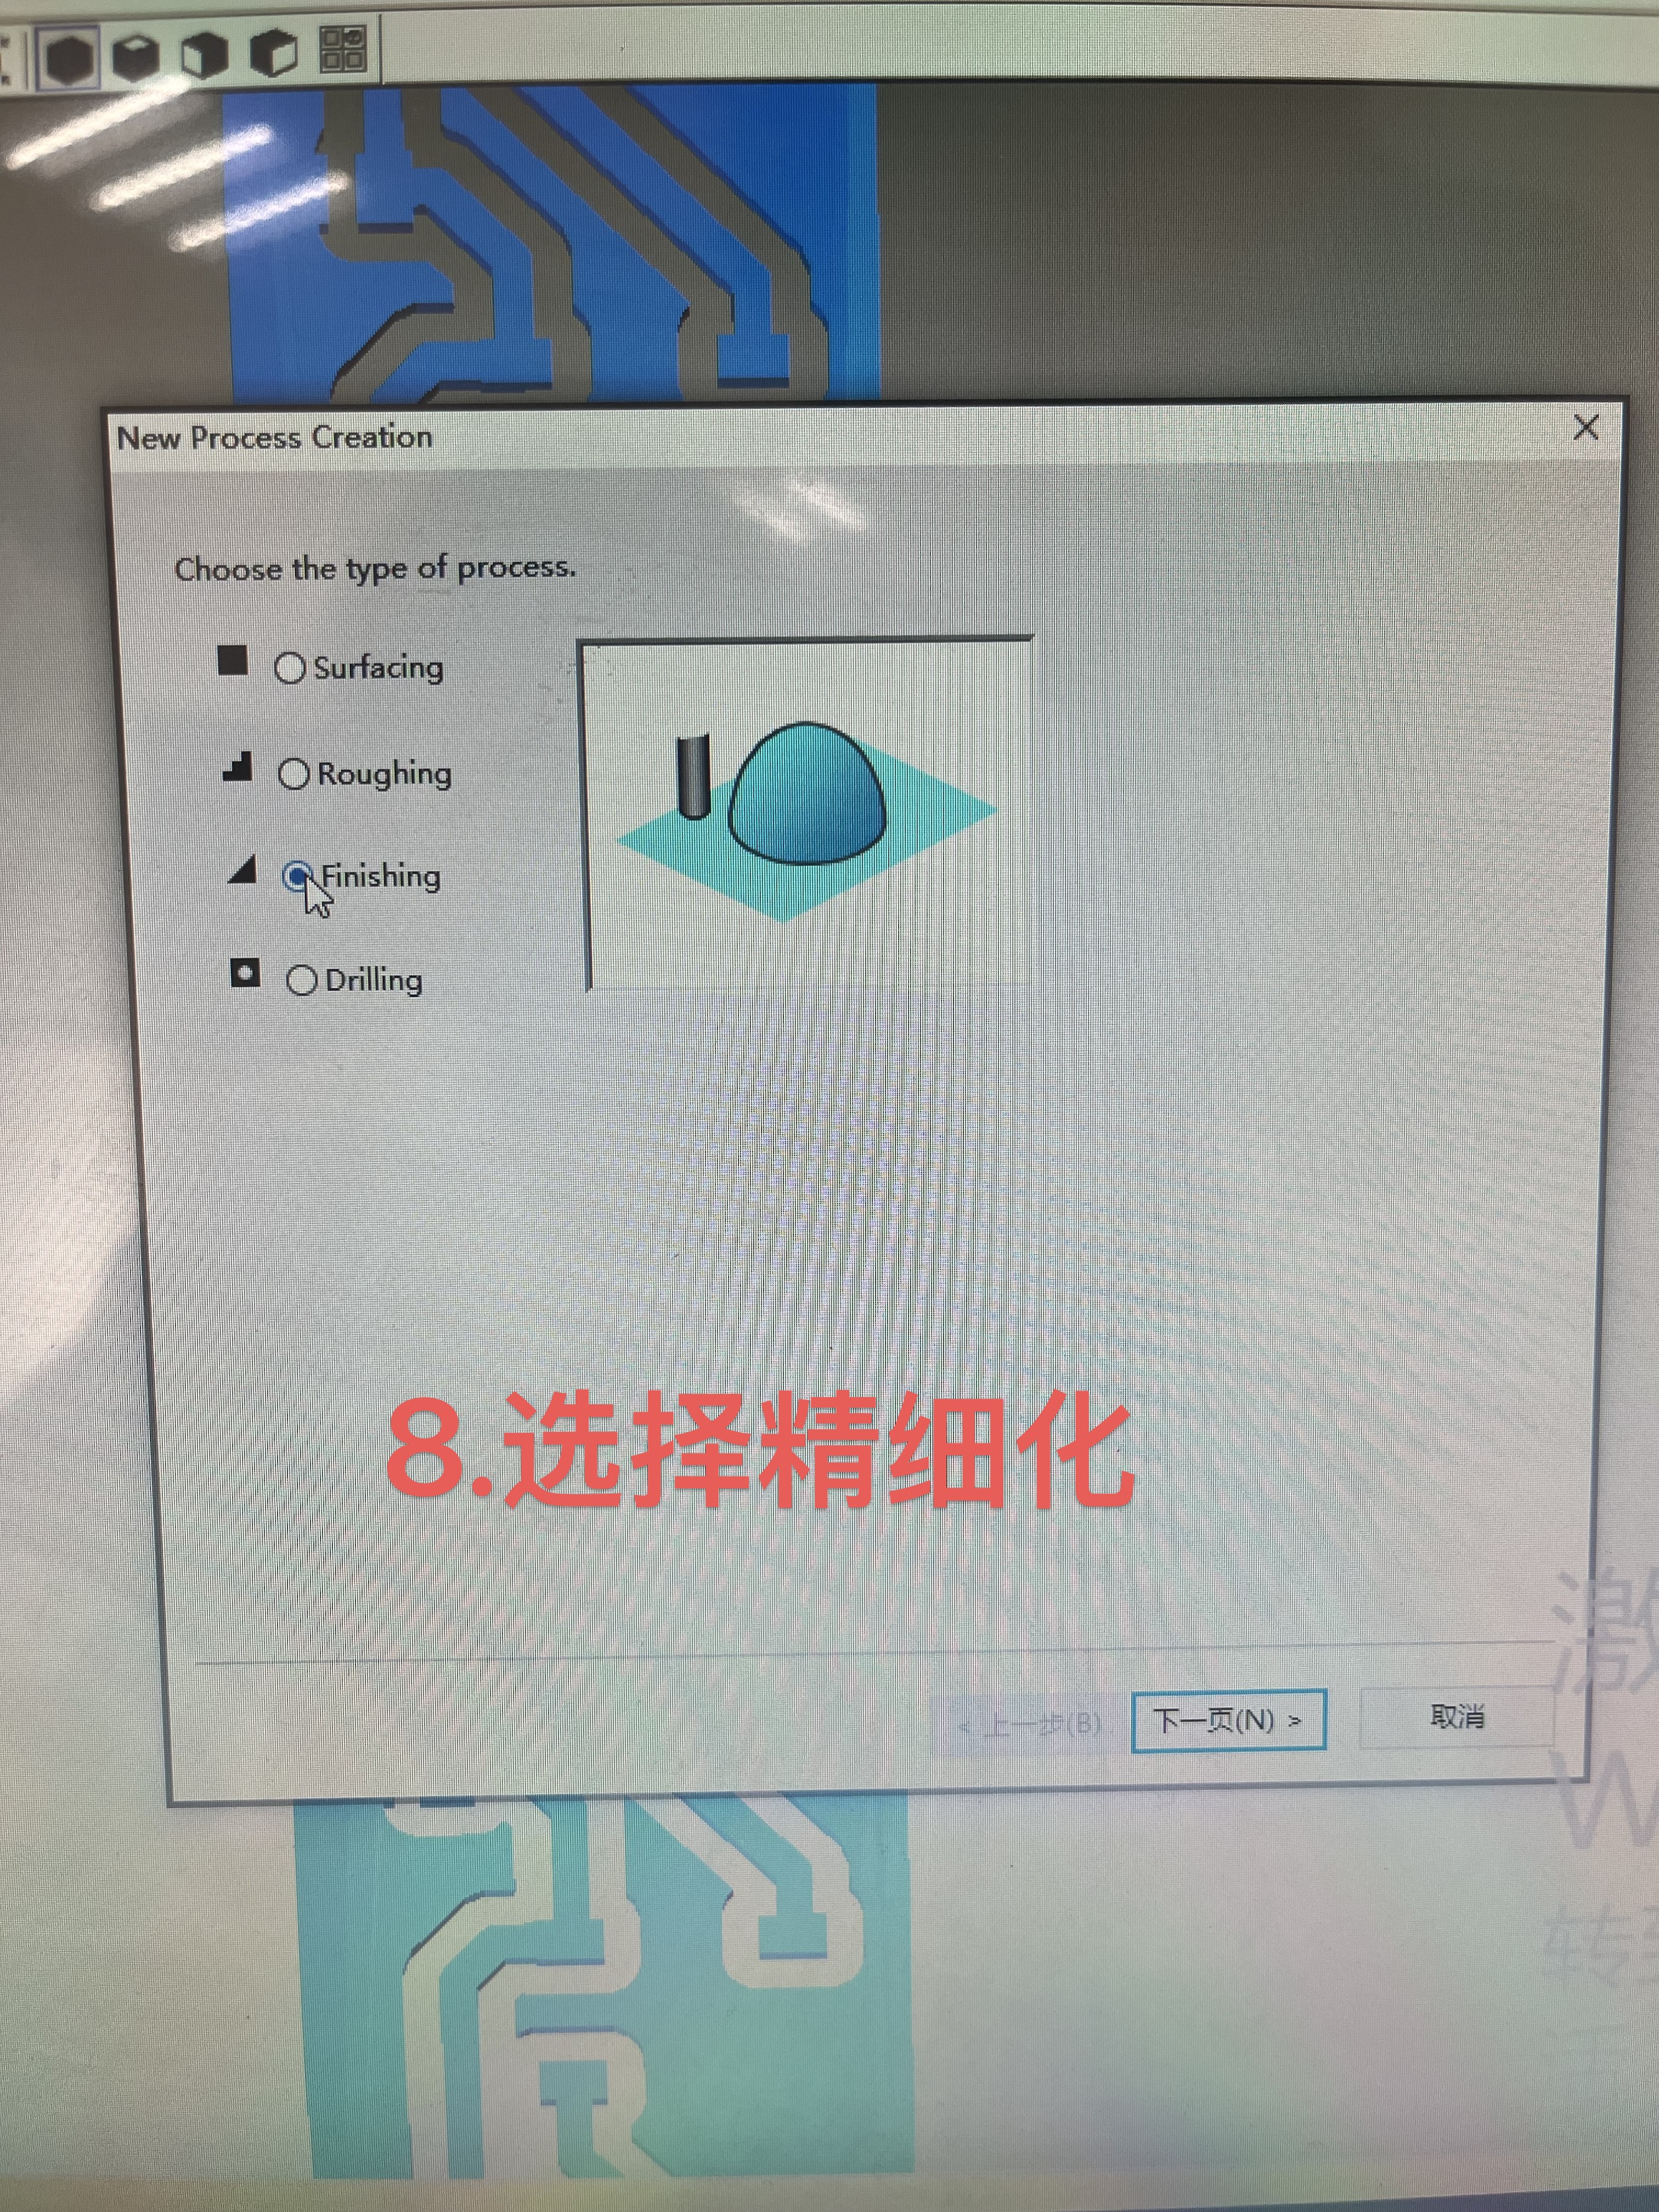 |
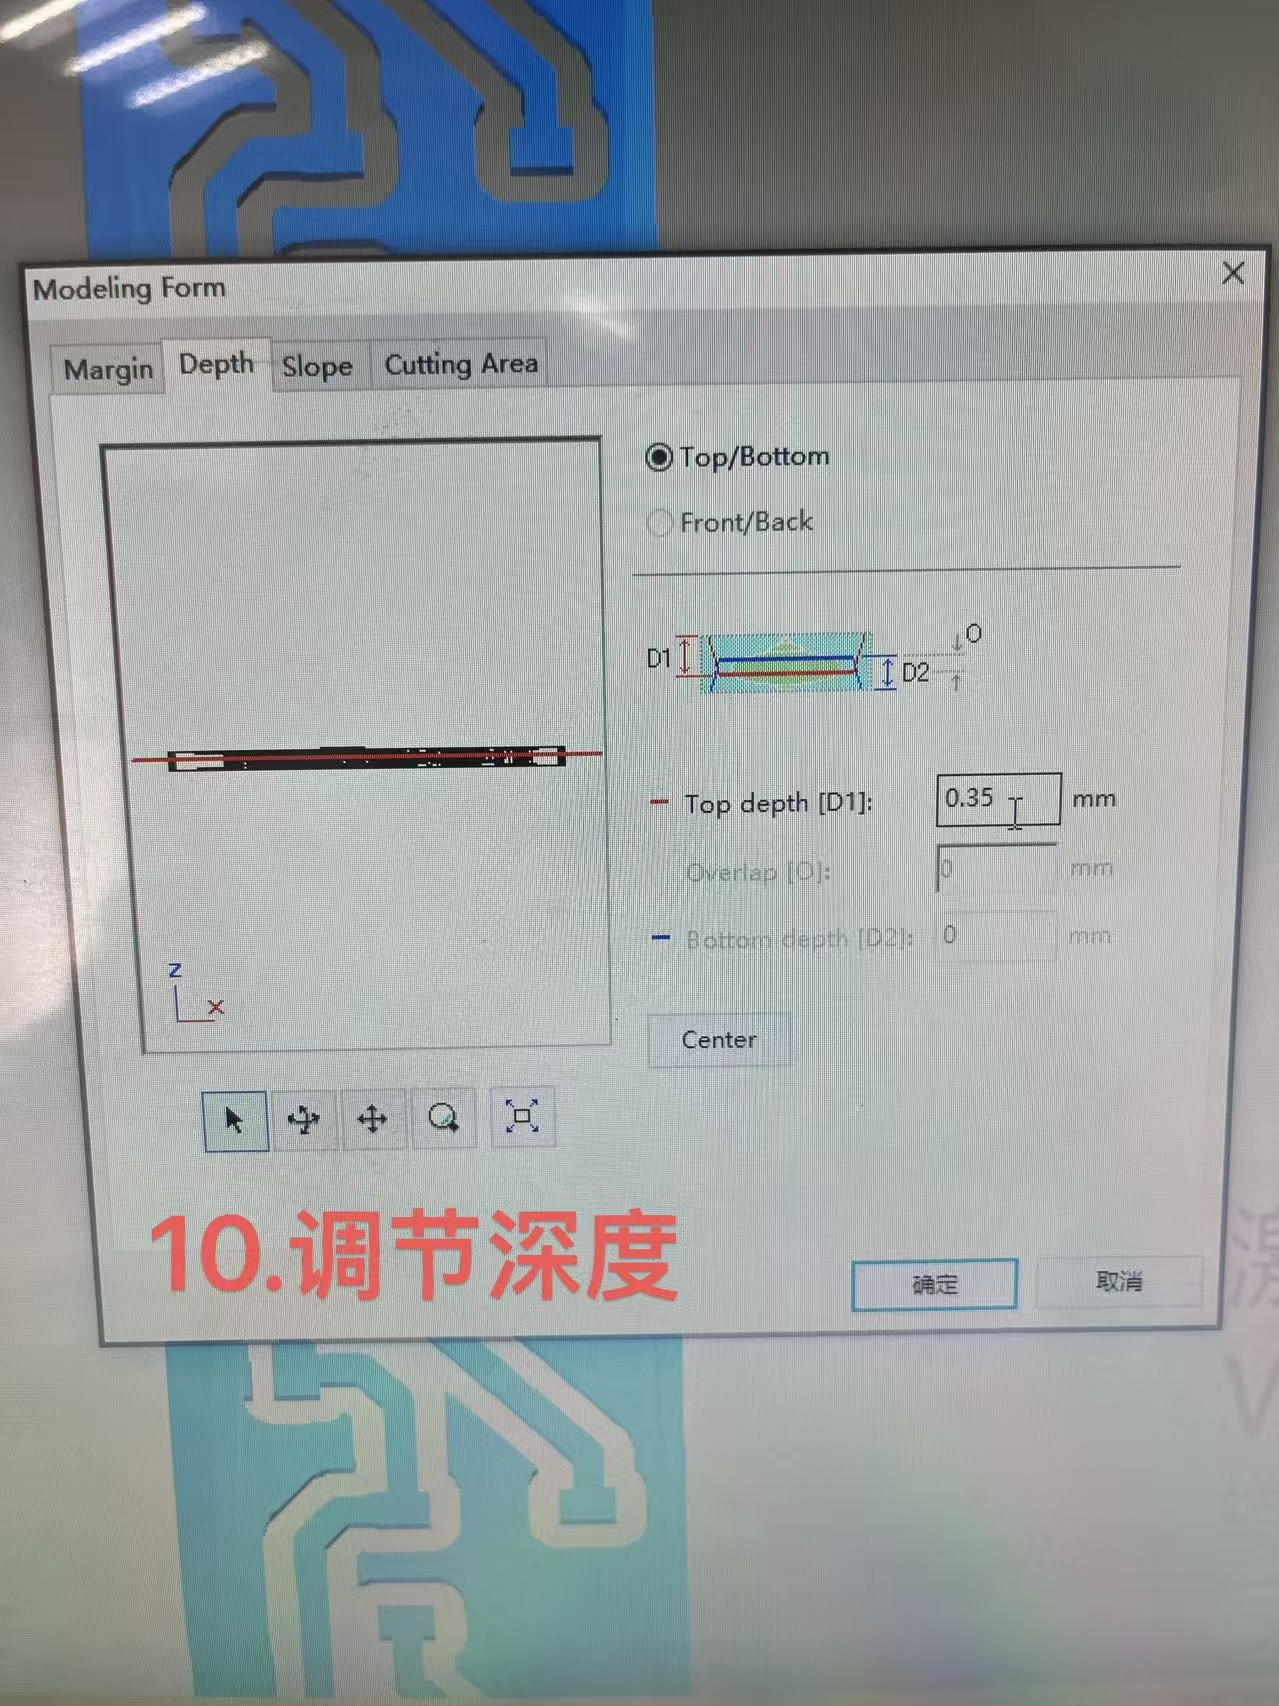
Now once above steps are done, click new process creation and select finished. In the next page choose the tool for the process, select the tool created earlier ago "New tool -0.6". Then in Modeling Form change the depth to 0.35mm.
 |  |
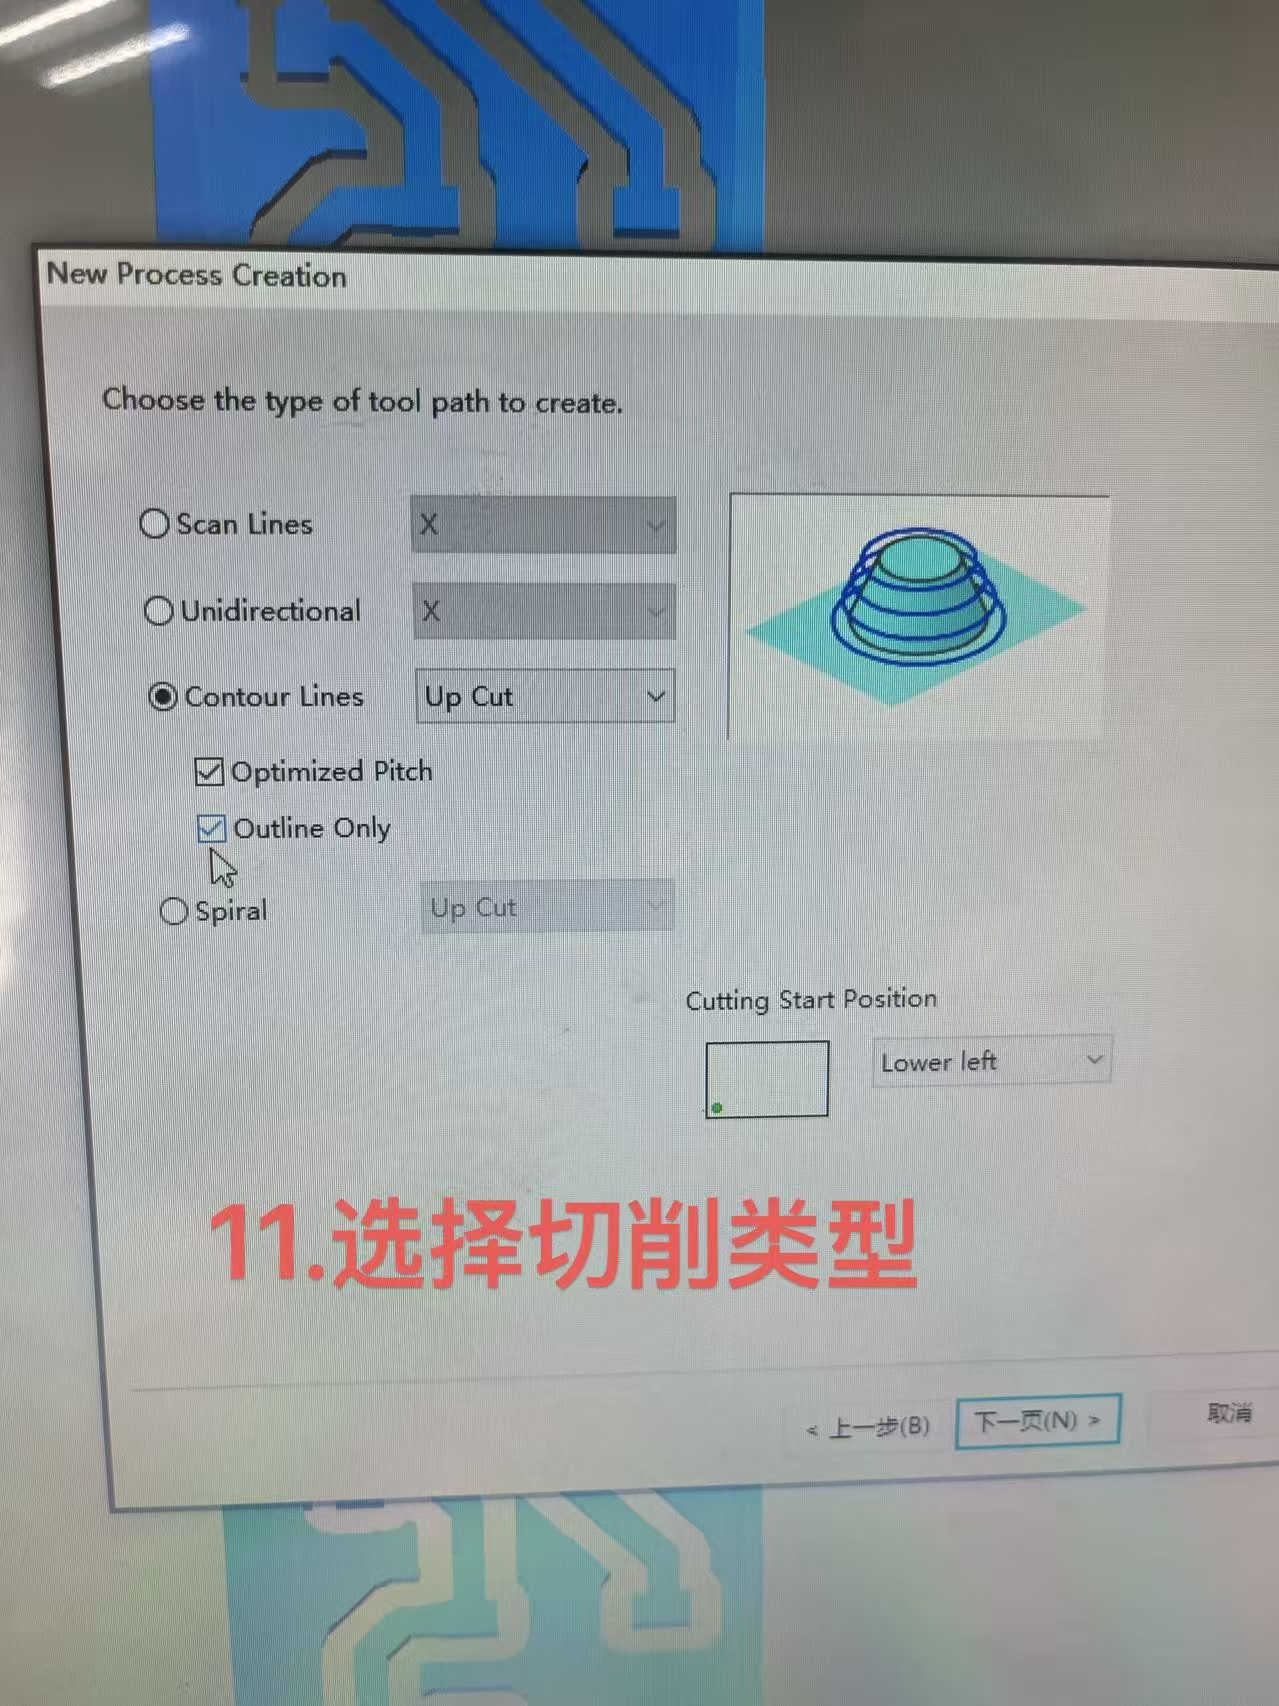
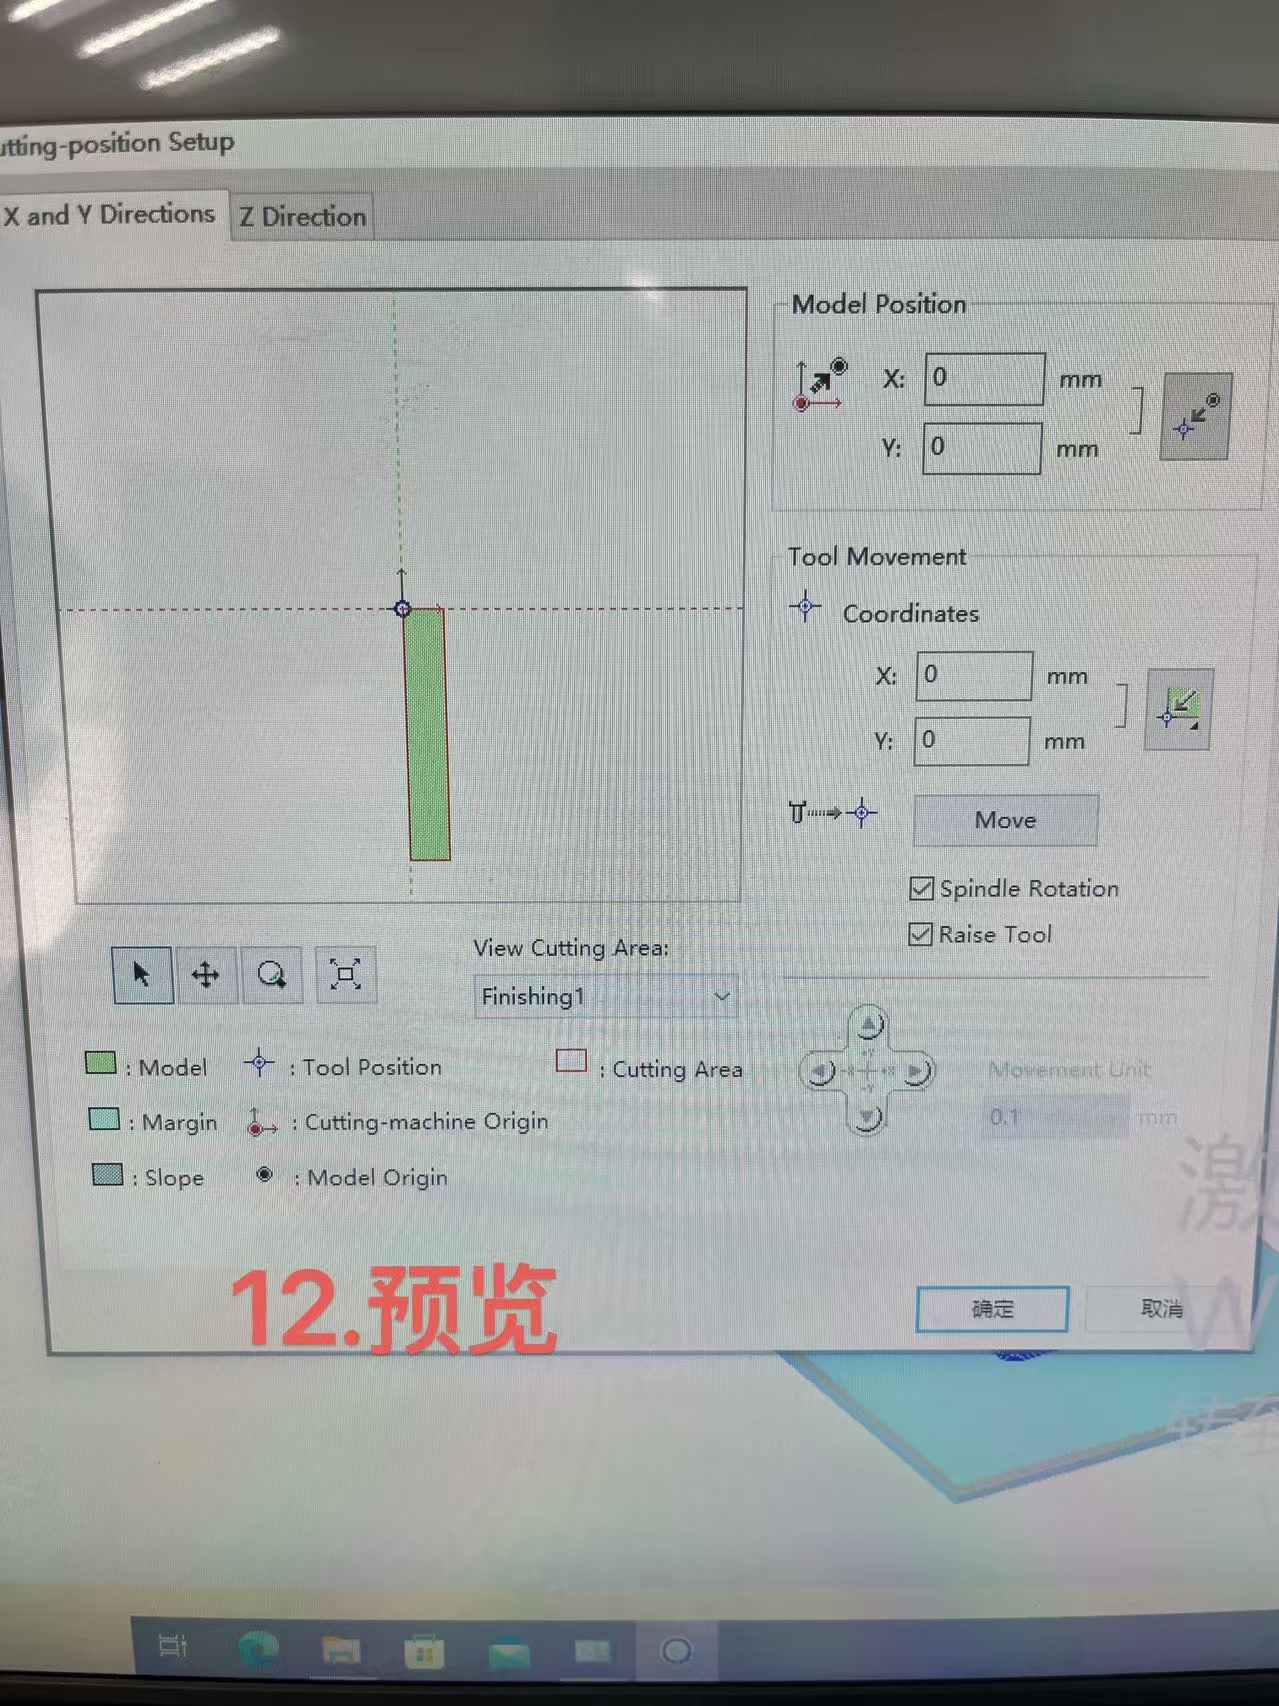
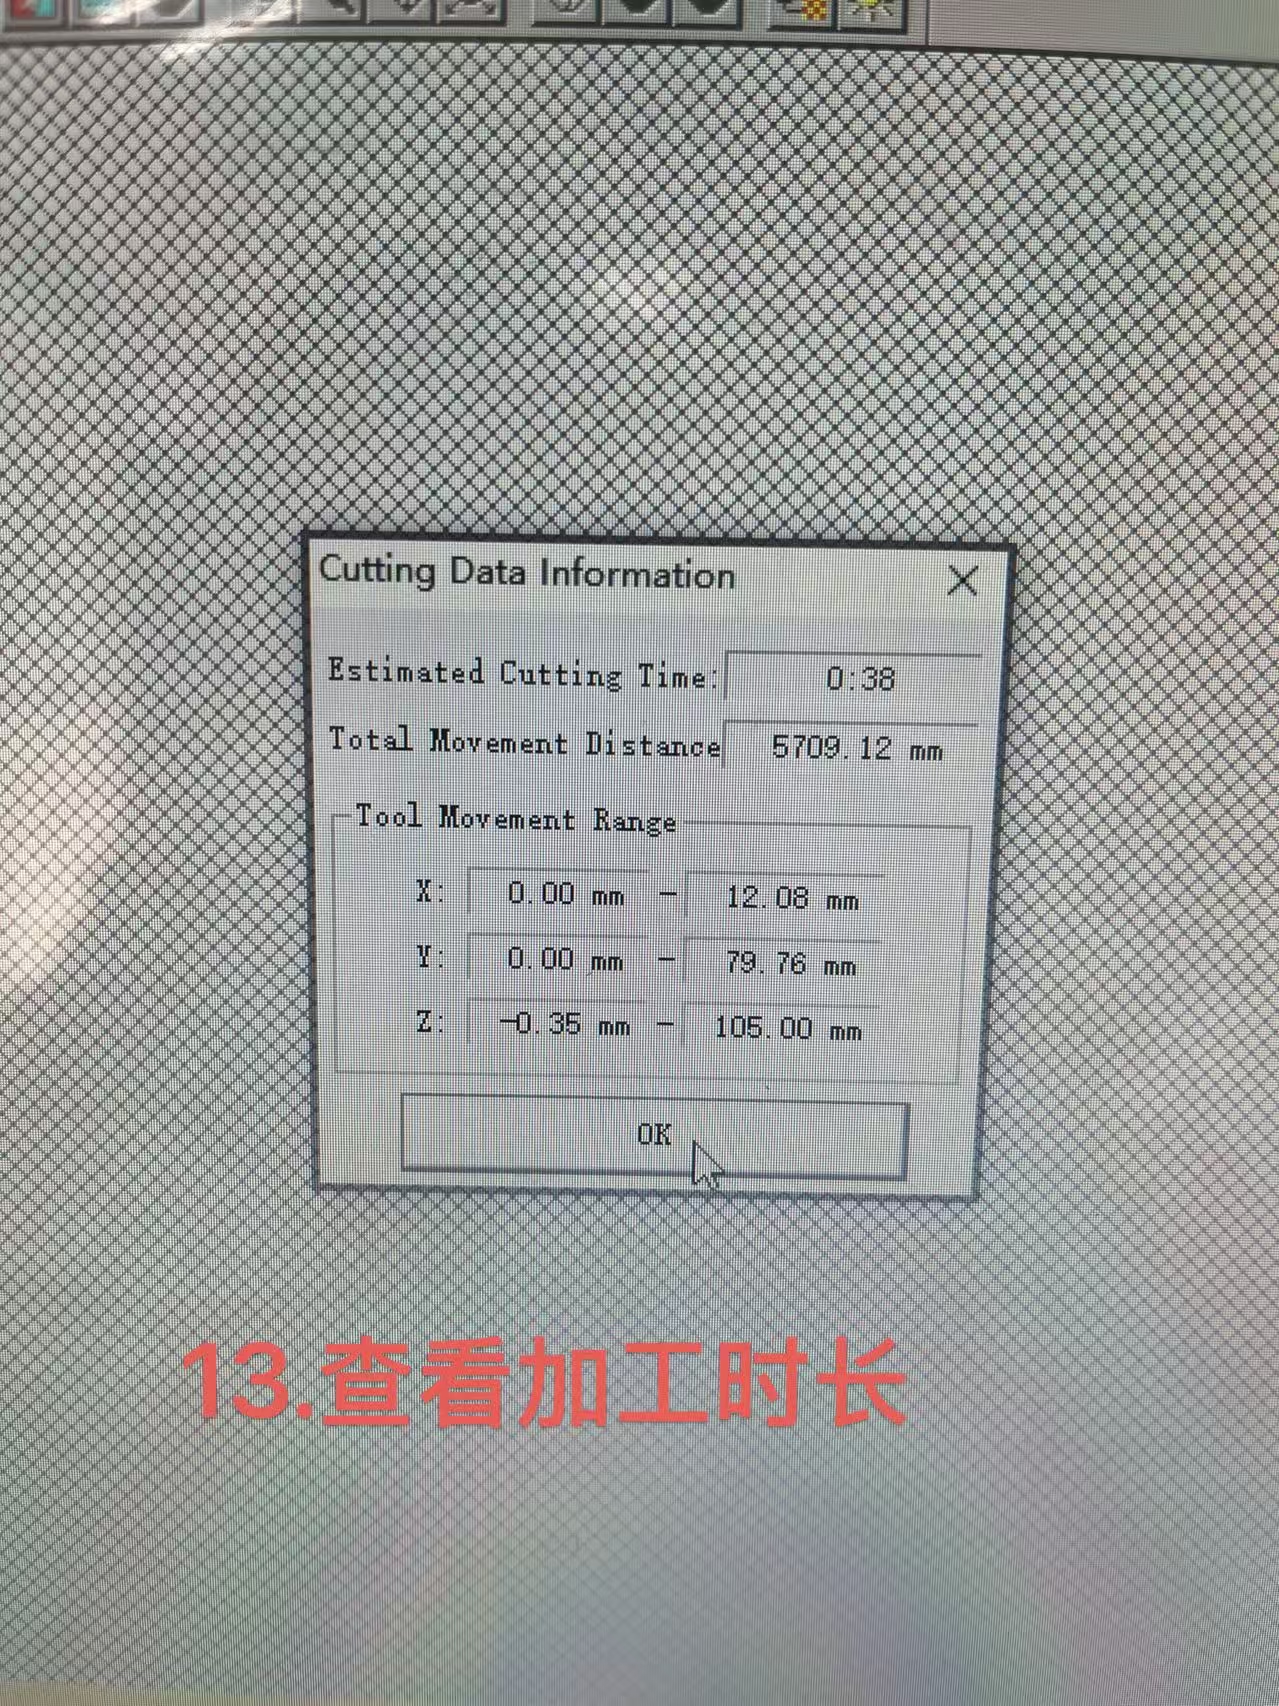
Under new process creation check both optimized pitch and outline only boxes. Take a quick preview check to see how long the duration will be. In this case estimated around 38 minutess. Start process and wait for material to be done.
 |  |
 | 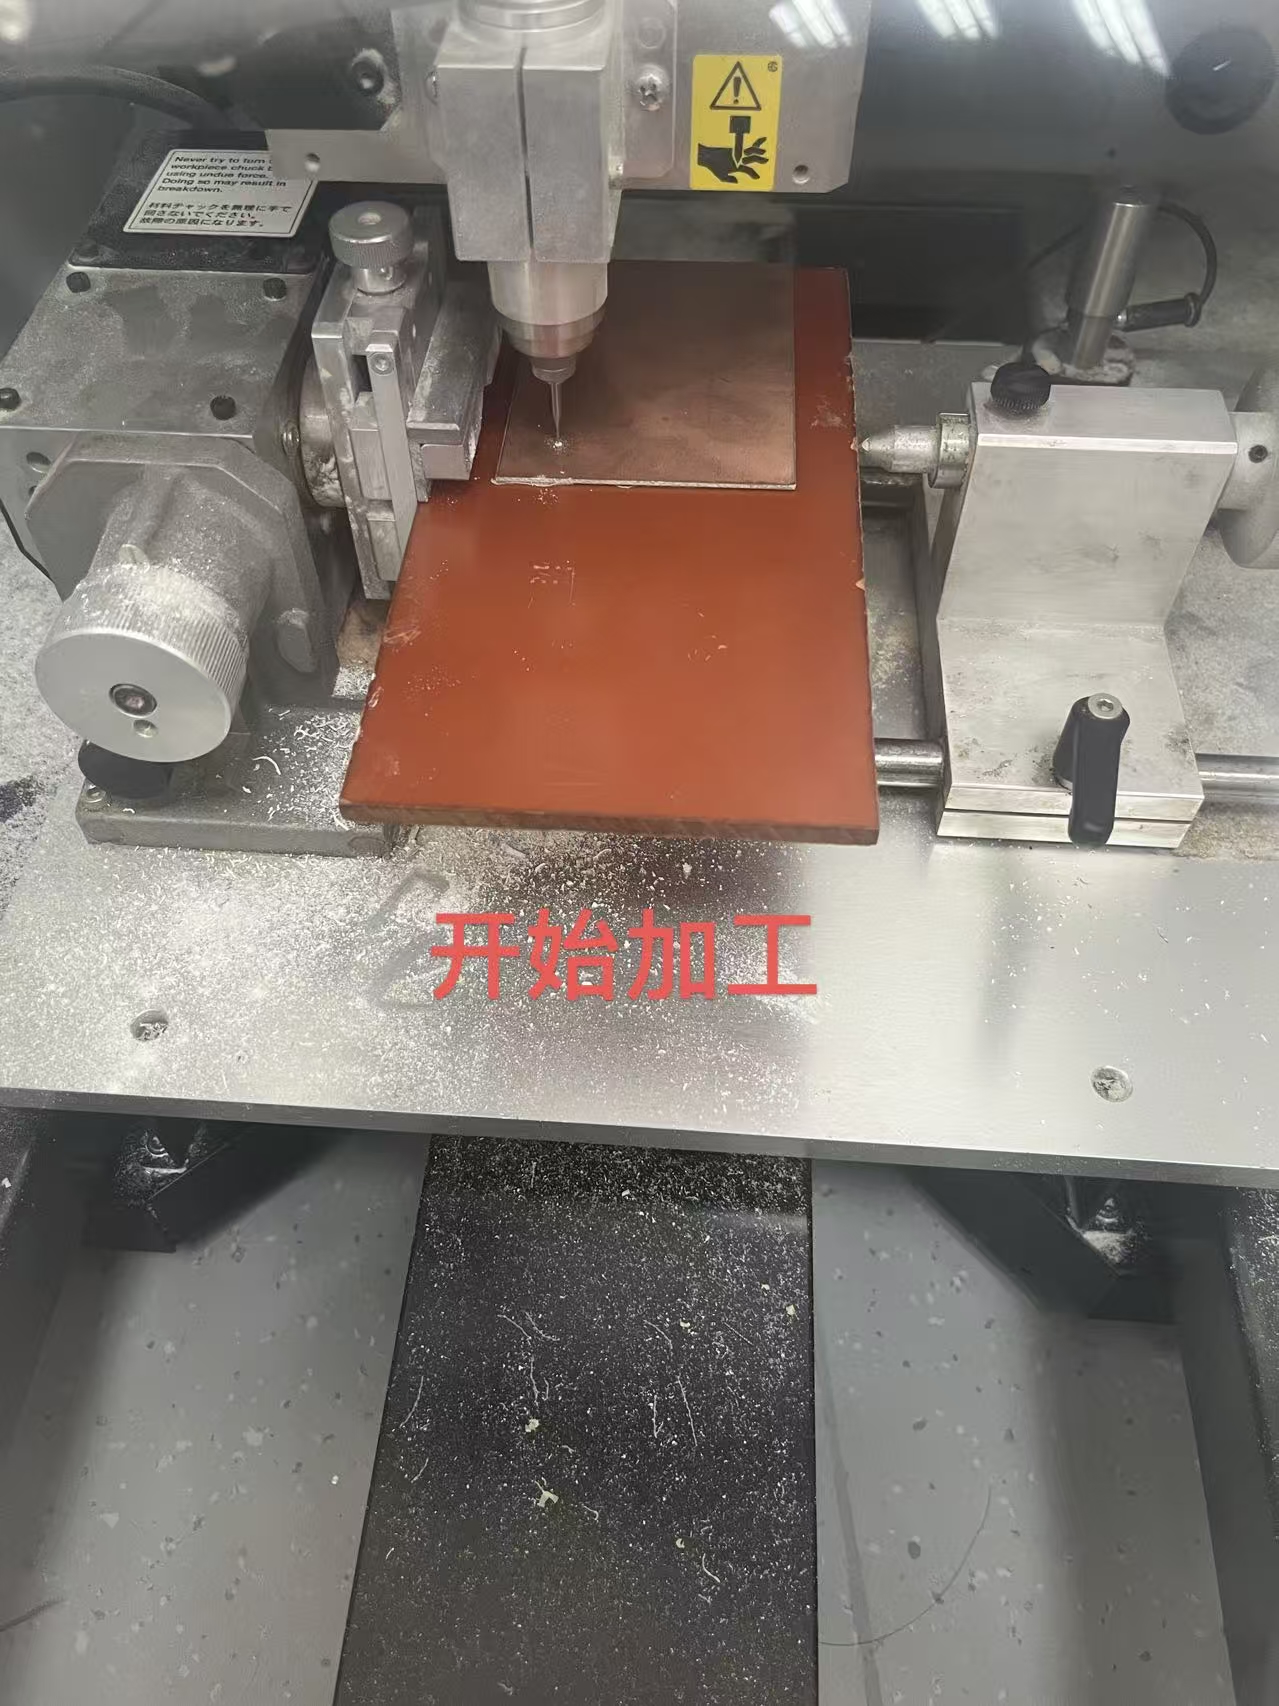 |
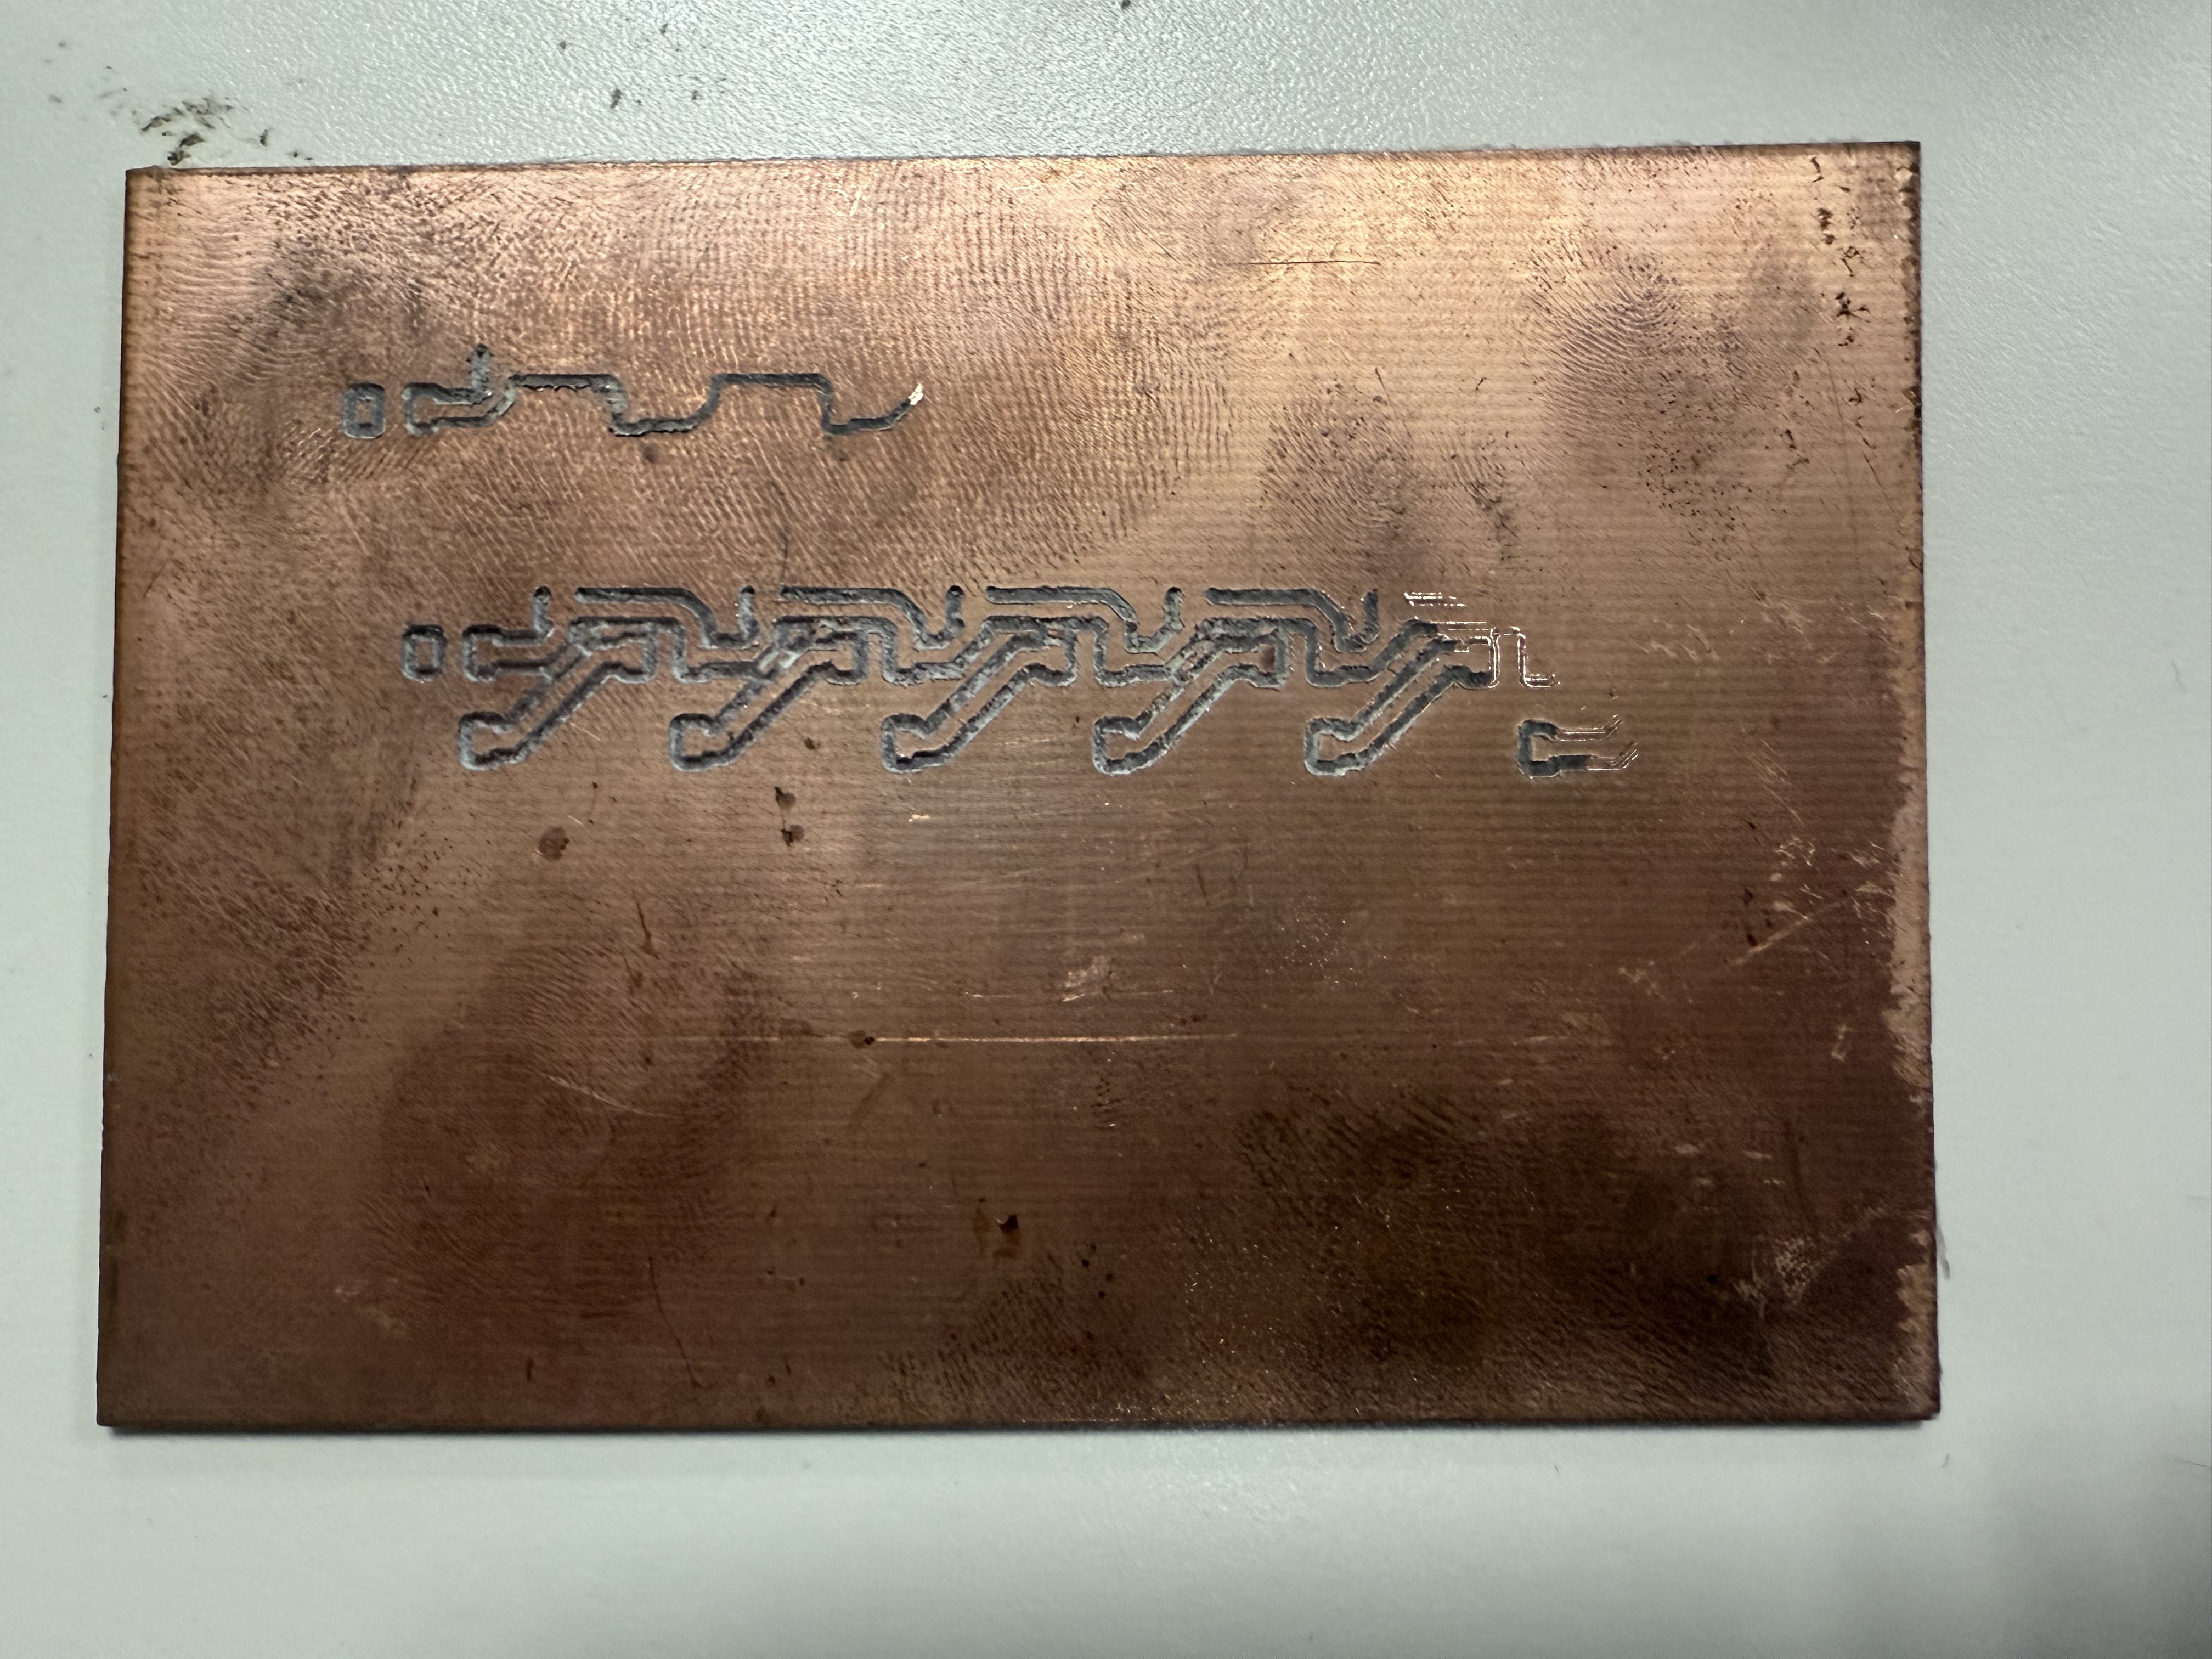
The final product is shown below. As mentioned earlier due to not using spirit level, the cut ended up not making it through on the bottom chunk.